Blog Giveaway: The Story of Us

We're happy to be the second stop on the Chronicle Books blog tour for the lovely new keepsake journal The Story of Us. This journal, created by Tacori and Chronicle, is a sweet way to remember all of the special moments in your relationship, from the first date to the honeymoon. For our stop on the tour Eunice and Sabrina tell their engagement stories-- both equally sweet yet full of quirky mishaps.

Eunice's Engagement Story: 

Our engagement story had, well, a few bumps. Daniel had planned to propose during a trip to Paris. Given how much I love France, he knew it would be the perfect venue. Unfortunately for him, just before the trip to Europe we attended a big weekend festival in Austin. In the midst of the festival, I suddenly became quite cranky. At first, I blamed the heat and the camping, but pretty soon I was really irritable and after a day or two I was fuming (for no apparent reason) and had transformed from the funny, uber-reasonable girl he knew and loved into what can only be described as a total harpie. So much so that Daniel actually consulted with his best friend Tom (luckily a good friend of mine as well) as to whether asking me to marry him might be a huge mistake - luckily, Tom reminded him of all my more charming attributes.
When we got back to San Francisco I noticed strange blistery bumps all over my torso, and soon discovered that in fact I had a raging case of chicken pox. Apparently, one of the first symptoms of chicken pox is out-of-control unreasonable irritability - needless to say, Daniel was hugely relieved that I had not simply transformed into a terrible monster overnight. Unfortunately, because I was incredibly contagious, and was banned from flying, our trip was canceled.
Daniel ended up proposing 6 months later at sunset at the top of Buena Vista Park where we were playing with our dogs, Indy and Simon, just after I had caught a muddy and slobbery ball, with his mother's antique pink diamond Cartier ring. In the end, it was the perfect proposal - he caught me totally off guard and it was all the more sweet for being a complete surprise.
******

Sabrina's Engagement Story:

My husband is from England and both of our birthdays are around New Years. We had booked a lovely old town house in Hampton Court where we were going to spend the holiday; we arrived on my birthday and his friends were all arriving the following day. They all knew he was planning to propose, so he was locked in! When we arrived, it was dark, cold and rainy (despite being 3 in the afternoon - that's England in the winter for you!). Hampton Court is famous for its gardens, designed by Christopher Wren and overlooking the Thames river.
Plan A was to propose to me in the gardens. He asked if I wanted to go for a walk. I thought he was crazy given it was pitch black and drizzling, but I went along. We walked out there in the cold and damp only to discover there were no outdoor lights. We stumbled around and got a brief glimpse of the Thames before heading back to the house.
Plan B was dinner at a restaurant with romantic view of Tower Bridge that Julian remembered as being swanky from his days in London. We walked in to the dulcet tones of a bar pianist singing "Close to you" by the Carpenters, which should have been a sign that things weren't going to end well. Julian had tipped off the Maitre D' before hand about his plans, asking for a special table by the window, but the guy had forgotten and seated us in the bar next to the pianist, who continued to bang out easy listening numbers throughout the evening.
Plan C was to propose in front of a romantic fire at Hampton Court. We got home from our dinner, and he set about making a fire with some extremely damp firewood. After several failed attempts, he finally gave up and just got down on one knee and proposed. I was completely surprised and baffled, and said yes!
******

For a chance to win this beautiful book, along with a copy of Handmade Weddings, and Fortune-Telling Book for Brides leave a comment below. We'll pick a winner this Friday, April 6th, and don’t forget to follow along with the rest of  the tour at these participating blogs!

Wednesday, April 4 – Apartment 34

Thursday, April 5 – Valley & Co.

Friday, April 6 – Engaged & Inspired

Bonne Chance!

Martha Stewart Weddings

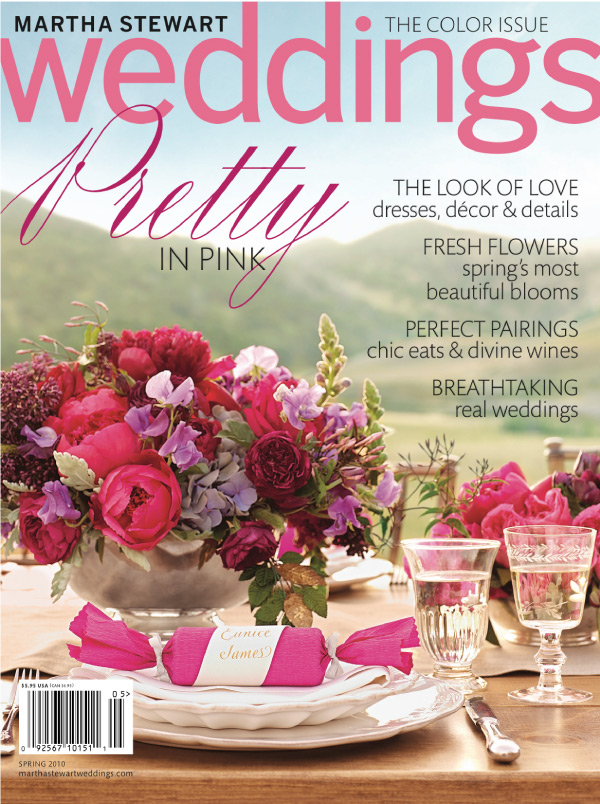
By now you most likely know about Eunice and Daniel's wedding featured in Martha Stewart Weddings back in 2010. The excitement was radiating around our studio, and we still relish in the memory of such an honor of appearing on the cover. Martha Stewart is one of the most inspiring bridal information destinations [along with endless craft and recipe ideas] so we feel blessed to be a small part of it every now and then. It's such a thrill to see weddings we have worked on appear in the Bride's Guide or even inside the shiny pages of the magazine, and because we love the Martha Stewart collection so much, we wanted to revisit all those moments of pleasure by bringing the real weddings to you.

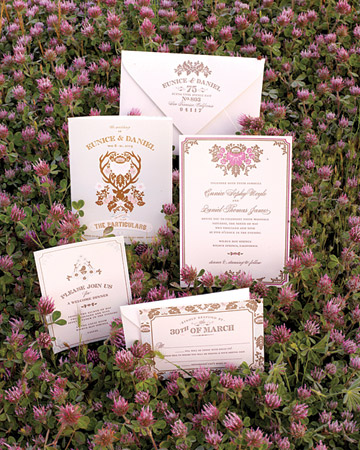
Eunice and Daniel started the trend by customizing our Woodland Damask wedding invitations (designed by Joel Dewberry).

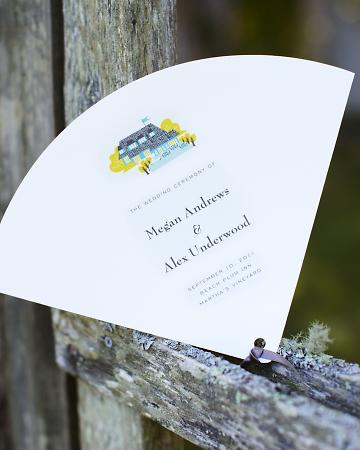
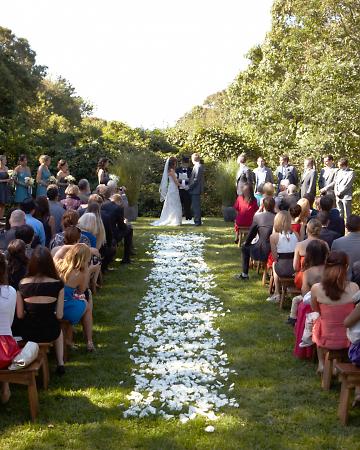
 Recently, Megan and Alex's wedding was featured including one of our newest destination invitations Visit Martha's Vineyard (designed by Lab Partners).

We also created these program fans incorporating an illustrated version of their reception spot The Beach Plum Inn. You can really see the resemblance!


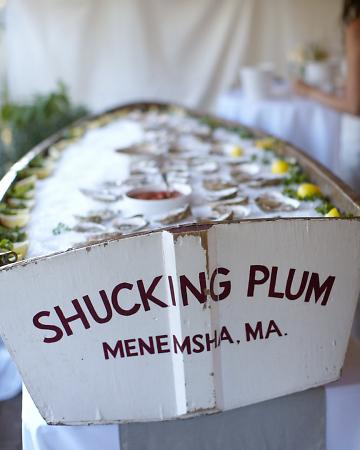
And of course, a New England wedding isn't quite complete without fresh oysters. We love the display atop this rustic mini fishing boat.

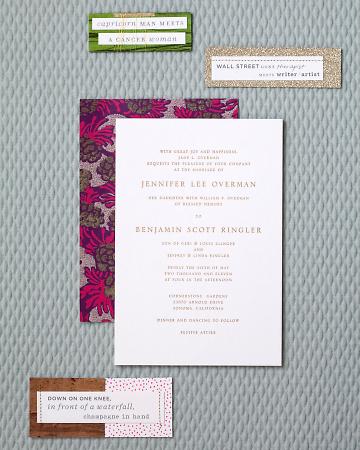
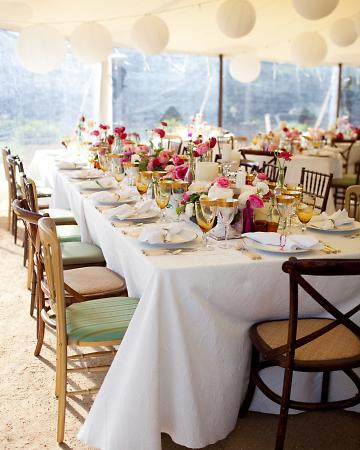
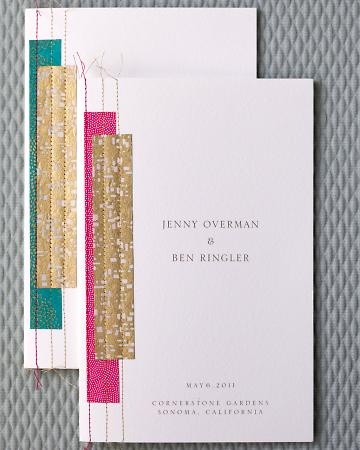
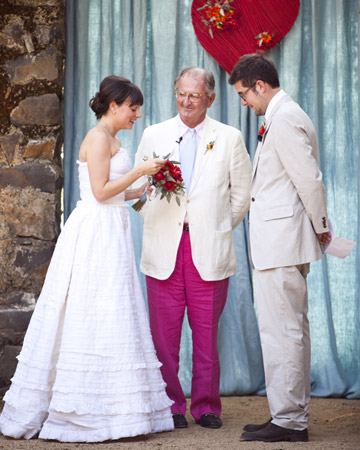
 Jenny and Ben's fairytale Sonoma wedding was a favorite last year, especially their custom created wedding invitations and programs. Their feature in MSW really highlighted their charming characteristics and artistic creations for the ceremony. We love that they weren't afraid to incorporate bright colors!

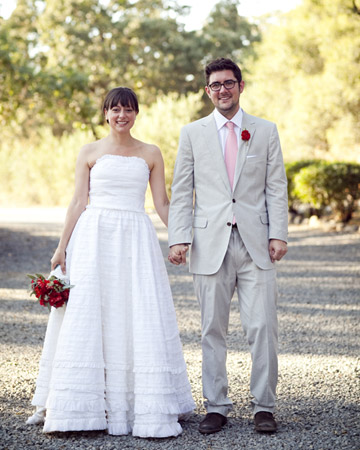
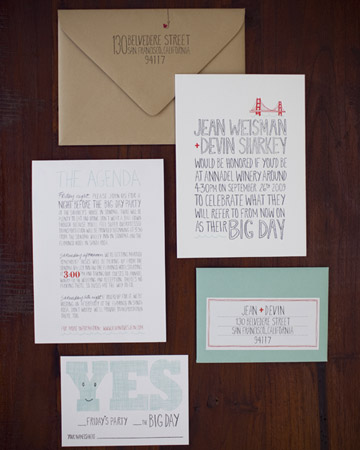
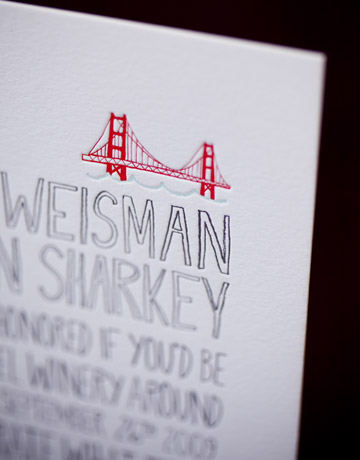
We can't forget about Jean and Devin's whimsical wedding. The true inspiration for our Big Day invitation suite, this couple's witty wording set the tone for one lovely [big!] day.

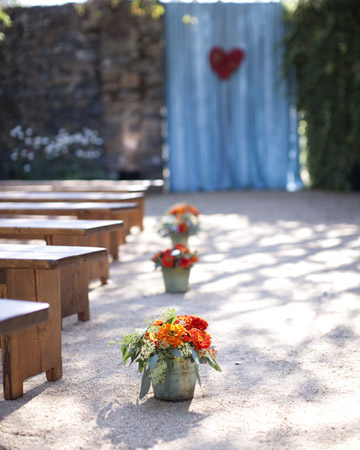
With the help of our friends at Alison Events, lots of crafty details made this intimate barn yard setting pop with color.


Studio Snapshot, at work and home! Eunice and Sabrina in Anthology

Eunice and Sabrina are featured in the latest issue of Anthology, and we had to share a little taste!

anthology_1

The article shares a snippet of how the sisters' distinct personalities and tastes have molded their work and living spaces.

anthology_2

Did you notice the Joel Dewberry-designed backdrop from Eunice and Daniel's wedding? That's part of our Woodland Damask wedding invitation design— how great that she's re-purposed it as a bohemian-style faux window in her living room. Love it!

anthology_3

Sabrina's style is more graphic modern, and a lovely contrast.

There's so much more to read and see at the Anthology site.

Enjoy!

Handmade Weddings Review and Interview on Craft Magazine Blog

Craftzine recently featured a great article about our new book, Handmade Weddings!

craftzine1

craftzine2

Click here, give it a gander, and download PDF instructions for how to make this charming cupcake stand! (It's a sweet little taste of what goodies you'll find in the book.)  Enjoy!

Jennifer Behr for Anthropologie / BHLDN

headband

We thought that this fab head band  looked familiar!  Turns out, our great friend Jennifer Behr, has a few pieces in the new Anthropologie collection, like this one, originally designed for Eunice's wedding!

1837lucky-3584

Now we are even more excited to see BHLDN given that Jenn is the queen of fabulous hair accoutrements!

Jimbo Trout and the Fishpeople

1582lucky-3504 Eunice and Daniel wanted their music to reflect the rustic surroundings of their wedding venue, so local bluegrass band Jimbo Trout and the Fishpeople fit the bill perfectly. They welcomed guests as they arrived to the ceremony, and later played along with the square dance caller after dinner. They even got the father of the bride (below) to join them on mandolin!

2196lucky-6797

Photos by Sara Remington and Gia Canali.

Wilbur Hot Springs

1115lucky-2104 Wilbur Hot Springs (the location of Eunice and Daniel's wedding) is a 20-room historic hotel, built in 1915, surrounded by an 1800-acre private nature preserve, and includes soothing natural hot springs. Wilbur is run 100% off the grid, powered entirely by solar panels and propane. This beautiful and serene location was the perfect spot for the wedding - the hotel could house the couples family and friends, and the vast surrounding fields were perfect to set up a brightly painted stage, rustic farm benches and enormous white tent. Wilbur is located about three hours northeast of San Francisco and is a perfect stop for a relaxing weekend of hiking, soaking in the hot springs and good ol' R&R!

1655lucky-2344

3520389689_c0742977cf

3521204002_cfd37e744a

Photos by Sara Remington, Gia Canali and Shauna Leytus.

Ring pillow

1509lucky-8066 Yet another (!) fabulous element from Eunice and Daniel's wedding was this handmade ring pillow. Designed by Eunice & Tricia Roush of House of Nines Design, this ring pillow can be yours!  Read on for complete how-to instructions...

1547lucky-2264

In addition to the pillow, Tricia also made the cockades for the groomsmen. Learn more about Tricia and her impressive millinery skills here, and visit her etsy site here.

Pin-tucked Ring Pillow How-to Guide

This linen ring pillow is decorated with pin tucks and a narrow pleated edge. We used seam tape, an inexpensive, delicate ribbon that is available in a range of pretty colors, for the edging and to tie the rings onto the pillow.

You'll Need

Materials (Makes 1 ring pillow)

1/4 yard linen 1/4 yard medium-weight quilting cotton in a light, solid color (no patterns) 1 bag fiberfill 3 yards 1/2" seam tape or ribbon, or 1 yard pre-pleated edge trim 1 yard 1/8" seam tape or ribbon Thread to match the linen

Tools

Quilting ruler Rotary cutter Sewing machine, and/or sewing needle Steam iron Scissors Straight pins Light colored tailor's chalk or chalk pen, like the Clover Pen-Style Chaco Liner Circle template with a 1" circle (optional)

How to: 1. Make the pillow insert. It's important to make a pillow insert to ensure that the lumps in the fiberfill don't show through the fabric of your finished product.

Using your rotary cutter, cut 2 squares of medium-weight cotton measuring 8.25" x 8.25." This will result an insert that is 7.75" x 7.75", for an 8" x 8" ring pillow (1/2" is used for a seam allowance). If you would like your ring pillow to be a different size, use the following formula: Canvas insert = Finished size + 1/4". Ring pillow = Finished size +1/2".

On the wrong side of one of the pieces, using the ruler and chalk, mark a line at 1/4" in from each of the edges. You have drawn a square, centered on the fabric, that measures 7.75" square. Using the circle template and chalk, round off the corners of the chalk square. If you don't have a circle template, try using a round household item, such as a jar lid. Layer the 2 squares one on top of the other, wrong side out. Starting about two inches in from one of the corners, sew using a running stitch on the chalk line, at 1/4" in from the edge along 3 sides plus about two inches at either end of the fourth side, leaving a gap in the center of the fourth side wide enough to slip your hand into. You can do this using a sewing machine, or by hand. Tie a knot and cut the thread. Cut off the excess fabric at the corners in a rounded shape to parallel the seam, leaving 1/4" for seam allowance. Turn right side out. Gather a handful of fiberfill. Pull apart to smooth out any lumps. Gently stuff into the pillow insert, using enough fiberfill to get a padded, but not overstuffed shape. Sew the open side shut using a ladder stitch.

2. Make the ring pillowcase top. Using your rotary cutter, cut 1 rectangle of linen measuring 8.5" x 12.5". To make the pin tucks (Figure 1): Lay the rectangle out in front of you, right (exterior) side up, with the long edges running from side to side. Starting at 2.5" from the left side edge, using the ruler and chalk, mark 16 vertical lines on the linen from top to bottom, every half inch. Starting with the first two chalk lines on the left, fold the linen matching the first line to the second, with the ridge of the tuck sticking out on the right (exterior) side. Pin in place and sew from top to bottom along the joined chalk lines with a running stitch, and iron the tuck toward the left edge of the pillow. Repeat this process with the third and fourth chalk line, and so on across the face of the pillow top until you have created 8 tucks. The pillow top should now measure 8.5" square.

On the wrong side of the pillow top piece, using the ruler and chalk, mark a line at 1/4" in from each of the edges. You have drawn a square, centered on the fabric, that measures 8" square. Using the circle template and chalk, round off the corners of the chalk square. If you don't have a circle template, try using a round household item, such as a jar lid.

3. Make the pleated edging. Lay out your 1/2" seam tape and starting from one end, measure 1/2" to the right, make a mark. From there measure 1/4" over & mark. Measure 1/2" from there, mark, move another 1/4", mark. See the pattern? You're making a series of 1/2" and 1/4" wide sections. Keep going until you reach the end.

Once all the pleats are marked, snip at each mark (a very tiny snip, needless to say). Fold the first pleat by pinching together the two sides of the first 1/2" segment and folding it down to the right so that the fold meets up with the next 1/4" mark. Stitch in place. Continue along, holding each pleat in place while you sew it down. You can also pin all the pleats down first and then run them through the sewing machine.

To save time, pre-pleated edging may be used instead.

4. Make the ring pillowcase bottom and attach the edging. Using your rotary cutter, cut 1 square of linen measuring 8.5" x 8.5."

On the right (exterior) side of the pillowcase bottom piece, using the ruler and chalk, mark a line at 1/4" in from each of the edges. You have drawn a square, centered on the fabric, that measures 8" square. Using the circle template and chalk, round off the corners of the chalk square. If you don't have a circle template, try using a round household item, such as a jar lid.

Lay the pillowcase bottom in front of you, right (exterior) side up. Place one end of the edging along one edge of the fabric, with the edging's sewn edge facing toward the outer edge of the fabric, and the ruffled edge facing the center of the pillow. The stitch line on the edging should be positioned at 1/8" in from the edge of the fabric. Leaving a 'tail' of about edging about 1" long free at the beginning, sew the edging to the pillow bottom all the way around, following the rounded corners as you go, stopping when you are about 1" before the place where the beginning and end of the edging will overlap. If sewing by machine, remove the piece from the machine and cut the thread ends off. To create a seamless look to the place where the edging joins, cut off any excess from the beginning and end of the edging, leaving 1/2" extra on for overlap. Where the two ends meet, fold the overlap over so that the join is covered and hidden in the fold. Iron lightly and pin in place. Sew the remainder of the edging down as before, joining the beginning and end as you attach them to the pillowcase bottom. Remove the pin, tie off and cut off thread ends.

5. Complete the ring pillowcase. Layer the 2 squares one on top of the other, wrong side out. Starting about two inches in from one of the corners on a side without pin tucks, sew using a running stitch on the chalk line, at 1/4" in from the edge along 3 sides plus about 2 inches at either end of the fourth side, leaving a gap in the center of the fourth side wide enough to slip your hand into. You can do this using a sewing machine, or by hand. You'll be sewing through both layers of the pillowcase, plus the pleated edging near its sewn edge. Tie a knot and cut the thread. Cut off the excess linen at the corners in a rounded shape to parallel the seam, leaving 1/4" for seam allowance. Turn right side out. The pleated edging should form a ruffle around the outside seam of the pillow. Fold the raw edges of the gap along the chalk lines (1/4" in from the edge), and gently press the folds flat with the iron to set them in place. Slip the pillowcase over the canvas pillow insert. Using the sewing needle and a slip stitch, stitch the gap closed. Tie a small, neat knot and cut the thread. Brush off any chalk that still shows on the pillow.

Cut two pieces of the 1/8" ribbon about 1 foot long each, and using a small, neat stitch and knot, attach them near their centers to the center of the ring pillow top.

Download the template here.

Flower Girls Crown

1156lucky-6175 At Eunice's wedding, Lily sported an adorable sparkly crown to complete her sweet flower girl ensemble. Want to make one for your flower girl? Read on for our free how-to guide!

1515lucky-7686

1689lucky-3550

Photography by Gia Canali & Sara Remington

Glass Glitter Crown How-to Guide

You'll Need: (Makes 1 crown)

  • Crown template
  • Scissors or craft knife, ruler and cutting mat
  • 16 in. x 6 in. piece of chipboard
  • Pen or pencil
  • Piece of copy paper, or a file folder
  • Craft glue
  • Glue brush
  • Glitter (we used glass glitter from here)
  • Stapler
  • 2 sheets crepe paper scraps in gold and fuchsia, at least 6 in. x 10 in.
  • Hot glue gun
  • 2 17-in. pieces of 3/8-in. ribbon

How to:

  1. Make the crown. Cut out the template, trace crown pattern onto a piece of chipboard at least 16 in. long x 6 in. wide. Cut out the crown using scissors or a craft knife, ruler and cutting mat.
  2. Glitter the crown. Fold a piece of paper in half, open it back up and lay it flat on your work surface (or lay an open file folder on your work surface). You will use this to protect your work surface from glue and to collect excess glitter. Lay one end of the crown on the paper. Using a brush, apply a generous layer of white glue over a 3-in. section of the crown and cover entire area with glitter. Lift crown and flick the back to release excess glitter. Fold the paper in half and return excess glitter to its pot. Repeat this process until the entire crown is glittered. For each new section overlap the glue on the previous glittered section about 1/4-in. to insure thorough coverage. Allow to dry completely.
  3. Add the rosettes. Using scissors, cut a piece of 1-in. x 1-in. scrap crepe paper. This will serve as a backing for assembling each rosette. Cut a 1-in. x 10-in. strip of gold crepe paper, with the grain (the creases in the paper) running in the short direction. Accordion fold along the grain into 1/4-in. sections. When the entire strip is folded, align the two ends, pinch the center and allow the outer edges to flair. Holding center in place, squeeze a drop of hot glue onto the scrap paper. Press the center of the rosette onto the glue and hold in place until it dries. Cut a 1/4-in. x 3-in strip of fuchsia crepe paper and accordion fold into 1/8-in. sections, and pinch into a rosette. Apply a dab of hot glue to the center of the larger gold rosette, and press the small rosette down into it. Repeat of each rosette. When all 5 rosettes are complete, center each one below a point in the crown and hot glue the backing to the crown.
  4. Finish the crown. Match the ends of the crown together and staple into place. Cut two 17" pieces of 3/8" ribbon and glue one piece to the inside of each side of the crown with a hot glue gun.

Download the DIY template here.

An array of accessories

1178lucky-6251 More details from Eunice and Daniel's wedding! Eunice embellished her Steve Madden flats with vintage shoe clips found at the Alameda flea market, one of our favorite sources for vintage ephemera in the bay area. She also purchased woodland animal brooches from Poodle Breath for her bridesmaids.

1187lucky-6669

The story of a dress

1170lucky-3604 We've gotten so many comments about Eunice's fabulous wedding dress! She came up with the original design of her dress and made a sketch with a rough idea of what she was looking for.

dress_sketch

She then handed the sketches off to Iain Bartlett (also know as H!L UK Sales manager), trusting him implicitly to turn them into the fabulous concoction that he came up with. He hand-stitched all those ruffles on (literally hundreds), and made a beautiful petticoat from raw silk and this amazing fabric made of bits of netting -- it looked like the under skirt was trimmed in feathers.

1902lucky-3695

1945lucky-1654

2179lucky-7563

Stunning!

It's all in the details

1179lucky-6590 In addition to stationery, playing cards, custom stage and a multitude of other items, Eunice also designed a bunch of smaller pieces that served to tie her wedding together, including the signage and labels for slippers (above) and packages for confetti (below).

1229lucky-6372

A custom wine label featured two stags and a cheeky name.

1357lucky-2156

Drink flags added color to cocktails.

1365lucky-6693

Fun labels helped identify unique condiments on the dinner table.

1371lucky-6703

A cute sign indicated the couples signature cocktail (you can find the recipe here!).

1395lucky-8081

Eunice also designed labels for popcorn boxes and donut holes - yum!

1406lucky-2286

1433lucky-7010

Read on for how-to instructions for the donut hole labels, jelly labels, and slipper labels. We'd love to see your photos if you make your own!!

Slipper Labels How-to Instructions

You'll Need:

  • Slipper Label Template
  • Inkjet printer
  • 8 1/2" x 11" label stock (we used Strathmore writing label in Natural White) (8 labels per sheet, calculate quantity accordingly - we recommend allowing a few extra sheets for misprints and other mistakes)
  • Craft knife
  • Ruler
  • Cutting mat
  • Corner Rounder (optional)
  • Slippers in various sizes (we got ours in Chinatown - cheap and cheerful!)

How to:

  1. Fill out the labels. Open the labels in Adobe Acrobat. Fill in your information (you will need to have the fonts Rosewood and Buckle Bold, available through http://www.myfonts.com, installed on your computer. If not, a default font will be used).
  2. Print labels. On your ink jet printer, print out the labels.
  3. Trim labels. With your craft knife and a ruler, cut out labels, aligning the ruler to the crop marks.
  4. Round corners. (optional) Round all four corners on each label with a corner rounder.
  5. Apply labels. Peel backing from each label and apply to the center of the insole of each slipper, centering from side to side and top to bottom as you see fit (we applied the label to cover up the branding on the slipper's insole).

Download the template here.
Gypsy Pepper Jelly Label How-to Instructions

You'll Need:

  • Gypsy Pepper Jelly Label Template
  • Inkjet printer
  • 8 1/2" x 11" label stock (we used Strathmore writing label in Bright White) (4 labels per sheet, calculate quantity accordingly - we recommend allowing a few extra sheets for misprints and other mistakes)
  • Fiskars rotary trimmer
  • Craft knife or straight blade on the rotary trimmer
  • Ruler
  • Cutting mat
  • 8oz jelly jars
  • 1/4" corner rounder (available at arts & crafts stores) - optional

How to:

  1. Print the labels. On your ink jet printer, print out the labels.
  2. Trim the labels. With your craft knife and a ruler, cut out labels, aligning the ruler to the crop marks. This can also be done on your rotary trimmer with a straight blade.
  3. Round the corners (optional). Round all four corners on each label with a corner rounder.
  4. Apply the labels. Peel backing from each label and apply to a jelly jar, centering from size to side and top to bottom as you see fit.

Download the template here.
Recipe for Sweet Gypsy Paper Jelly

Ingredients

  • 1 1/2 lb gypsy peppers cut into 1-inch pieces (6 cups)
  • 2 teaspoons dried hot red-pepper flakes
  • 3 tablespoons Sure-Jell less- or no-sugar-needed pectin (from a 1 3/4-oz box)
  • 3 1/4 cups sugar
  • 1 cup apple cider vinegar
  • 1 tablespoon unsalted butter
  • 3/4 teaspoon salt

How to:

  1. Pulse gypsy peppers with red-pepper flakes in a food processor until finely chopped. (Mixture will measure about 2 1/2 cups.)
  2. Whisk together pectin and 1/4 cup sugar in a small bowl.
  3. Stir together pepper mixture, vinegar, butter, salt, and remaining 3 cups sugar in a 5- to 6-quart heavy pot. Bring to a vigorous boil over high heat, then continue to boil vigorously, stirring occasionally, 5 minutes. Gradually add pectin mixture, whisking constantly. Return jelly to a vigorous boil, stirring constantly, and boil, stirring constantly, 1 to 2 minutes (mixture will thicken slightly). Remove from heat. Season to taste.
  4. Fill processed jars and store.

You'll need:

  • Inkjet printer
  • 8 1/2" x 11" card stock in white or ecru
  • Craft knife
  • Ruler
  • Cutting mat
  • 1 1/2" ribbon long enough to hang the sign
  • Scissors

Drink Sign How-to Guide

How to:

  1. Print the sign. On your ink jet printer, print out the labels.
  2. Trim the labels. With your craft knife cut out the sign along the light grey outline. Use a ruler to cut slots on either side for threading the ribbon.
  3. Thread ribbon and hang the sign. Cut an appropriate length of ribbon and thread through the cut slots in the sign. Starting on one side, thread the ribbon through the front and out the back. Bring the ribbon across the back of the sign and thread it through the second slot, from back to front. Pull the ribbon through so that the sign is centered and tie around your drink container.

Download the template here.
Donut Hole Bags How-to Guide

You'll need:

  • Inkjet printer
  • 8 1/2" x 11" label stock (we used Strathmore writing label in Bright White) (4 labels per sheet, calculate quantity accordingly - we recommend allowing a few extra sheets for misprints and other mistakes)
  • Fiskars rotary trimmer with scalloped blade
  • Craft knife or straight blade on the rotary trimmer
  • Ruler
  • Cutting mat
  • 1/4 lb glassine pastry bags available at PaperMart

How to:

  1. Print the labels. On your ink jet printer, print out the labels.
  2. Trim the labels. With your craft knife and a ruler, cut out labels, aligning the ruler to the crop marks. This can also be done on your rotary trimmer with a straight blade.
  3. Trim the glassine bags. With a scalloped blade in your rotary trimmer, trim the top and bottom 1/4" off the glassine bags for a cute scalloped edge.
  4. Apply the labels. Peel backing from each label and apply to a glassine bag, centering from size to side and top to bottom as you see fit (we applied the label centered from side to side and closer to the bottom of the bag).

Download the template here.
Happy crafting!

Cake Topper

1397lucky-6358 One of the most unique elements of Eunice and Daniel's wedding was their adorable cake topper (featured on the Martha Stewart show!). Lian of Publique Living took the illustration of the couple from their save the date poster and laser cut it out of basswood. It was then stained a deep indigo with calligraphy ink, and mounted onto a styrofoam base covered in a pale green metallic crepe paper and trimmed with two tones of fuchsia grosgrain ribbon. The arch was created using floral wire, crepe paper, and tiny crepe paper flowers. The actual cake was made by Kelly Zubal of Inticing Creations.

1401lucky-3669

Michele Papineau calligraphy

MSWesddings_Spring2010_Cover_72dpi The stunning calligraphy gracing the cover of the current Martha Stewart Weddings was completed by Michele Papineau, one of our favorite calligraphers.

1345lucky-6659

In addition to the favor crackers (above), Michele also wrote out the evenings menu on colorful chalkboards that were hung inside the tent.

1286lucky-2566

To see more of Michele's beautiful work, please click here.

Because We Can

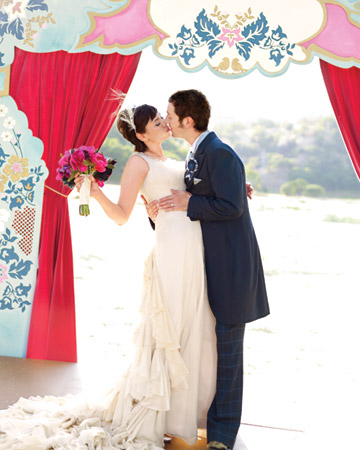
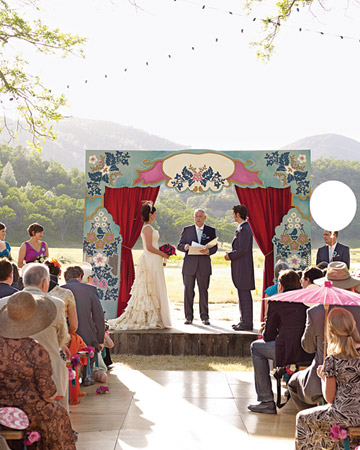
1222lucky-6137 We've mentioned Because We Can before, but the pieces that they created for Eunice and Daniel's wedding are worth mentioning again! In addition to the prop mustaches and word bubbles used for the photo booth, they also created the amazing stage that the ceremony was performed on. Inspired by Joel Dewberry's Woodland Damask pattern (also used on the invitations!), the stage was made of all sustainable wood or recycled fiber with water-based glue and finished with eco-friendly paint, hand painted by the couple and their friends (read more about the process here).

1565lucky-3673

Additionally, Because We Can also created an array of shadow puppets for guests to carry during the parade to the ceremony site. They even created a white unicorn for Daniel (above)!

1661lucky-2355

2032lucky-5387

Below, Because We Can founders Jillian and Toast enjoy the wedding festivities.

1580lucky-3503

Jennifer Behr

When planning her look for the wedding, Eunice knew there was only one place to go for her hair accessories - good friend and hair accessory maven, Jennifer Behr.  Jennifer created a custom headpiece (available here!) after a consultation at her fabulous Brooklyn studio... DSC_0331

Initial thoughts included a dash of hand-dyed fuchsia feathers and something rather dramatic...

DSC_0274

DSC_0354

DSC_0228

An early assembly of feathers and crystals that would later get pared down into the final look...

DSC_0217

DSC_0222

DSC_0207

Jennifer, working her magic!

1837lucky-3584

The result was a delicate crystal tiara handwrapped in 1920's vintage metallic ribbons. A spray of elegant ostrich feathers and floating crystals finish this breathtaking headpiece.

2087lucky-5642

1665lucky-8169

Jennifer also created beautiful little hand-dyed feather poufs to match each bridesmaids' dress for a final perfect detail...

Working with Jennifer was a breeze - her work, as always, was pitch-perfect for the occasion and coordinated perfectly with the dress.

Bottom photos by Gia Canali and Sara Remington.

Magnolia Photo Booth

Little guests and photo booth One of the highlights of Eunice & Daniel's wedding was the photo booth from Magnolia Photo Booth. Guests of all ages absolutely loved it! In lieu of a traditional guest book, guests put their photos into an album with photo corners -- the photos were also posted online after the wedding.

Photo booth pic 5

Photo booth pic 3

Photo booth pic 4

A key to the fun was providing all kinds of creative and funny props, which we hung on the trunk of a tree...

Photo booth and prop tree

1249lucky-1080

A mad hatter hat with bunny ears...

1368lucky-7936

Chalk board word bubbles and mustaches designed by Hello!Lucky and fabricated by Because We Can.

Photo booth pic 7

Photo Booth Pic 10

Photo booth pic

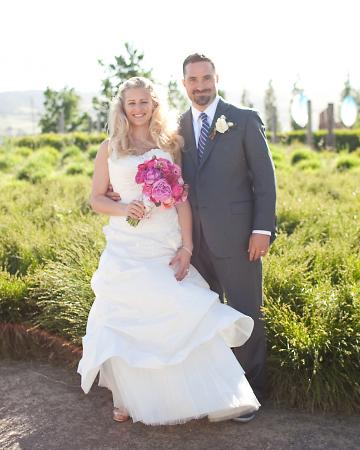
The bride and groom!