Free Halloween Printables


Take your table to the next level by adding place cards and poison wine labels! We created free downloadable templates so you can print your own matching cards and labels!


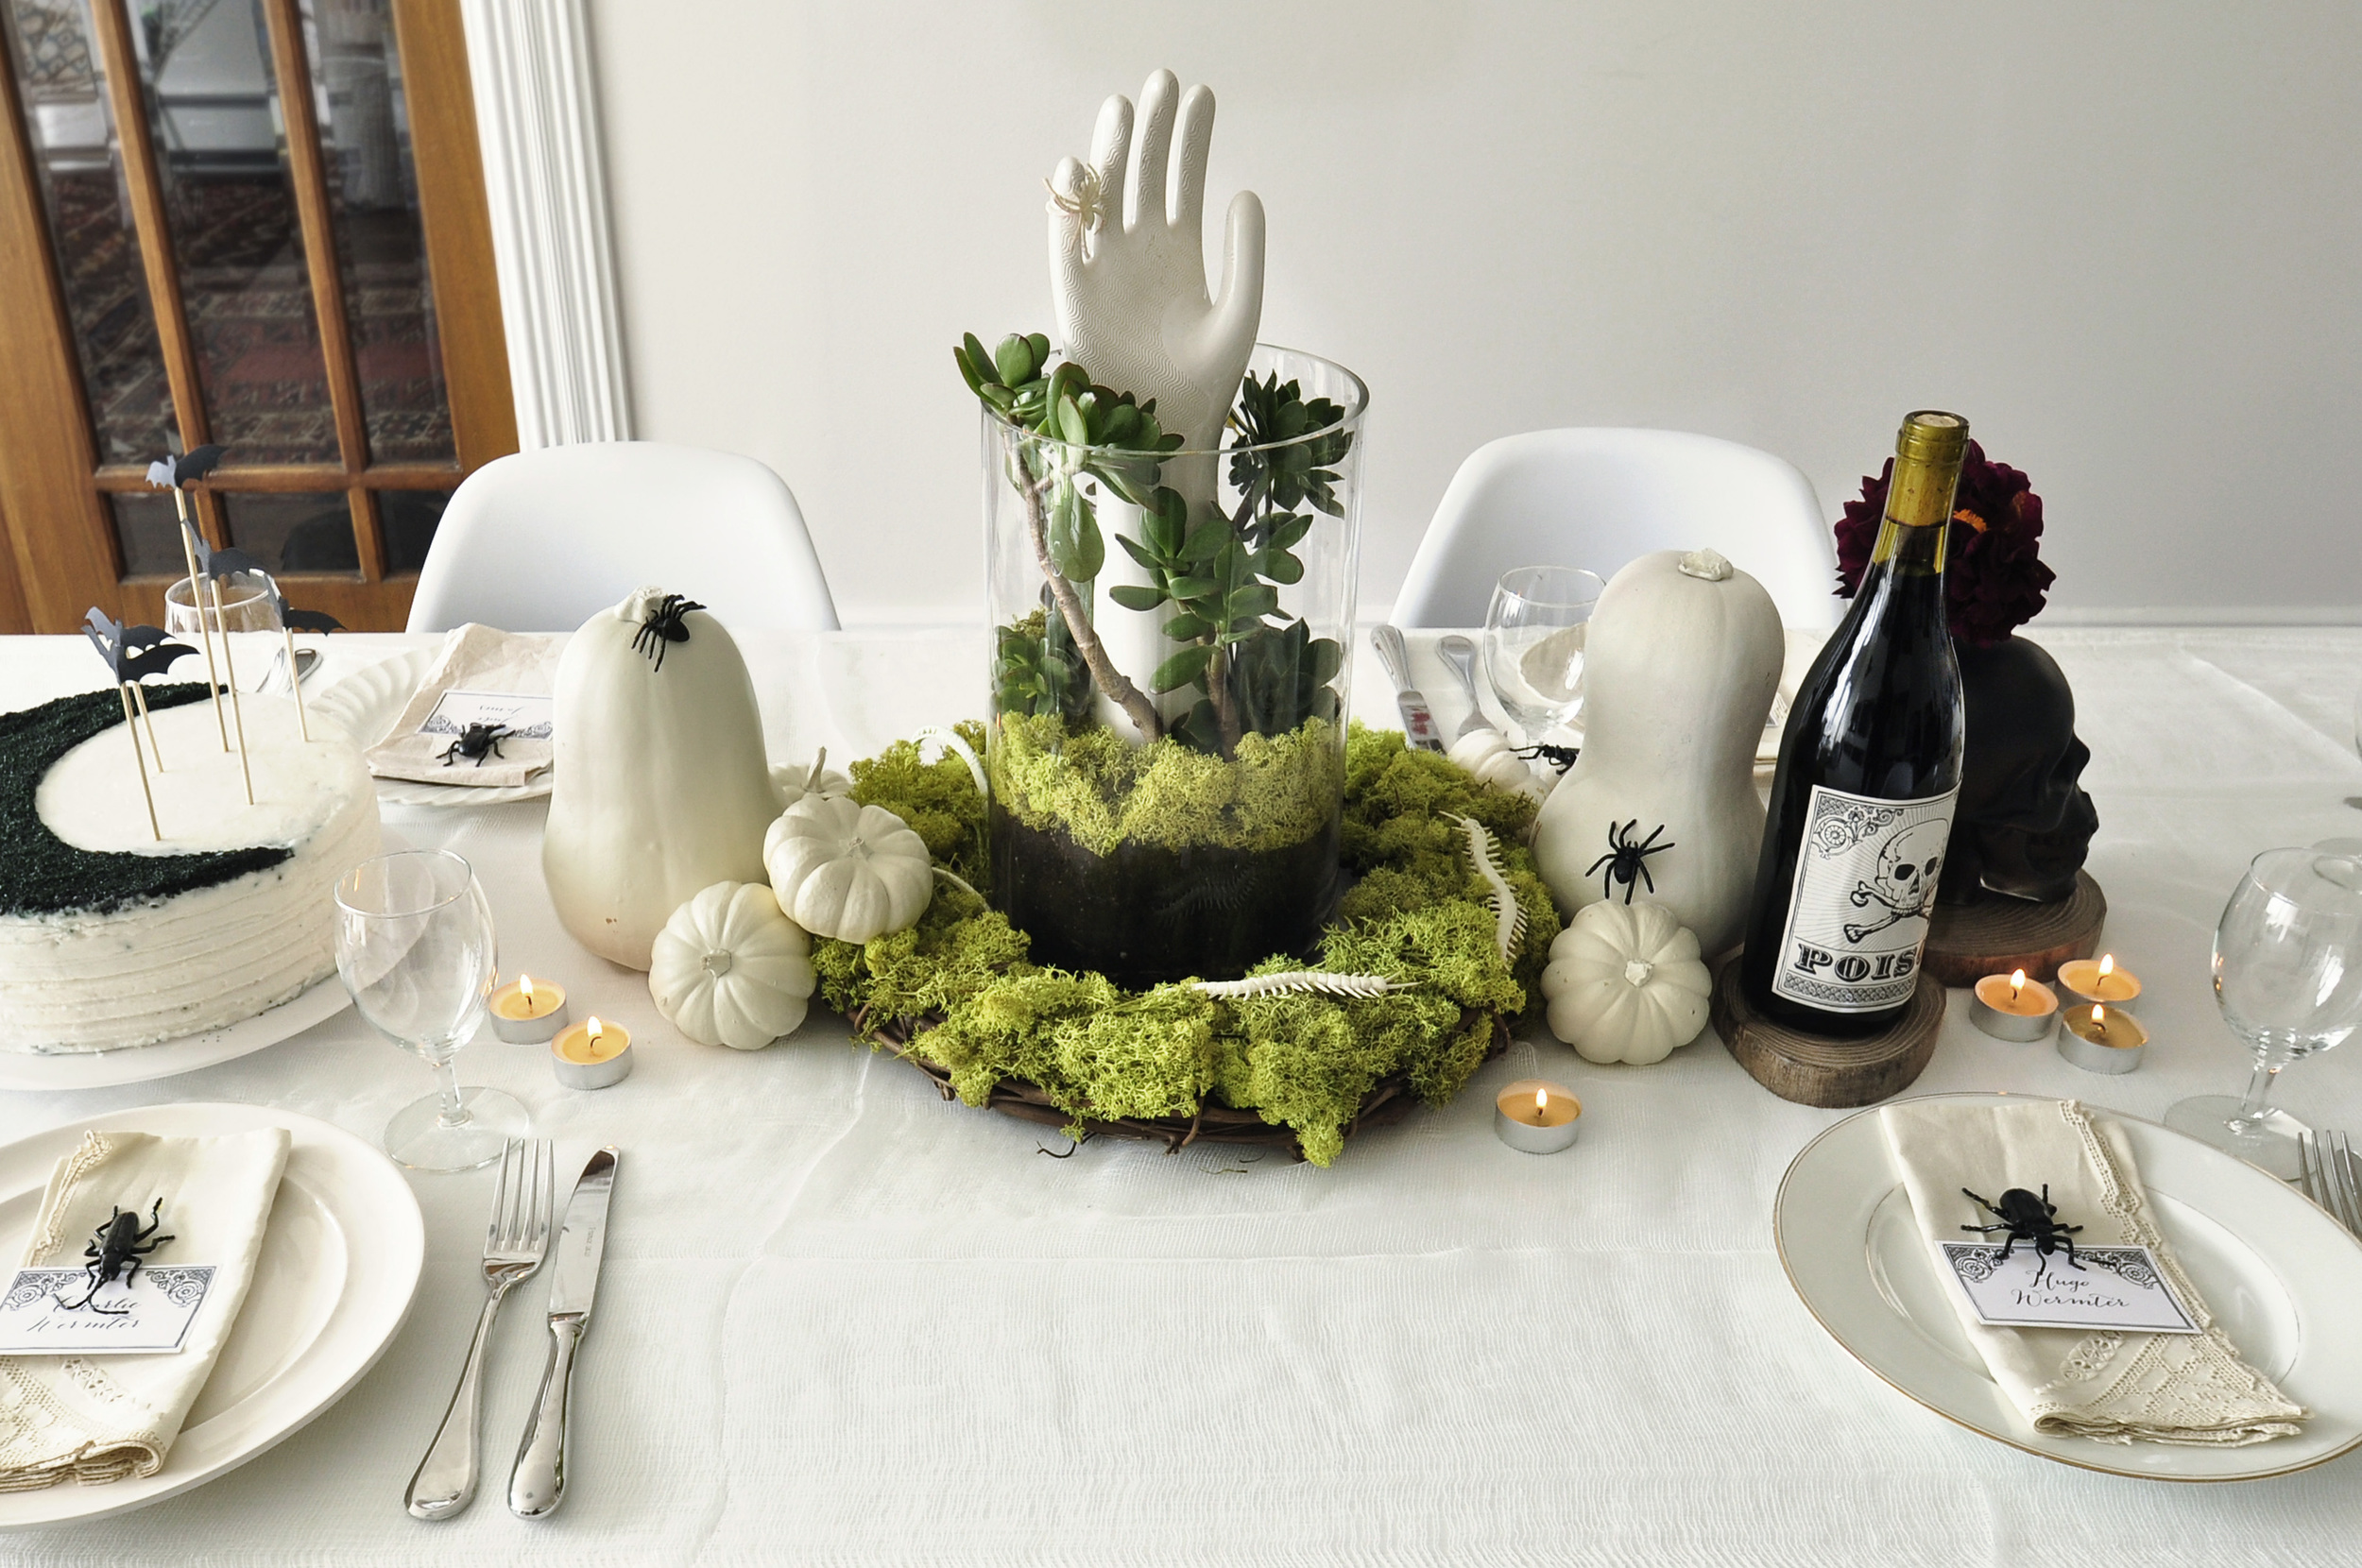
Try using a plastic bug as a place card holder. We spray painted ours black, but you can also find them black to cut out a step!

We recommend you print your wine labels on sticker paper found at most craft stores, or simply cut out using the markers and stick on using double stick tape!

Print your free place cards here!

Print your free wine labels here!

Bat Cake Topper DIY


Try this sweet and spooky cake/ cupcake topper DIY using our free printable template! Materials + Template + Printer + Black cardstock + Craft knife + Cutting mat/ magazine + Tape + 5 bamboo skewers + Hot glue gun & glue + Scissors 1. Print out template here 2. Tape the template to your piece of cardstock so it doesn't move around. 3. Cut out each bat with craft/ exacto knife. 4. Cut each skewer at a different height. 5. Using your hot glue gun, glue the back of each bat to top of skewer 6. Place in cake and voila! Enjoy!

DIY Halloween Centerpiece


A table is never complete without a captivating centerpiece! Follow these steps for the perfect Halloween themed décor. What you will need:+ Glass cylinder vase/ terrarium- Michaels or Amazon + Moss- Home depot + Sand, bark, or rocks + Succulents- Home depot + Potting soil- Home depot + Ceramic hand- Etsy (This is an investment, but they make for amazing jewelry holders). + White spray paint (optional)- Home Depot + Black spray paint (optional)- Home depot + Pumpkins/ squash- Home depot + Toy spiders- Amazon or Michaels Spray paint pumpkins white and spiders black (if not purchased that way) & allow for overnight drying.1. Fill the bottom of your glass vase with 2-3 inches of bark, sand or rocks, this is so the water has somewhere to drain. 2. Place your purchased ceramic hand in the center of the vase. 3. Surround hand in potting soil and pack tight so the hand is stable. 4. Place succulents around the hand, gently pushing roots into the soil. Sprinkle an extra layer of potting soil around base of succulents. 5. Cover the top layer of soil in moss.

Halloween Tablescape


Charm your dinner party guests this Halloween with a themed tablescape. With easy and affordable creepy crawler place card holders, printable poison wine labels, and a corpsy succulent centerpiece, your table will be the talk of the town.

This week we will be posting DIY’s and free printables so you can create a spooky tablescape of your own!

Stay tuned for these DIY’s and printables:

+ Glow in the dark serpent wreath- DIY

+ Lend me a hand centerpiece- DIY

+ Bats cake topper- Printable

+ Poison wine bottle label- Printable

Happy Halloween!

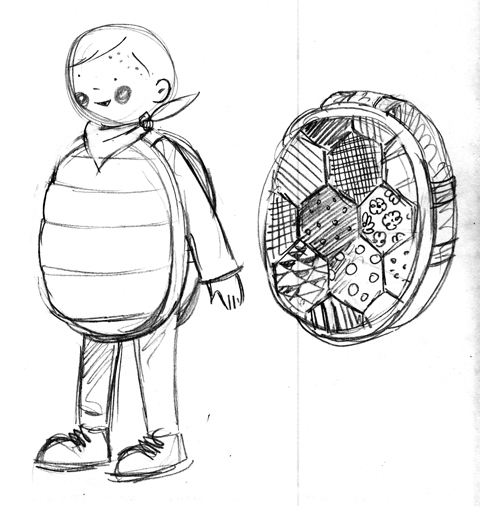
As if getting a two-year-old to hold still for a Halloween picture isn't hard enough, Jude wasn't exactly keen on the idea of wearing the custom stuffed turtle shell I made this year, after weeks of reassurance that he wanted to be a turtle. The sketch was promising and the final costume turned out great, for the minutes we could convince him to wear it.

Sometimes, bribery does the trick! Here Jude is concentrating on his gâteau so I snapped a picture of the front of the shell.

His friend Hugo was rocking a super-hero costume, customized with a felt star and "H est super."

We couldn't celebrate Halloween without a costume, so I had to think on my toes. Luckily I had some scrap metallic silver fabric at hand, resulting in the fastest costume transformation yet - a dragonfly!

The wings were a big hit and Jude is ready to hit the town. Oh, the joys of toddler-hood. Hope you all have a very happy and safe Halloween!

Happy Halloween! + DIY Skull Cookie Cutters

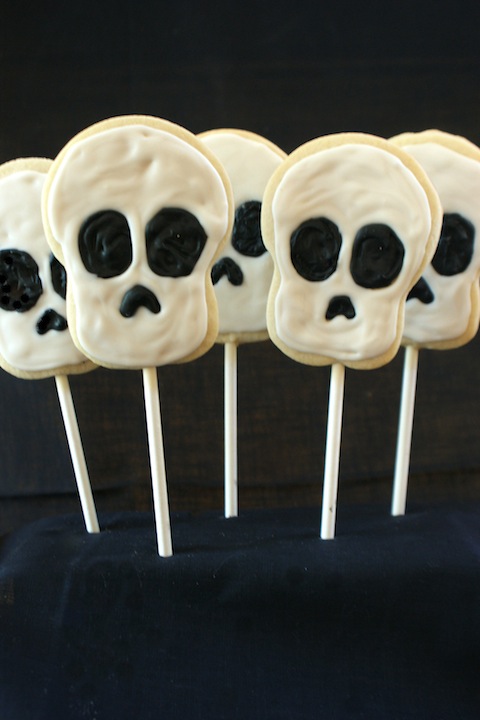
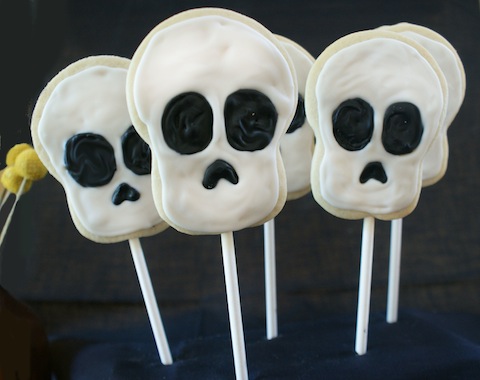
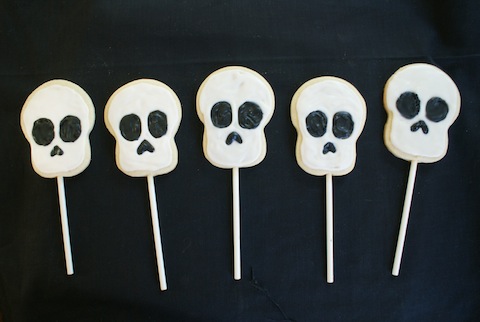
Are you getting excited for Halloween? We are! We had so much fun creating our DIY Sidewalk Skulls, we couldn't help but recreate them into edible cookie pops.

First we made DIY skull cookie cutters. All you need is a circular cookie cutter (about 4" in diameter) and pliers (optional). Simply pinch the sides with your fingers, or use pliers to create a more defined bend. Using this recipe from Sweetapolita, our sugar cookies were perfectly prepared and held our cookie pops with pride. You can customize your cookies to any color, or get creative to celebrate Dia de los Muertos (November 1st)!

Bake a batch and bring these to work or to Halloween parties! And let us know in the comments if you have any other go-to Halloween recipes you love making.

For more fabulous DIY ideas, visit our website here!

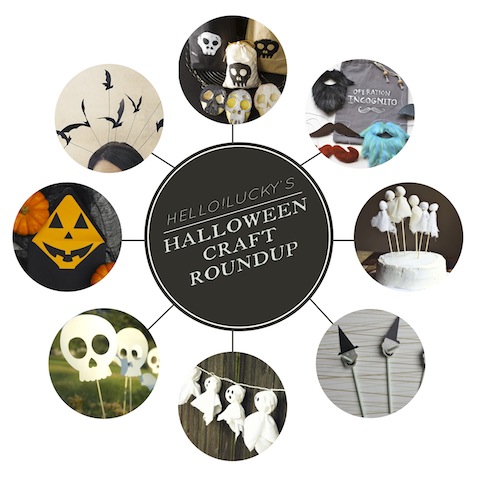
Halloween Craft Roundup

Witch hats, black cats, ghosts and gourds, all these things that represent Halloween make wonderful holiday decorations and crafts. This year we're overwhelmed with inspiration from around the web from sites like Pinterest and Craftgawker, so as Hallow's Eve draws nearer, we can easily keep track of our favorite DIYs. Our Halloween Craft Roundup has projects in multiple categories - from costume ideas to kids activities - and from quirky to sophisticated.

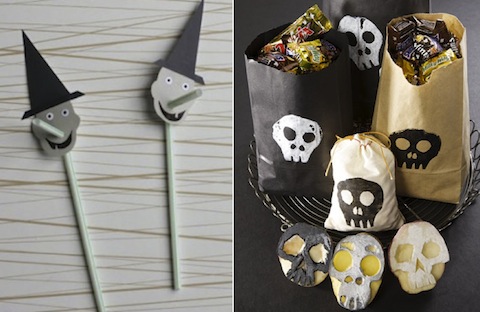
These easy and inexpensive kids craft ideas bring a little spook to your standard DIY. Straw toppers are super versatile and really simple to make. We love the idea of using the bendy straw as a nose. Props to Classic Play for coming up with a great idea for the kiddos. Next are these potato print candy bags by the ever-clever Martha Stewart. Again, this craft can be customized for any shape and it's totally suitable for children.

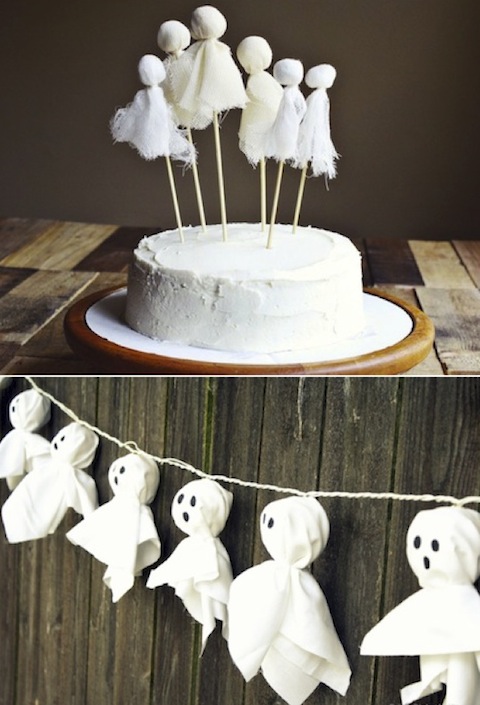
Grouping ghosts together keeps Halloween decor simple but with a subtle scare. This amazing ghostly cake by A Beautiful Mess is definitely going to make an appearance at our Halloween party. It's made with just cotton balls, cheese cloth, skewers and string (aside from the delicious looking layer cake). So simple and so pretty. Next is the playful ghost light garland by Design, Dining, and Diapers, made with cotton fabric, lantern lights, string, and black sharpie. Almost everyone has a set of string lights, so we are loving the quick and easy transformation into Halloween decor.

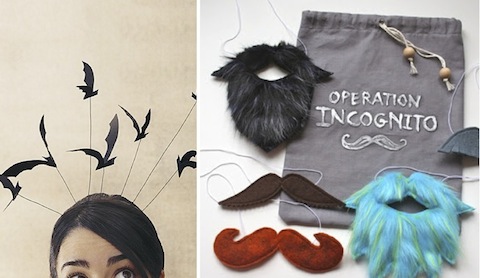
You may have noticed our obsession with Halloween costumes (see sketches for the boys this year), so it was hard to pick some favorites. This bat headband by Martha Stewart always comes to mind when thinking of quick adult costume ideas. Simple, spooky, and totally handmade. Just how we like it! Then there's the incredible Operation Incognito seen on mmmcrafts. You can buy the pdf patterns right here and in just a few quick stitches you'll be a whole new person.

We couldn't help but include our DIY Sidewalk Skulls into the roundup. Check out the full instructions here!

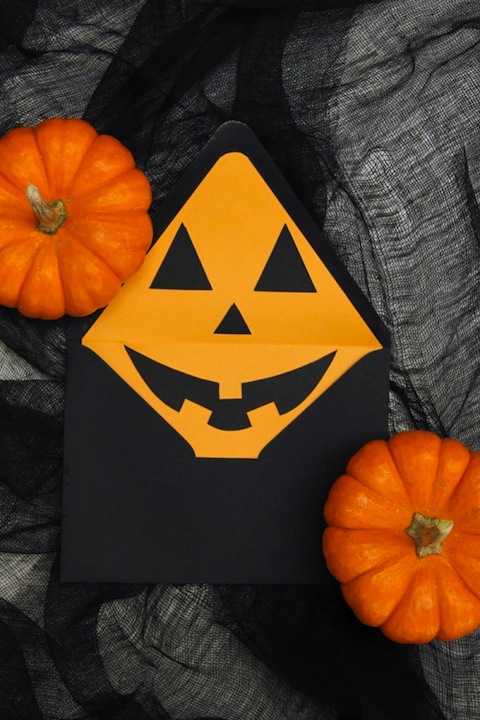
And last but not least, perhaps our most favorite DIY this season has to be these pumpkin envelope liners by Studio DIY. It's the perfect touch for sending out our free printable Halloween party invitation and is also easy to customize. We're blown away with all the talented people sharing their brilliant ideas. Halloween is just around the corner so get crafting today!

Hello Weekend!

Happy friday friends! There's a whole lot happening in the bay area this weekend, from Fleet Week to Hardly Strictly Bluegress in Golden Gate Park. The weather is beautiful here right now and we're hoping it stays that way all weekend long.

Thanks to everyone who left comments on our Halloween post. The two winners are Malia and Colleen. You two will be hearing from us via email shortly.

Have a great weekend everyone!

Halloween Costume Sneak Peek!

Halloween is just over the horizon, so it's time, once again, for another possibly overly ambitious halloween costume!  This year's costume is inspired by the boys' various sea creature obsessions - Jude happens to be a big fan of turtles at the moment, and this concept was inspired by a turtle embroidery kit that our mom did back in the 70's.

The idea is to have the shell be made from a piece of patchwork which will then be stuffed with batting for a cool soft sculpture look - I have a feeling Jude's really going to enjoy throwing himself around once he realizes being ensconced in this costume will make him semi-impervious to doing himself bodily harm. The overall costume will have a front and back shell attached to each other with wide bands of fabric and elastic, paired with a green long sleeved tee and leggings. Some cute rosy cheeks, a red sassy bandana, and voilà! Turtle-y goodness!

Of course, Sabrina's twins James and Alex must have coordinating costumes! James loves starfish and suction cups right now, so our plan is to make him a plush starfish costume with suction cups glued all over the front like starfish feet. Possibly a bit of a patchwork look on the back to match Jude's 70's vibe. Still have to sort out the logistics of the neckline - fingers crossed!

Alex is going to be a jelly fish - essentially an organza or other sheer fabric fashioned into a bubble skirt with some tulle for structure, worn decorated with shimmery paillettes and ribbon tentacles. It will be blue so we don't compromise his masculinity TOO much!  Love the idea of a little starfish perched on his head as an homage to James.

We're thinking that the dads will be dressed as fisherman, complete with pipes, yellow hats, and stripey shirts. Sabrina and I are tbd - possibly mermaids (really just an excuse to own a pair of metallic American Apparel leggings) although we are toying with turning Sabrina, who is very pregnant at the moment, into a pufferfish, her belly being perfectly proportioned!

Stay tuned, the crafting begins in full force this week! We'll be sure to post photos of the finished costumes here!

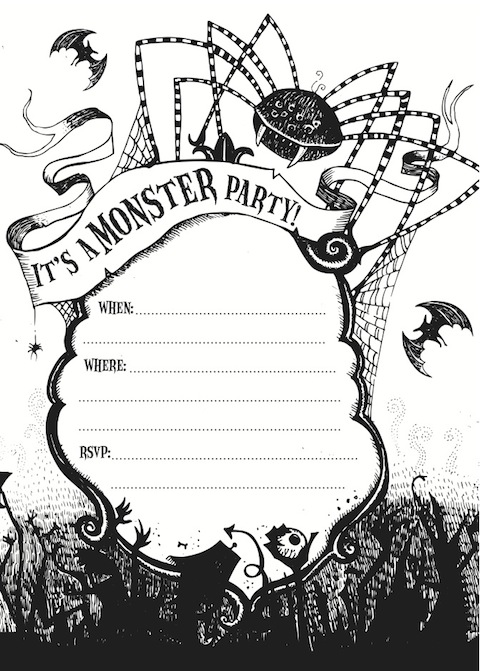
Free Printable Halloween Party Invite + Giveaway!

Are you getting in the Halloween spirit yet? We definitely are and can't wait to break out our costumes and candy. This year we wanted to give our readers an extra spooky treat with this free printable Halloween party invitation. Even if you're not the costume king or queen, throwing a party for Hallow's Eve is a great way to get geared up for the holidays. Print this template at home on card stock paper and address it to your party people. Guests will be too scared to say no.

We're also giving our fans the chance to win a set of 3 eerie Halloween greeting cards! Simply comment below telling us what you want to be for Halloween and we'll pick two random winners. We're still deciding on our Halloween costumes this year so we look forward to reading your ideas! Be sure to enter your comment before noon of next Thursday, October 4th and we'll announce the winners on Friday! Good Luck!

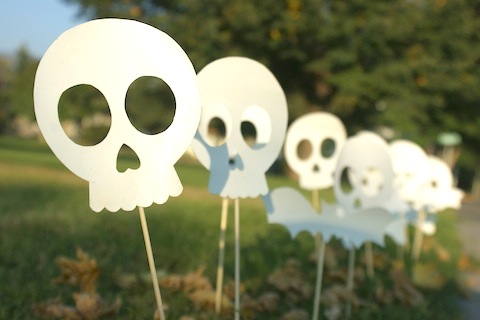
DIY Halloween Sidewalk Skulls

DIY Sidewalk Skulls by Hello!Lucky

It's that time again! The holidays are right around the corner and that means we're gearing up for a season of DIY decor. Halloween is the one holiday in which you can get away with practically anything. And although we love faux spider webs and painted pumpkins, we're more attracted to unique, original designs. Our DIY Sidewalk Skulls are a great way to add spook to your home without too much black and orange. Where's the wow factor? It's a glow in the dark graveyard so each piece glows in the gloomy night of Hallow's Eve.

DIY Sidewalk Skulls by Hello!Lucky

Materials: White poster board or card stock, Scissors or craft knife, pencil, glow in the dark acrylic paint (available at craft stores), paintbrush, skewer sticks, masking tape

How To:

1. Print this skull template on your home printer. Cut out with scissors and a craft knife (for the eyes and nose) and trace onto your poster board or card stock. *Tip: for extra strength or to keep your skulls from warping over time, glue two pieces of card stock together before tracing and cutting.

2. Cut out the skull from the poster board or card stock using scissors and a craft knife.

3. Apply three generous layers of glow in the dark paint.

DIY Sidewalk Skulls by Hello!Lucky

4. After the paint is dry, place the skewer stick on the back (pointed side down) and secure with a piece of masking tape.

DIY Sidewalk Skulls by Hello!Lucky

*Tip: We recommend keeping the skulls under a lamp or bright light before displaying for best results. If rain is in the forecast, remove the skulls from the yard to preserve the strength of the paper.

Place skulls along your sidewalk or pathway to light the way for trick-or-treaters! We added bats and bones to the mix, but you can make anything from witch hats to pumpkin heads!

DIY Sidewalk Skulls by Hello!Lucky

Happy Halloween!

For more crafty DIY ideas, visit our website today!

Happy Halloween!

closeup

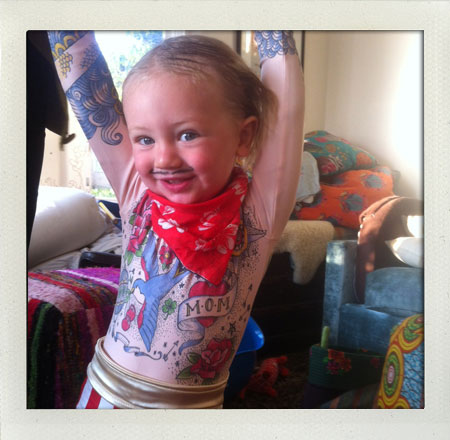
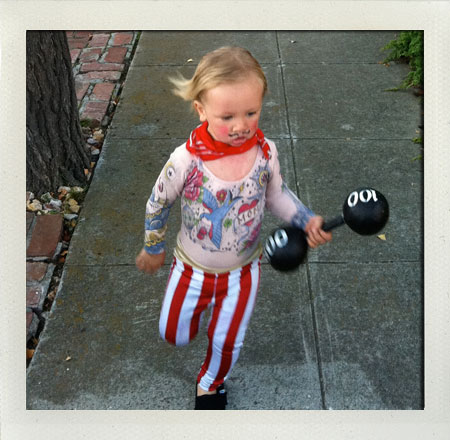
Needless to say, Halloween is a just a big excuse to get our crafting on and we love to pull out all the stops!  This year, Jude was a strong man (inspired by his penchant for bashing things and lifting heavy objects despite repeated warnings that if one, say, drops a large rock on one's foot, it's gonna hurt!)

Going-Strong

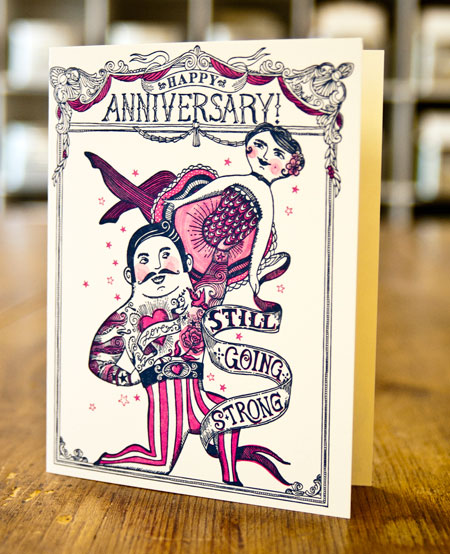
His costume was based on our fab Going Strong card...

jude_running

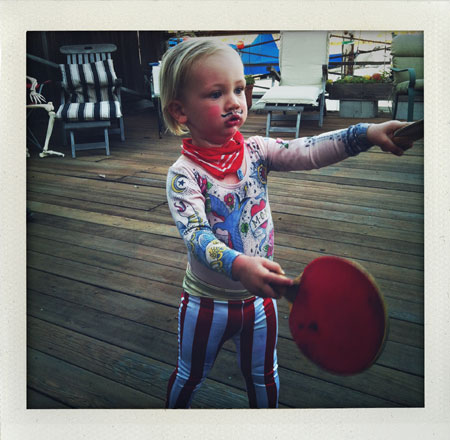
The costume consisted of drawing Sailor Jerry style tattoos with Sharpies on a pink leotard, leggings (made by tracing half a pair of store-bought leggings, cutting out four pieces and stitching them together - way easier than you would think!), a pair of Tom's and a barbell made with two styrofoam balls, a dowel, and papîer maché...the toughest part was drawing a moustache on a two year old!  I also slicked his hair down with egg whites for that 19th century gentleman look...

jude_directing

Have a fabulous Halloween!

Lucky Friday # 35, Skull & Crossbones

Hello all you lucky folks out there! This is the 35th edition of our Lucky Friday Giveaway! Each Friday we feature one of our letterpress cards. We’ll choose THREE LUCKY WINNERS to get a free card.  Post a comment by 12 p.m. PST the following Thursday, and we’ll announce the winners on the following Friday!
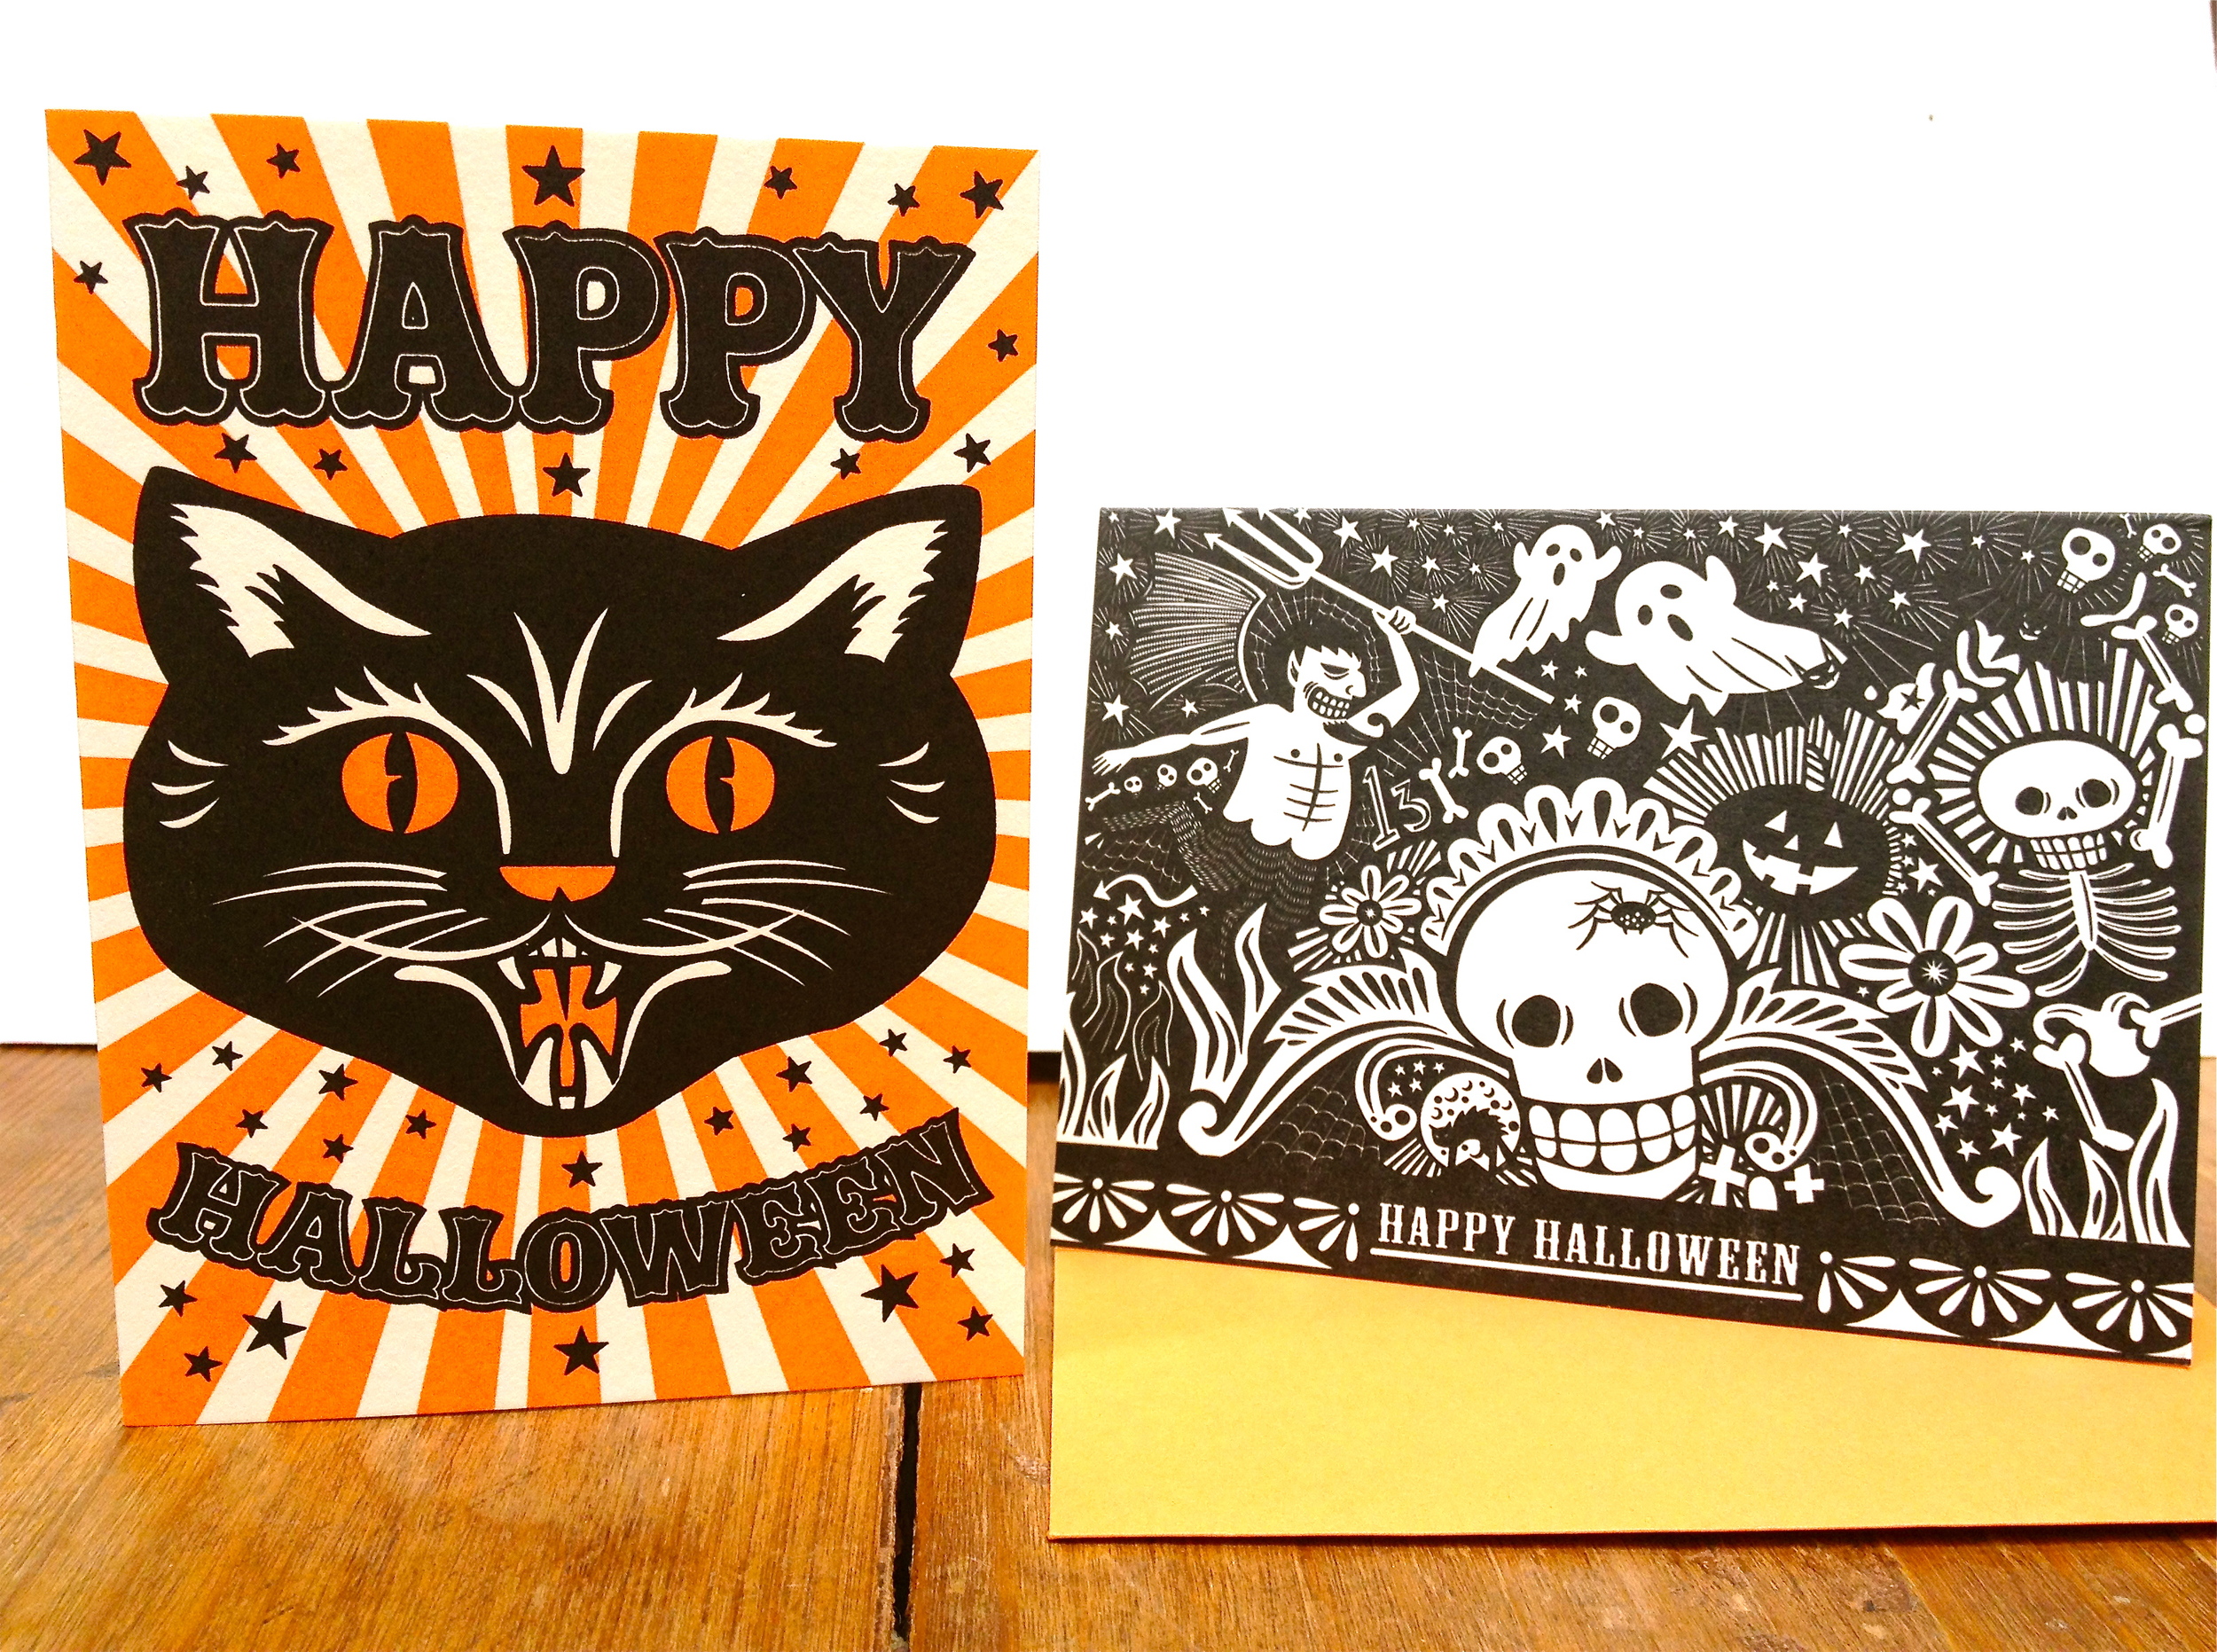
The three winners from last week are (drum roll, please):

Amanda, Paige L., and Cody!

We’ll contact you next week to arrange sending your Trick or Treat card!

Now for this week’s spooky selection:

skull&crossbones

Design: Skull & Crossbones Artist: Eunice Moyle Inspiration: We were playing Ouija one night and the spirit told us that oui and ja both mean "yes." Creeeeepy. Who to send it to: A Jolly Roger, a femme fatale, or a slightly sinister sister. Ideas we scrapped in favor of this one: "We put the 'gal' in gallows humor." Actually, we're still working on that one. Favorite detail: We like how the different sized eyes make all the difference in the skulls' spookiness. Why letterpress? Because the spirit spelled it out for us. Oui. Ja. Yes. L-E-T-T-E-R-P-R-E-S-S. I swear, I wasn't pushing.

Don’t forget to post your comment and tune in next week, same time, different stationery, to see if you’ve won!

Lucky Friday # 34, Lab Partners' Trick or Treat!

Hello all you lucky folks out there! This is the 34th edition of our Lucky Friday Giveaway! Each Friday we feature one of our letterpress cards. We’ll choose THREE LUCKY WINNERS to get a free card.  Post a comment by 12 p.m. PST the following Thursday, and we’ll announce the winners on the following Friday!

The three winners from last week are (drum roll, please):

Mary, Renee G and Mary E!

We’ll contact you next week to arrange sending your Skeleton Fiesta card!

Now for this week’s spooky selection:

trick_or_treat

Design: Trick or Treat Artist: Lab Partners Inspiration:  A tiny town teeming with teeny trick-or-treaters was just too tempting not to attempt. Who to send it to: a petite pirate, a diminutive Dracula, a wee werewolf, a smallish skeleton or an itty-bitty kitty. Ideas we scrapped in favor of this one: We thought the college version, with kids dressed as showers, laundry baskets and zombie sorority girls was a little too hard to communicate at that scale. Favorite Detail: Who could name just one? But we delight in saying that there really is a devil in the details.

Don’t forget to post your comment, and tune in next week, same time, different stationery, to see if you’ve won!

Lucky Friday # 33, Halloween Card Giveaway!

Hello all you lucky folks out there! This is the 33rd edition of our Lucky Friday Giveaway! Each Friday we feature one of our letterpress cards. We’ll choose THREE LUCKY WINNERS to get a free card.  Post a comment by 12 p.m. PST the following Thursday, and we’ll announce the winners on the following Friday!

The three winners from last week are (drum roll, please):

Ruth, Sara and Wolfie!

We’ll contact you next week to arrange sending your Going Places card!

Now for this week's spooky selection:

Skeleton_Fiesta

Design: Skeleton Fiesta Artist: Eunice Moyle Inspiration: Cleaning a closet full of vintage souvenirs we found some spooky sugar skulls and thought we ought not just let our calaveras out of the closet, but give them maracas and let them party! Who to send it to: Any guy, ghoul or witch with whom you have a funny bone to pick. Ideas we scrapped in favor of this one: An archaeology-themed romantic Halloween card reading "I Dig Your Bones" gave us the shudders, and our "Happy Howl- a-Ween" card with an "Owl-len Ginsberg" cartoon reading from HOWL— never mind— forget we ever said that. Favorite detail: The fact that the itsy-bitsy spider is depicted with all 28375764 of its eyes makes us cringe with ghoulish glee. Why letterpress? Nothing else could quite capture all the crisply creepy detail.

Don’t forget to post your comment, and tune in next week, same time, different stationery, to see if you’ve won!