Susan Connor


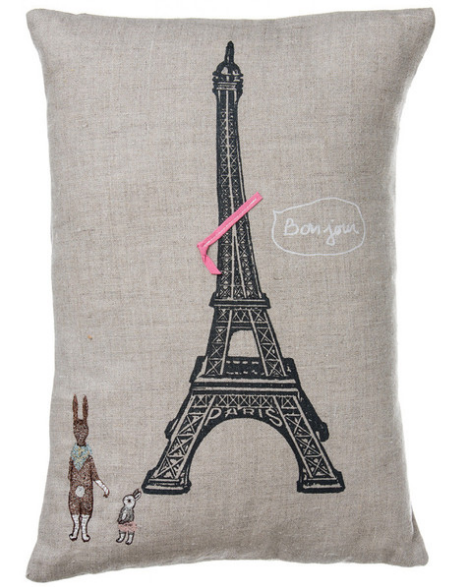
Newly launched handmade goodness from Susan Connor. This New York based designer creates her patterned textiles using hand-drawn carved blocks. She prints on linen to create one of a kind throws and pillows. Each print is a little bit different, much like letterpress! See her full collection here!

Winners for the Hello!Lucky & Egg Press Giveaway

letterpress mail love

To say we were blown away by the entries for our pen pal giveaway with Egg Press is an understatement! We absolutely loved reading your comments and seeing the #LetterPressMailLove photos you tagged us in. Here's a sampling of some of the great photos you shared on instagram.

photo-4

The three winners for our giveaway were....

Grand Prize Winner Jaclyn: My dream pen pal would be my Great-Great-Grandmother Angelina who immigrated to the U.S. from Italy. Never adopting the English language, I’d love to translate her italian handwriting to read her firsthand account of growing up in Italy in the late 1800s, moving her life to America, and raising 8 children in Delaware. I’ve heard only stories of the strong woman that she was, and her letters would be something I could pass on to keep those stories alive.

2nd Prize Winner Angela: Oh I love this! My dear friend and I have been consistent pen pals since 1997-ish. We even wrote letters when we lived in the same city (we haven't shared a zip code since 1999). The last two Decembers we have tried to make and mail a postcard a day to each other (Daily December). This year we are working on a postcard a week (52 for You).

3rd Prize Winner Samantha from Instagram: Sharing a photo of her correspondence-covered fridge said "Because I live far from friends and family sending letters is an important way for me to keep in touch. I post correspondence with pride."

fridge letterpress love

Thank you all for participating and making this such a fun giveaway. We will definitely be doing more of this in the future so stay tuned! And in the mean time happy letter writing.

photo-2

Photos above from @apoth, @ImagineJoy, @sammade and @8mmideas.

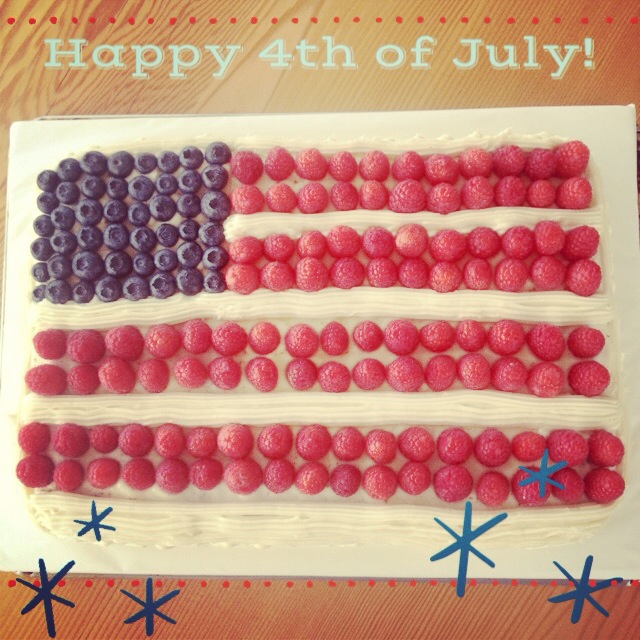
Happy Independence Day!


Sabrina had a great time making this cake with her kids to get ready for the holiday. We love that it uses fresh summer berries instead of colored frosting as decoration. And the best part -- it's chocolate cake inside! For the complete recipe head over to Epicurious.

We hope you have a fantastic holiday weekend! We'll be taking off on Friday as well just to squeeze a little more sunshine out of summer.

Happy fourth of July!

Inspired By: Coral & Tusk

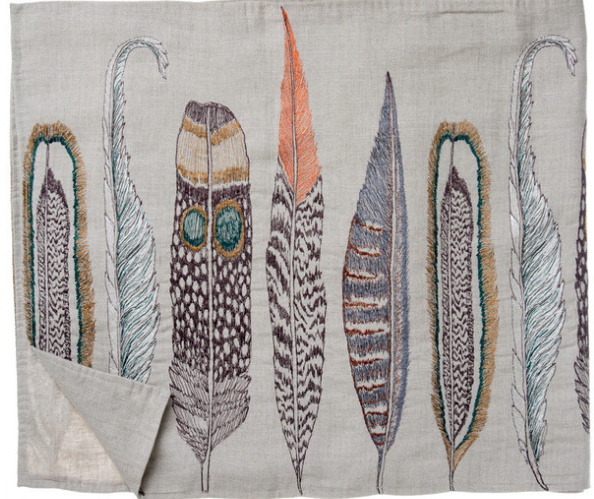
We first discovered the embroidered work of Coral & Tusk at a local wedding fair where a vendor had a beautifully stitched table runner on display. We loved the detailed feathers and immediately sought out more of their work online.

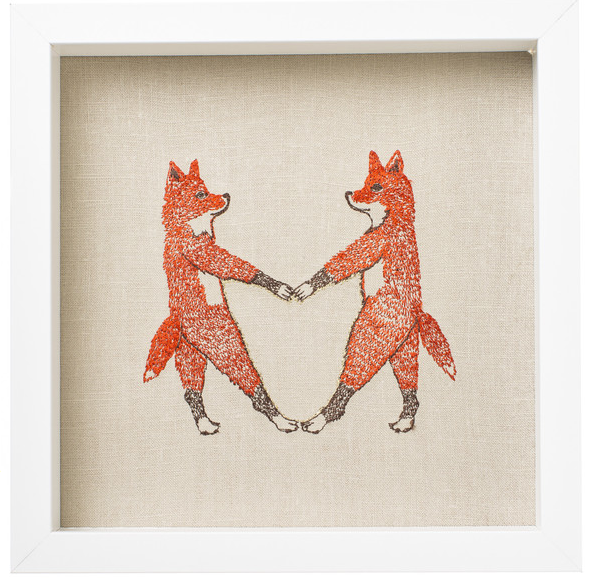
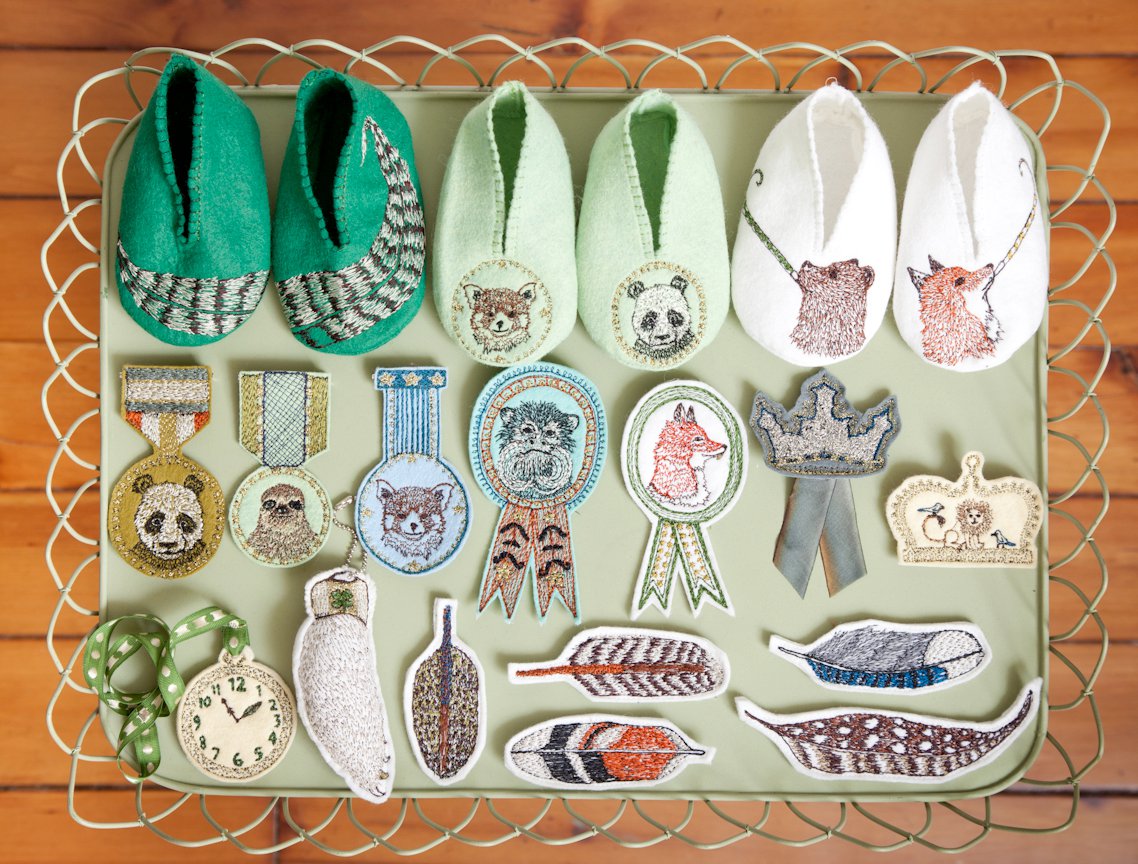
Founded in 2007 by Stephanie Housley together with her husband Chris Lacinak, Coral & Tusk creates work inspired by their travels all over the globe. Their love of animals, adventure, and the natural world are reflected in every piece they create. We're especially fond of their stitched animals who always seem to be celebrating.

A RISD-trained textile designer, Stephanie creates all of her scenes and irreverent characters as original pencil drawings before she redraws them stitch by stitch using special computer software. Finished by hand in Coral and Tusk's Brooklyn loft, every machine-embroidered pillow, doll, napkin and artwork retains the story-telling spirit and hand-drawn allure of the original illustration. A mix of smart design, magic and mischief is at the heart of every Coral & Tusk embroidery.

View & shop Coral & Tusk here.

See if they are in a store near you here.

Follow along with their latest here.

The Fabulous Mr. Finch

We just stumbled across the work of Mr. Finch, a textile artist from Leeds in Yorkshire, and were immediately enamored by his ethereal and whimsical creations.

Finch says he is inspired by British folklore, shape shifting witches, and moon gazing hares. We love that he believes the animals he creates come to life at night when everyone is sleeping.  It's no surprise that his creatures feel so magical.

He has had no formal training which is completely inspiring.


Love this sea horse...

This charming hare reminds us of the Velveteen Rabbit.

Check out more of his work here and here. You can pick up some of his pieces at his Etsy shop.


Filex & Milou

I have two dogs and thus can tell you, with some authority, that a truly fabulous dog bed (and by that I mean one that isn't varying shades of neutral or plain ol' preppy striped) is tough to find.  Needless to say, I was super excited to discover Felix & Milou, a brand new dog bed line by Tove Jakobsson -huzzah!  Finally, something with a little style!

Her cushions are all made by hand from lovely graphic Swedish fabrics. They're sized for a cat or small dog, hopefully soon, a bigger size to come! I fear poor Indy is getting the shaft, being more in the medium to large range. But wouldn't they make great floor cushions around a low table as well?

This is the one I purchased - a fabric by Cecilia Hall Åhlens that has a lovely Josef Frank vibe - beautifully made and adorable in person!

All the cushion covers are removable and washable.  Check out the rest of her products here.


Inspired By: Abigail Brown

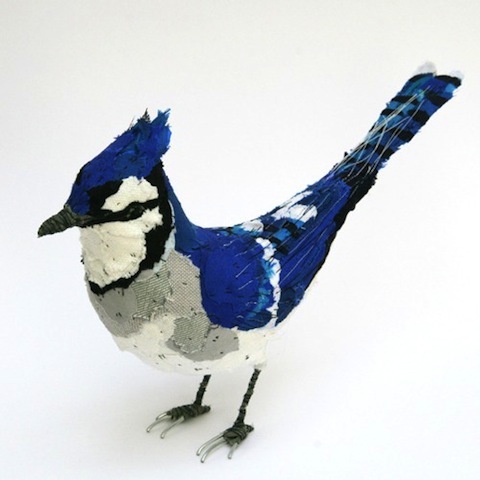
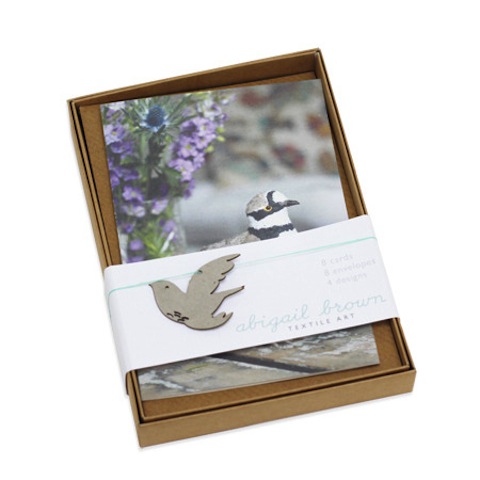
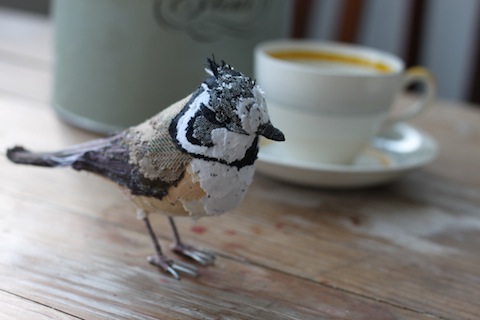
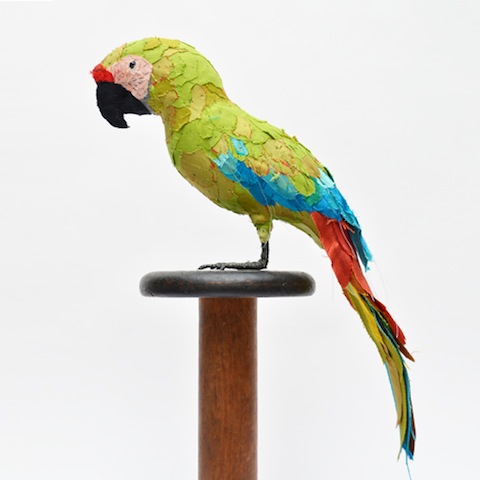
It's hard to believe it's been over four years since we first featured the work of Abigail Brown on our blog. Her textiles had caught our attention back then, and she still continues to inspire us. Her collection of hand crafted birds are some of the most intricate textile pieces we've ever seen, and to top it off she incorporates reusable materials in her designs. A London dweller now, Abigail inherited her skills from her seamstress grandmother, and while she has transformed the long-time craft into fine art sculpture, her attention to detail is craftsmanship at its finest.

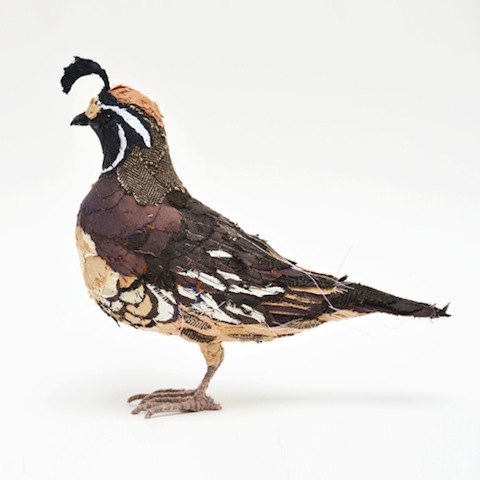
We are simply in awe of the work involved with these pieces. Our favorite might be the classy Californian Quail adorned in chic herringbone.

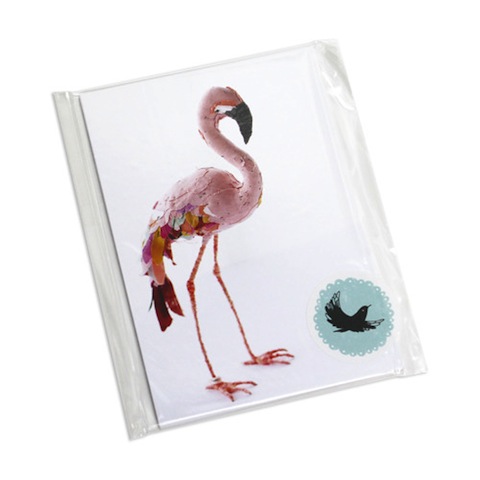
Her felted fledglings make timeless gifts for the bird-lovers in your life, but if they are out of price range you can still enjoy her work in other ways. Abigail's shop is full of prints, postcards, plush toys and every day accessories.

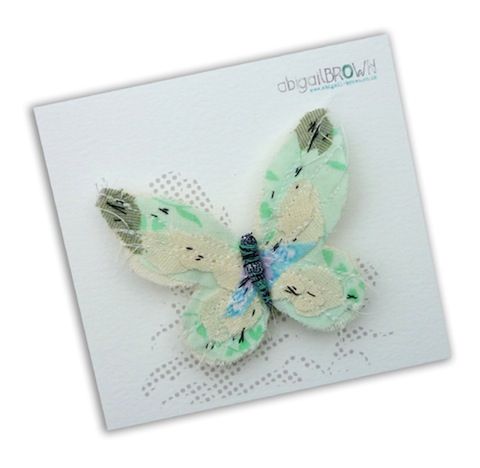
Abigail does more than just birds. Her butterfly brooches are just as elaborate and beautiful but are affordable for all!

To view more of Abigail Brown's work, click here and to get your hands on your very own, visit her shop!

Valentine's Cards for Meals on Wheels

Our employees love to get together after hours for holiday craft nights, especially if they benefit a good cause. Meals on Wheels has been providing meals to seniors since 1940 and has evolved into an extraordinary foundation for fighting hunger. For holidays the good people like to deliver cards to the seniors as a gift of love, and this year we decided to join in. All of our cards were handmade with love for the people supported by Meals on Wheels, and to know they were going to a good home was a beautiful thought.

As stationers, paper is our primary medium, so coming up with materials was a cinch. We try to save as many scraps as we can, knowing that they could come in handy for a card-making craft night.

Our team is the best at coming up with witty one-liners. We loved this "I a door you" card.

To support the Meals on Wheels Association of America, visit their website!

DIY Valentine's Day Geo Heart Bulletin

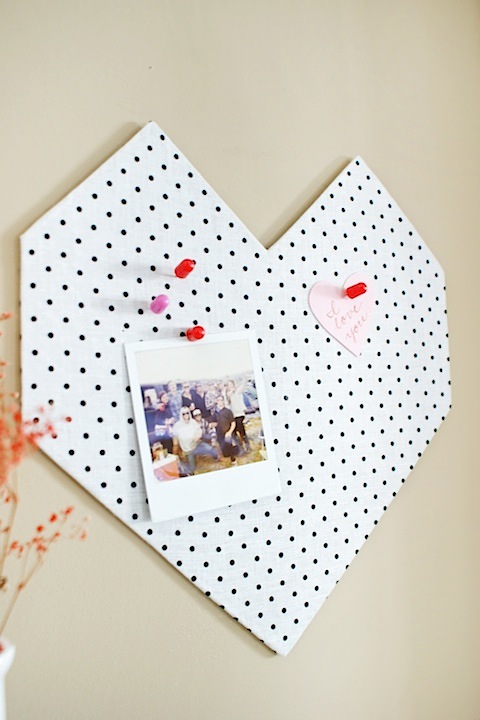
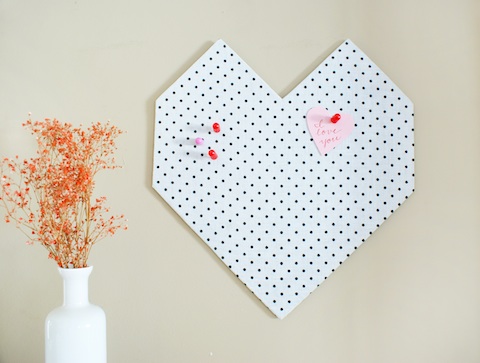
Our next DIY doesn't just have to make an appearance for Valentine's Day. It's a nice addition to any home decor and it's sleek shape would look great year round! Geometric shapes are trending around the blogosphere lately, and we're really into the look. This DIY Geo Heart Bulletin is fun and functional, and the perfect way to show your home some love. Instructions below!

Materials:

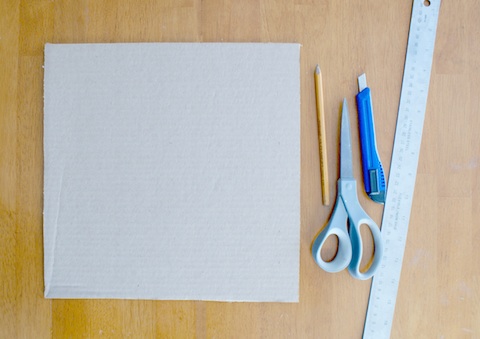
12" x 12" cardboard* (recycle from an old box!), Pencil, Box cutter or sharp scissors, Ruler, 18" x 18" fabric, Spray adhesive, Hot Glue and gun, Foamfast hanger or command hook for hanging

*Make sure your cardboard is 1/4" thick, so pins don't poke through to the back

Instructions:

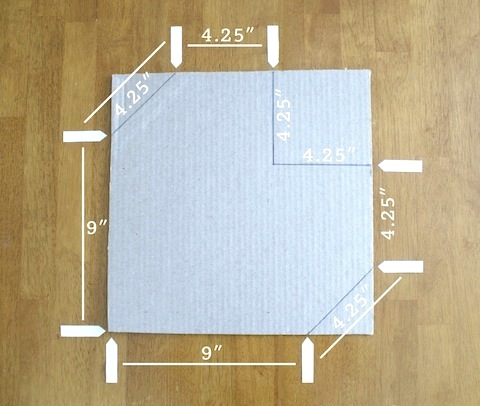
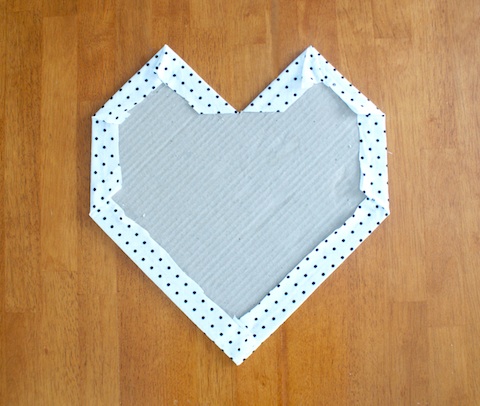
Step 1. Measure your heart shape. The two long sides are 9", the rest are 4.25". See below for reference.

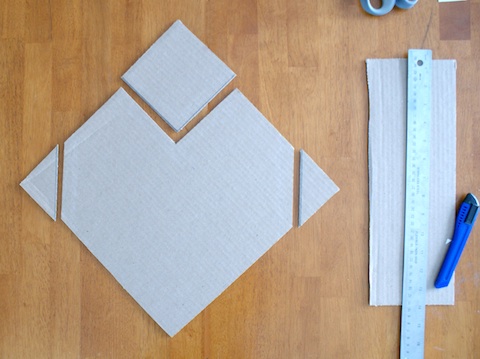
Step 2. Use your box cutter or scissors to cut out your shape. Discard scraps. Be sure you use a scrap of cardboard or a magazine underneath to prevent cutting your work surface!

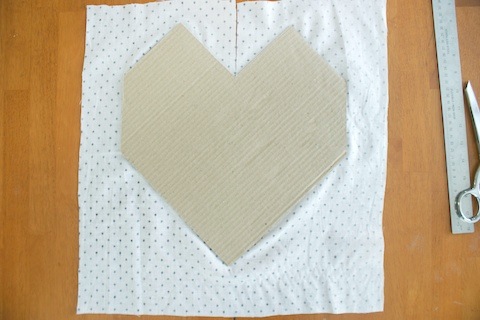
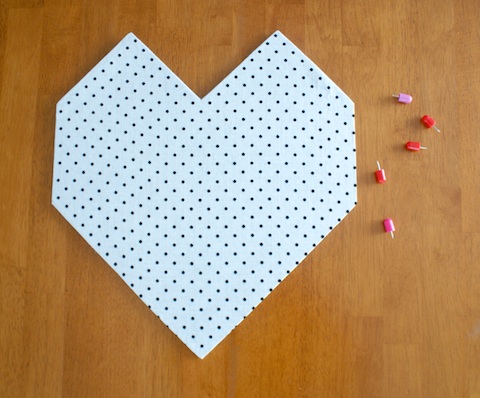
Step 3. Apply a thin, even layer of spray adhesive to one side of the heart and smooth on the fabric. Use your fingers to smooth any bubbles. Use scissors to make a slit directly above the point of the heart.

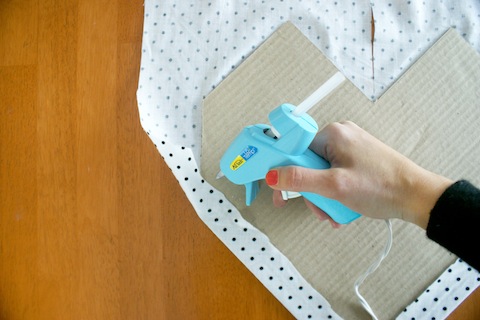
Step 4. Fold the edges of fabric over to the back side. Secure with hot glue, about 1/2" from the edge. Snip any excess fabric off and discard.

Step 5. Voila! These Foamfast hangers or command strips will work well for hanging.

Leave your loved ones a special note on Valentine's Day or use it to pin up special photos. It's lightweight and easy to make!

For more festive DIY ideas, visit our website!

DIY Valentine's Day Candles

Valentine's Day is definitely one of our favorite holidays to celebrate. Christmas, Thanksgiving, Fourth of July, they're all a blast, but when we're given the thumbs up to decorate with all the pinks, fuchsias and reds we wish, we're overjoyed. Our Love/Valentine's card collection is one of our strongest (especially with the latest additions by Lisa Congdon) and our Big Day Pinterest Inspiration Board is overflowing with hearts and love. But it's really gearing up for the big 2/14 that get's us in the mood. The beauty of this DIY (found and inspired by the ladies at Design Mom!) is that you can use any color of wax, and cut in any shape you want, but we're going all out in hearts and XO's.

Materials: Colored candles or wax, candle wick, toothpicks, double-boiler or two pots, wax paper, small cookie cutters or knife

How To: Step 1. Using a double-boiler melt your wax. If you don't have a double-boiler, just stack one pot on top of anther. Add a little water to the bottom pot and bring to a boil. Rest the other pot on top (without touching the water).

*Try recycling those used or unwanted holiday candles for this project. It's a shame tossing out the bottom half of those delicious apple-pie scented wonders, so throw them in a pot and melt it down for a new facelift. Most wax will melt down well but we recommend you steer clear of beeswax.

Step 2. While your wax is melting, cover a flat work surface with wax paper, and snip your candle wick to about 1" stems. The length will depend on the shape so check your cookie-cutters in advance. You want the wick to reach about 1/3 or half of the way down your shape.

Step 3. After your wax is completely melted, allow to cool. *If you're using a recycled candle, remove any wick or wick stands.

Step 4. Once the wax starts to stick to the side of the pot, or a thin layer of skin forms at the top, you're ready to pour.

Step 5. Carefully pour the wax onto your covered work surface. You want to aim for 1/8 "- 1/4" thickness.

Step 6. Now you need to let the wax cool for about a minute before you start cutting your shapes. You can test the wax before cutting by pressing your finger into a corner. It should be firm but still hold the shape of your finger. You will need to pay close attention so that the wax does not get too firm before you cut.

Step 7. Cut your shapes out of the wax with your cookie cutter and remove excess wax.

Step 8. Carefully drive a toothpick up the center of the wax (about 1/2" - 1" depending).

Step 9. Finally, set your pre-cut wick into the top of the wax, leaving about 3/8" - 1/2" exposed.

Step 10. Allow to dry completely before use. You can reuse the excess wax again by simply melting in the same pot.

*Clean up tips: Allow the wax to completely dry in the pot and use a knife to gently pick it out. If you find there's still residue, boil water in the pot and while still warm, wash with soap and water. If it still doesn't come out, melt the dry wax and wipe with a paper towel, then wash with soap and water.

Happy crafting Valentine's Day lovers! For more fun DIY ideas, head over to our website!

DIY Neon Ornament Wall Decals

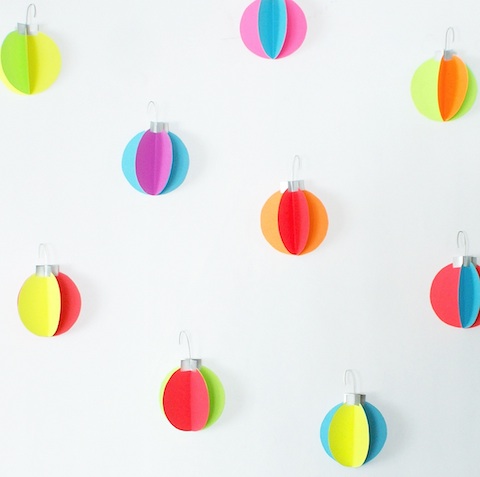
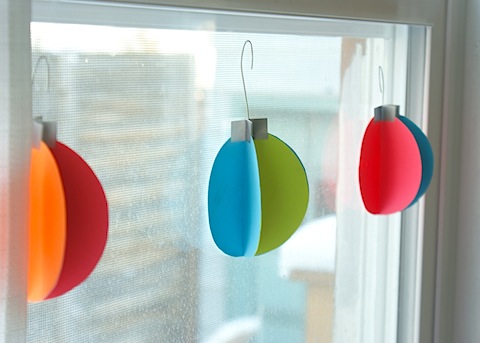
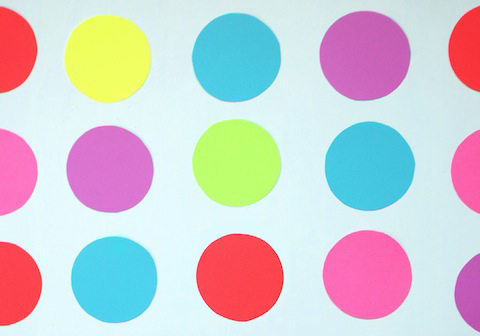
Christmas is literally almost here but there's still time to spread some cheer around your home! We're big fans of decorating with items already found around the house, and since we're paper geeks, this DIY is dear to our hearts. Looking back at 2012 it was definitely the year of neon. Remember the boys' second birthday party? And our new neon kids birthday party invitations? We thought we'd spend one last time this year indulging in our neon fix before another fabulous trend comes in 2013. These DIY neon ornament wall decals were inspired the hot air balloon decals made by Gosh and Golly shown in Sabrina's nursery. Full instructions below!

Materials:

Neon Paper, Silver Paper, Mug & pencil - or circle-cutter, Scissors, Glue stick, Silver wire or ornament hooks, Hot Glue + Gun, Glue dots or sticky-tac

How To:

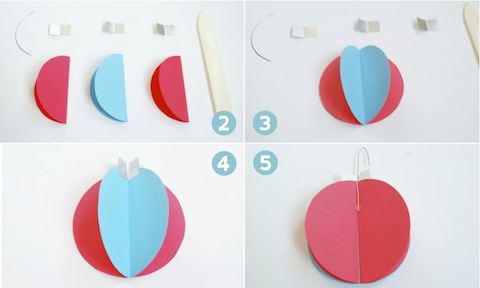
Step 1. Trace your circles onto sheets of colored paper and cut out with scissors. This part takes patience, unless you have a handy circle cutter at home. They come in all sizes, but 4" is a happy medium. As long as your circles are all the same size it will work.

Step 2. Choose three colored circles and fold them in half.

Step 3. Glue the back of both sides of the center circle, then adhere to one side of the other two.

Step 4. Cut your silver paper into three 1" x .5" strips. Fold in half (hamburger style!) and glue one half of the back (hotdog style!) Then place at the top end of each of your folded circles.

Step 5. Cut your wire into 3" strips and fold the top .5" over with your finger. Or, if you have spare ornament hooks lying around, you can use those just as well. Place a small dab of hot glue on the back (flat side) of your paper ornament and set the flat end of the wire in place.

Step 6. When you're ready to display, place a dab of sticky-tac or a small glue dot on the back and you're done! Be careful when you remove the wall decals that you do not remove too quickly. With glue dots you can slowly peel of and rub the excess off with a finger, or twist to remove. Sticky-tac is probably more gentle on paint but the decals might not stay in place as long.

Happy crafting and Happy Holidays!

Handcrafted Holiday by Creativebug

Join Creativebug in their mission to take back the Handcrafted Holiday! Our friends and craft extraordinaire's are offering a weeks worth of FREE handcrafted holiday workshops! It's a great way to get involved with Creativebug and their fabulous DIY ideas. Plus, it makes a terrific gift for your crafty friends. A gift subscription comes with 1-6 months worth of drool-worthy DIY and who knows, maybe your friend will even invite you along for the fun. You can get detailed instructions on our pom pom garland, cake toppers, and photo booth backdrop, along with tons of other inspiring tutorials. Check out the free holiday workshops here!

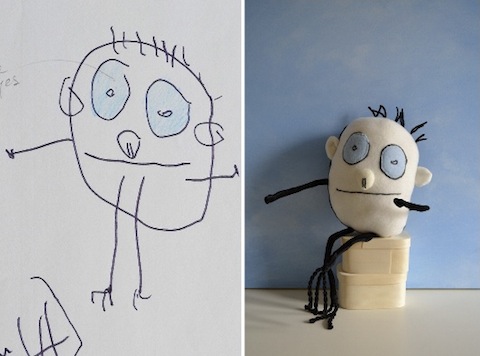
Child's Own Custom Toys from Drawings

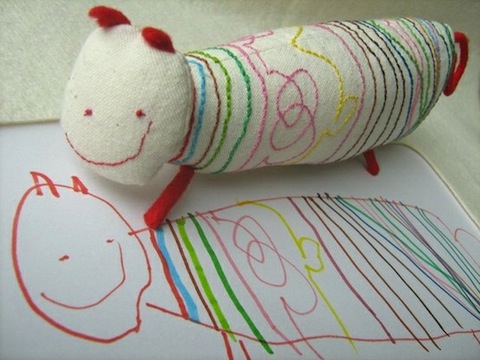
This image has spread like wildfire on Pinterest. There's something magical about a child's imagination, and the playfulness of a simple drawing. Child's Own Studio has been turning those imaginative doodles and drawings into real life toys since 2007 and we are completely in love.

The creator and master softie-maker Wendy takes time to incorporate every detail, from each finger and toe to every scribble of the nose.

This is the kind of gift that stays with a child for a lifetime, so we encourage parents, family friends, and all to invest in this one-of-a-kind toy. Currently Wendy is booked, but visit this list of other Softiemakers for your order. Congratulations to Child's Own on all the success!

DIY Color Block Holiday Cards

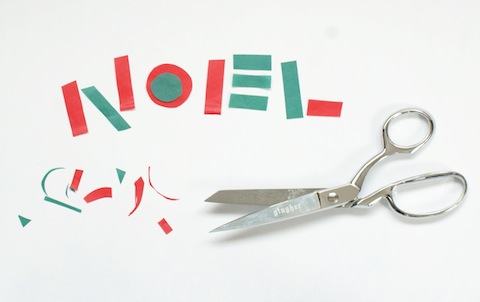
It's hard to believe Thanksgiving has passed and we're in the home stretch toward the holidays. Over the Thanksgiving weekend we were thankful for down time with family and friends, but itching to get decorating and DIY-ing for what's next. This can be a hectic time of year, so we're all about keeping things simple. This DIY Color Block Holiday Card project is a simple and inexpensive way to send cheer to your loved ones. And, you most likely have the majority of the supplies at home. It was inspired by our Color Block Kids Party Invitation (also available in pinks!) made for the boys' 2nd birthday party earlier this year, but we also have a new Color Block Holiday Photo Card with convenient customization. With some quick snips of colored tissue paper, you can recreate this bold typeface design into a one-of-a-kind Christmas card. Instructions below!

Materials needed:

Tissue Paper - We used green and red, but any combination would work! Just one sheet of each color will be plenty.

Blank Cards or Card Stock paper - Most craft stores sell 5" x 7" blank cards and matching envelopes, or you can cut a 10" x 7" sheet of card stock and fold in half. Use some spare envelopes or buy some from the craft store as well.

Bone Folder - For trouble-free folding!

Glue Stick - Make sure the glue stick is new - or retains its moisture. If it's too sticky you will have trouble working with the tissue. Also be sure it dries clear.

Scissors - The sharper, the better! Cutting tissue paper is tricky because the paper is very delicate. Sharp scissors will make cutting a breeze.

Craft Knife (optional) - Some people are more comfortable cutting small pieces with a craft knife. Just be sure it's super sharp, to get a clean cut of tissue paper.

Step 1: Using just a small corner of tissue, start by cutting your shapes. For "Noel" each vertical line was about 2" x 1/4" and each horizontal line was about 1" x 1/4" but we say, the more imperfections the better.

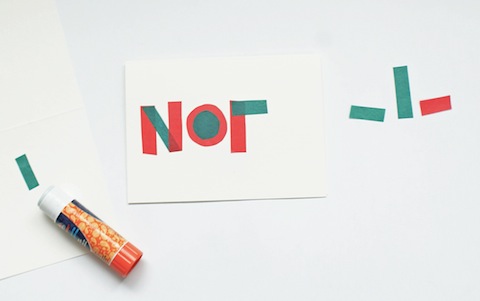
Step 2: Glue your shapes onto your card, one at a time. This step can be frustrating, so bring on the patience. A nice, new, moist glue stick will be a tremendous help. We suggest using a blank piece of paper as a gluing surface. Gently (and we mean ever-so-softly) apply glue to one side of the tissue <insert frustrations here> It will be ok, just be gentle. Lay your piece of tissue down on the card and smooth with a glue-free finger. What we like best about the look of this DIY is the overlapping of colors. You can just apply glue directly on the card, then lay the tissue on top, but you will see the dried glue surrounding the shapes.

All done! You can get creative with this DIY and come up with any shapes you like. Our Color Block Kids Party Invitation had some fun arrows and scalloped edging, so we definitely wanted to include that in our cards.

We'd love to see the cards you come up with. Be sure to share any pictures on our Facebook page!

Happy crafting!

For more fun DIY ideas, visit our website!
DIY Thanksgiving: 5 Uses for Patterned Papers

Thanksgiving happens to be one of the favorite holidays among our team. Something about the cold air, gathering of families, and cooking together warms our hearts. While it's meant to be a time to reflect and give thanks, sometimes the preoccupation with the perfect holiday decor takes its toll. We're flooded with images of the fanciest table tops and gourmet recipes, but not all of us have the time (or budget!) to go all-out for the big feast. If you are the lucky one hosting Thanksgiving this year and are looking for affordable, simple, and festive decor, our patterned papers are a great go-to. We've come up with 5 uses for patterned papers that you can make in no time, and just in time for your guests to arrive. Shown here is our classic Marquee pattern, but there are lots to choose from!

1. Patterned Paper Jar Lids: You may have to fight for the leftovers, but sending friends and family members home with equal portions is a great way to share. Or, send them home with a hand-made treat as a thanks-for-coming favor. Simply cut a 4.5" square (or 5.5" square for wide-mouth jars) of patterned paper. Place the metal lid cover over the jar, then set your paper square on top. Twist the screw-on cap over the paper and lid to ensure closure. You may need to press hard!

2. Patterned Paper Napkin Rings: The possibilities are endless here. With a starter shape of 1.5" x 7" you can double the napkin ring as a personalized place card by gluing a .5" x 2" piece of paper on top. Or, take a 2.5" x 8" strip, cut out a leaf shape on one end, and trim the other end to 1" wide. Apply glue to 1/2" of one side and seal under the other.

3. Patterned Paper Thankful Chain: Keep the kids busy or adults guessing with this paper Thankful Chain! It's a new twist on the Christmas paper chain, with a whole new meaning. Cut 1.5" x 7" strips of paper and ask your guests write a few things they are thankful for on one side. Glue one end of the strip under the other end and repeat, looping the next strip through your first chain. When assembled, hang above the table for decor or spread around the table. Throughout the meal you (or the kids) can read each strip and reflect - make it a game and guess who said what!

4. Patterned Paper drink flags/stirrers: Every party needs some of these. Celebrate the autumn weather by cutting your flags into leaf shapes. Start with a 1.5" x 5" strip and fold in half. Open it back up, draw your shape on one half of the blank side of the paper, fold in half again, then cut out. Reverse the fold, apply glue to one side, place a skewer or straw in the center then hold to adhere.

5. Patterned Paper Place Card Holders: Thanks to Martha Stewart for this idea, keep things simple with a folded paper place card holder. We scaled ours down to a 3" x 3.75" piece of paper, folded in half, then folded in half again, creating three 3/4" folds. Unfold the paper, and reverse one fold, making an "M" shape. Place your place card inside and voila!

For more pretty patterned paper ideas and DIY crafts, visit our website here!


Customer DIY Envelope Liners

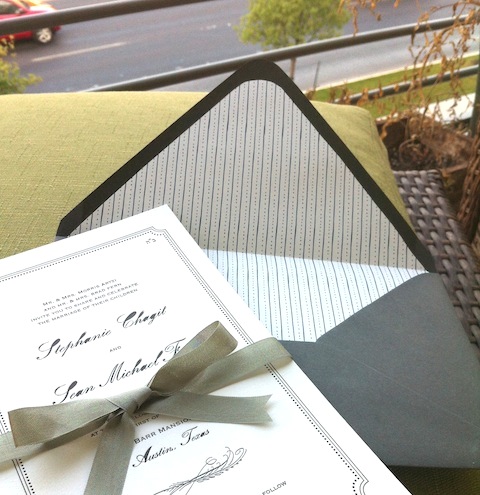
Our customers are loving our new DIY collection! This photo comes from the lovely Stephanie who hand made her own envelope liners from our Love Knot Patterned Paper. Her invitations were printed elsewhere but the patterned paper matched perfectly with her design. We love the cool grey color palette with the whimsical dotted lines. Excellent work Stephanie! Remember, you can make your very own envelope liners using this template!

For more wedding DIY projects, head over to our website here!

Happy Halloween!
As if getting a two-year-old to hold still for a Halloween picture isn't hard enough, Jude wasn't exactly keen on the idea of wearing the custom stuffed turtle shell I made this year, after weeks of reassurance that he wanted to be a turtle. The sketch was promising and the final costume turned out great, for the minutes we could convince him to wear it.

Sometimes, bribery does the trick! Here Jude is concentrating on his gâteau so I snapped a picture of the front of the shell.

His friend Hugo was rocking a super-hero costume, customized with a felt star and "H est super."

We couldn't celebrate Halloween without a costume, so I had to think on my toes. Luckily I had some scrap metallic silver fabric at hand, resulting in the fastest costume transformation yet - a dragonfly!

The wings were a big hit and Jude is ready to hit the town. Oh, the joys of toddler-hood. Hope you all have a very happy and safe Halloween!

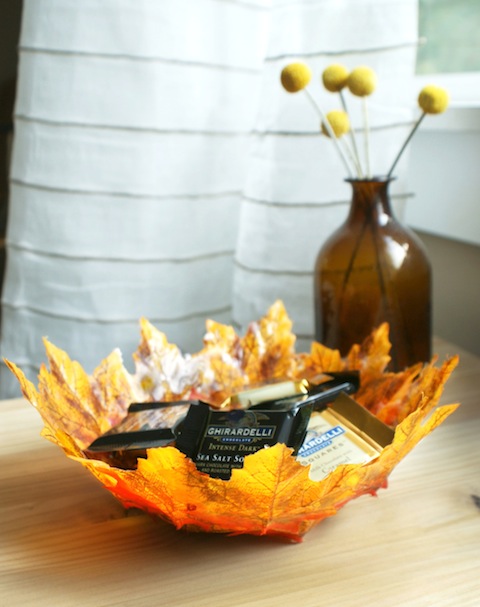
DIY Autumn Leaf Bowls

As we mentioned before, this is our favorite time of year for DIY decor. The chill is in the air and the leaves are changing color, and there's no better way to preserve the delight than by welcoming it into your home. Yes, the craft stores overflowing with autumn decorations can be intimidating, but there are ways to turn those faux autumn leaves into something beautiful and functional. Below are instructions for your very own autumn leaf bowl, perfect for holding your favorite scented potpourri or tasty Halloween treats.

Materials:

Craft store leaf garland, Mod Podge (matte finish), Foam Brush, Balloon, Scissors, Mixing bowl

*Tip: try to find thin, paper-like leaves for your garland. The thinner the leaves, the better they will mold to the shape of your balloon. Also, avoid any plastic-coated leaves.

How To:

1. Begin by snipping the leaves off the strand of garland. Leave about 1/8" at the base.

2. Carefully rip the entire plastic stem (and all the veins!) off of the faux leaves (See image above). This will help the leaves mold to the shape of the balloon.

3. Fill up your balloon to size. We stuck ours inside a mixing bowl to keep it in place.

4. With your mod podge in a cup near by, gently apply a thin layer on top of your balloon, starting in the middle and working your way out.

5. Lay a leaf on top of the wet mod podge and smooth with your fingers or foam brush. Once it's stuck in place, apply another thin layer of mod podge on top of that leaf. See image below.

6. Repeat, covering any empty spaces with smaller leaves.

7. When you reach about a quarter of the way down the balloon, add one or two leaves to the bottom of the bowl for extra weight and support. Allow to dry at least an hour.

8. When the mod podge is dry, carefully pop your balloon with a pin at the tied end, slowly letting the air out. Don't be alarmed if the leaves shrink down when the balloon deflates, it will return to its original shape after a minute or so. You may find that some of the mod podge will stick to the edges of your leaves, but you can just pick or cut it off.

9. Use your bowl to hold potpourri or little wrapped halloween candies. We love easy ways to liven up your home decor and this colorful DIY does the job well.

**Attention readers! Having trouble getting your leaves to stick? We're here to help. Be sure you remove the plastic "stems" from the faux leaves before trying to adhere them to your balloon. After you apply a layer of Mod Podge to your balloon, wait about 30 seconds or until the paste feels sticky, then gently press on your first leaves. If they start to bend upward, hold the leaves down at the tips with your finger. Keep a moist towel nearby to wipe any glue off your hands. This will help the leaves from sticking to your fingers. Feel free to comment below and ask questions - we'll email you as soon as possible!**

Looking for more DIY projects and free downloads? Head over to our site here.

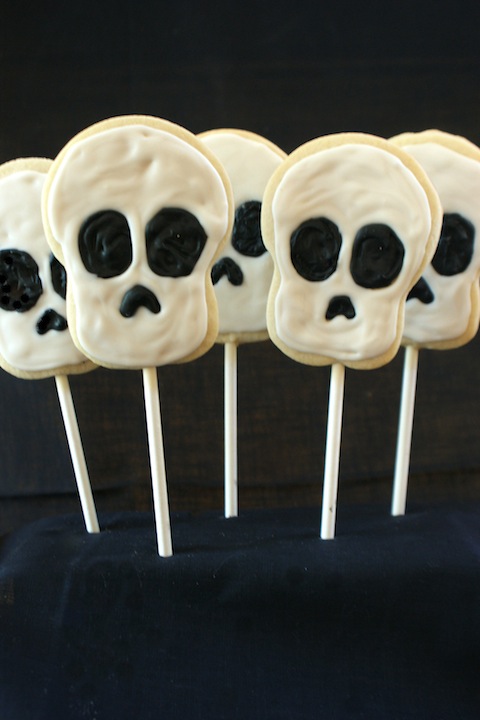
Happy Halloween! + DIY Skull Cookie Cutters

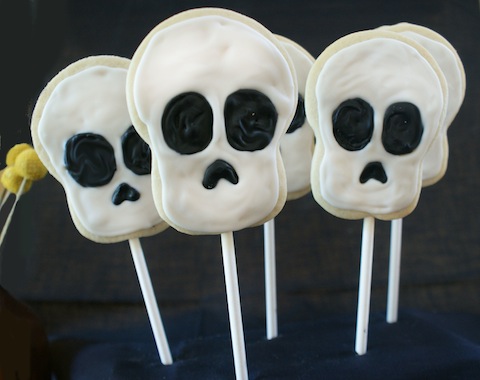
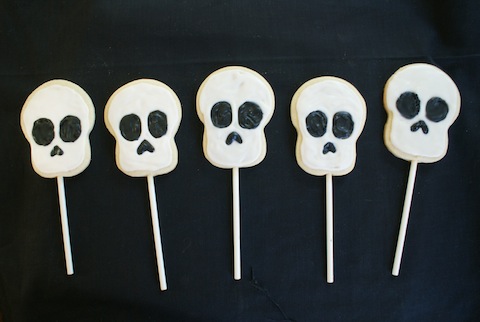
Are you getting excited for Halloween? We are! We had so much fun creating our DIY Sidewalk Skulls, we couldn't help but recreate them into edible cookie pops.

First we made DIY skull cookie cutters. All you need is a circular cookie cutter (about 4" in diameter) and pliers (optional). Simply pinch the sides with your fingers, or use pliers to create a more defined bend. Using this recipe from Sweetapolita, our sugar cookies were perfectly prepared and held our cookie pops with pride. You can customize your cookies to any color, or get creative to celebrate Dia de los Muertos (November 1st)!

Bake a batch and bring these to work or to Halloween parties! And let us know in the comments if you have any other go-to Halloween recipes you love making.

For more fabulous DIY ideas, visit our website here!

Creative Bug Event Photos

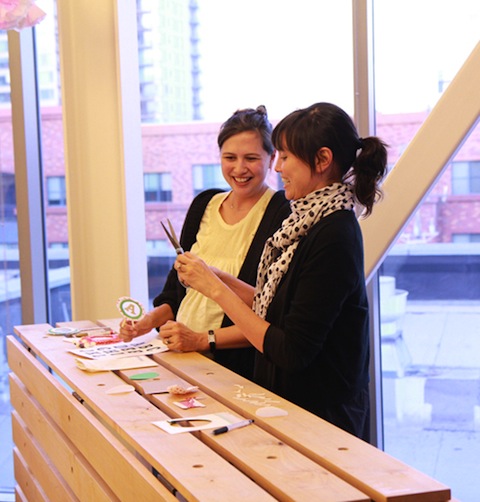
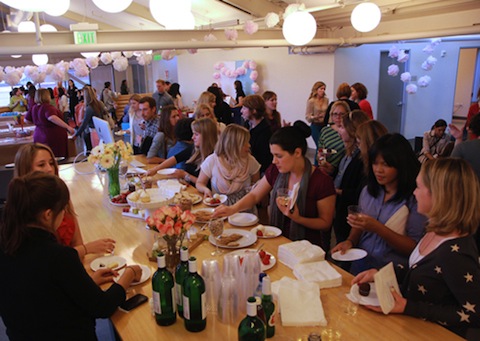
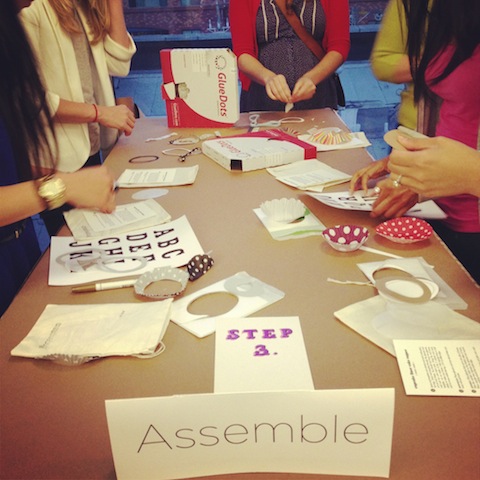
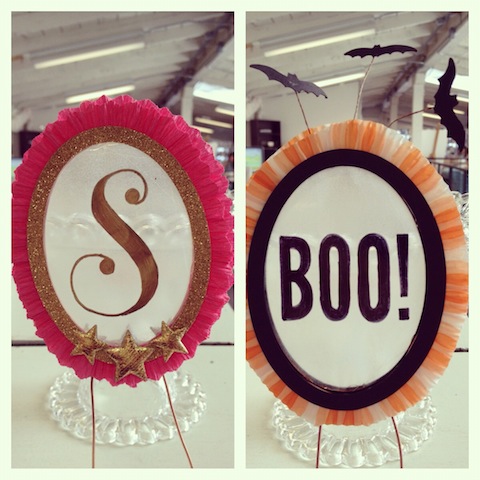
If you follow us on Instagram, then you know how great the turnout was at the Creative Bug Crafts, Cocktails & Cake-toppers event at Chronicle Books last week. There was a fantastic crowd of happy crafters and the handmade cake toppers were adorable. Eunice and Sabrina delivered a stellar performance, giving hands-on instructions for making these versatile decor items. We had a blast getting together with Creative Bug at Chronicle Books and want to extend a special thank you to all who were involved and all who came to enjoy the evening. Here are some of our favorite photos from the event. Don't worry if you missed it, because there is a great online workshop available at Creative Bug right here!