Bits, Glorious Bits!

dotty-butterflies

We're always on the lookout for fabulous details that might be used to add little touches of flair to wedding or party design.

ruffles

We came across The Gilded Bee via the lovely Head vs. Heart.  This adorable little shop has a selection of bits'n'bobs that would be a perfect addition to favors, cake décor, or...we're sure there are a multitude of uses to be had! Love this bit of ruffle...

poppies

oval_tag

Handy little tags!

velvetyflower

butterflies

Butterflies in a myriad of colors...all available here!

We Heart Donna Wilson!

painting (1)

Scottish designer Donna Wilson is one of our new faves. We are endlessly inspired and amused by her fabulous homewares, quirky dolls, and handpainted ceramic dogs!

pups

dann_090429_003

As avid knitters, we love her wonderful knitted creatures - this here is Rosie who, apparently, likes ladybirds and rainbow beetles, dislikes being on her own.

dann_090429_002

The guy on the right (above) is Harry Hairy Head.  He likes Roller Discos and Cherry Cola.  Hilarious!

145-379-thickbox

We are seriously coveting this knitted pouf too!

comboverspoon2

peacock folk flower2copy

Some of her housewares...we want them all!   Check out her blog , Leaves and Twigs for more!

Ring pillow

1509lucky-8066 
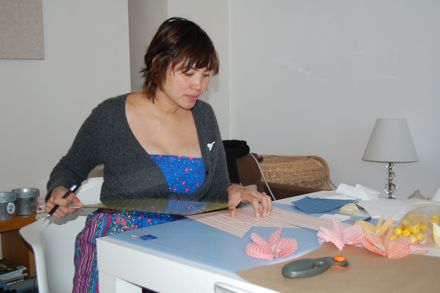
Yet another (!) fabulous element from Eunice and Daniel's wedding was this handmade ring pillow. Designed by Eunice & Tricia Roush of House of Nines Design, this ring pillow can be yours!  Read on for complete how-to instructions...

1547lucky-2264

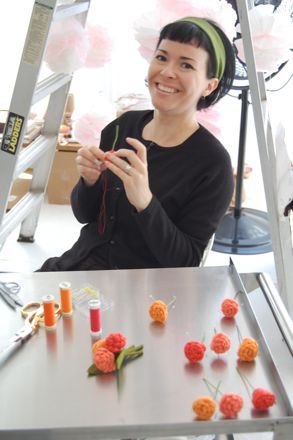
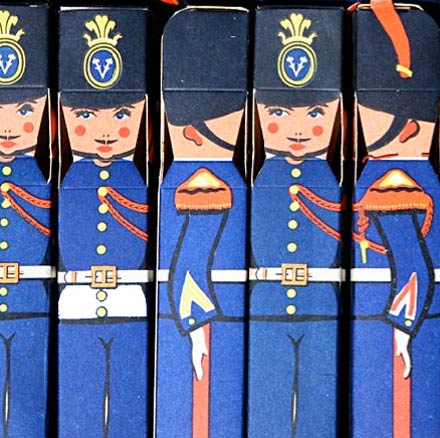
In addition to the pillow, Tricia also made the cockades for the groomsmen. Learn more about Tricia and her impressive millinery skills here, and visit her etsy site here.

Pin-tucked Ring Pillow How-to Guide

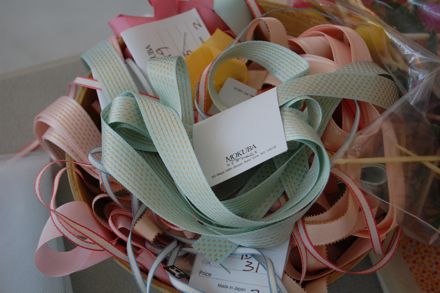
This linen ring pillow is decorated with pin tucks and a narrow pleated edge. We used seam tape, an inexpensive, delicate ribbon that is available in a range of pretty colors, for the edging and to tie the rings onto the pillow.

You'll Need

Materials (Makes 1 ring pillow)

1/4 yard linen 1/4 yard medium-weight quilting cotton in a light, solid color (no patterns) 1 bag fiberfill 3 yards 1/2" seam tape or ribbon, or 1 yard pre-pleated edge trim 1 yard 1/8" seam tape or ribbon Thread to match the linen

Tools

Quilting ruler Rotary cutter Sewing machine, and/or sewing needle Steam iron Scissors Straight pins Light colored tailor's chalk or chalk pen, like the Clover Pen-Style Chaco Liner Circle template with a 1" circle (optional)

How to: 1. Make the pillow insert. It's important to make a pillow insert to ensure that the lumps in the fiberfill don't show through the fabric of your finished product.

Using your rotary cutter, cut 2 squares of medium-weight cotton measuring 8.25" x 8.25." This will result an insert that is 7.75" x 7.75", for an 8" x 8" ring pillow (1/2" is used for a seam allowance). If you would like your ring pillow to be a different size, use the following formula: Canvas insert = Finished size + 1/4". Ring pillow = Finished size +1/2".

On the wrong side of one of the pieces, using the ruler and chalk, mark a line at 1/4" in from each of the edges. You have drawn a square, centered on the fabric, that measures 7.75" square. Using the circle template and chalk, round off the corners of the chalk square. If you don't have a circle template, try using a round household item, such as a jar lid. Layer the 2 squares one on top of the other, wrong side out. Starting about two inches in from one of the corners, sew using a running stitch on the chalk line, at 1/4" in from the edge along 3 sides plus about two inches at either end of the fourth side, leaving a gap in the center of the fourth side wide enough to slip your hand into. You can do this using a sewing machine, or by hand. Tie a knot and cut the thread. Cut off the excess fabric at the corners in a rounded shape to parallel the seam, leaving 1/4" for seam allowance. Turn right side out. Gather a handful of fiberfill. Pull apart to smooth out any lumps. Gently stuff into the pillow insert, using enough fiberfill to get a padded, but not overstuffed shape. Sew the open side shut using a ladder stitch.

2. Make the ring pillowcase top. Using your rotary cutter, cut 1 rectangle of linen measuring 8.5" x 12.5". To make the pin tucks (Figure 1): Lay the rectangle out in front of you, right (exterior) side up, with the long edges running from side to side. Starting at 2.5" from the left side edge, using the ruler and chalk, mark 16 vertical lines on the linen from top to bottom, every half inch. Starting with the first two chalk lines on the left, fold the linen matching the first line to the second, with the ridge of the tuck sticking out on the right (exterior) side. Pin in place and sew from top to bottom along the joined chalk lines with a running stitch, and iron the tuck toward the left edge of the pillow. Repeat this process with the third and fourth chalk line, and so on across the face of the pillow top until you have created 8 tucks. The pillow top should now measure 8.5" square.

On the wrong side of the pillow top piece, using the ruler and chalk, mark a line at 1/4" in from each of the edges. You have drawn a square, centered on the fabric, that measures 8" square. Using the circle template and chalk, round off the corners of the chalk square. If you don't have a circle template, try using a round household item, such as a jar lid.

3. Make the pleated edging. Lay out your 1/2" seam tape and starting from one end, measure 1/2" to the right, make a mark. From there measure 1/4" over & mark. Measure 1/2" from there, mark, move another 1/4", mark. See the pattern? You're making a series of 1/2" and 1/4" wide sections. Keep going until you reach the end.

Once all the pleats are marked, snip at each mark (a very tiny snip, needless to say). Fold the first pleat by pinching together the two sides of the first 1/2" segment and folding it down to the right so that the fold meets up with the next 1/4" mark. Stitch in place. Continue along, holding each pleat in place while you sew it down. You can also pin all the pleats down first and then run them through the sewing machine.

To save time, pre-pleated edging may be used instead.

4. Make the ring pillowcase bottom and attach the edging. Using your rotary cutter, cut 1 square of linen measuring 8.5" x 8.5."

On the right (exterior) side of the pillowcase bottom piece, using the ruler and chalk, mark a line at 1/4" in from each of the edges. You have drawn a square, centered on the fabric, that measures 8" square. Using the circle template and chalk, round off the corners of the chalk square. If you don't have a circle template, try using a round household item, such as a jar lid.

Lay the pillowcase bottom in front of you, right (exterior) side up. Place one end of the edging along one edge of the fabric, with the edging's sewn edge facing toward the outer edge of the fabric, and the ruffled edge facing the center of the pillow. The stitch line on the edging should be positioned at 1/8" in from the edge of the fabric. Leaving a 'tail' of about edging about 1" long free at the beginning, sew the edging to the pillow bottom all the way around, following the rounded corners as you go, stopping when you are about 1" before the place where the beginning and end of the edging will overlap. If sewing by machine, remove the piece from the machine and cut the thread ends off. To create a seamless look to the place where the edging joins, cut off any excess from the beginning and end of the edging, leaving 1/2" extra on for overlap. Where the two ends meet, fold the overlap over so that the join is covered and hidden in the fold. Iron lightly and pin in place. Sew the remainder of the edging down as before, joining the beginning and end as you attach them to the pillowcase bottom. Remove the pin, tie off and cut off thread ends.

5. Complete the ring pillowcase. Layer the 2 squares one on top of the other, wrong side out. Starting about two inches in from one of the corners on a side without pin tucks, sew using a running stitch on the chalk line, at 1/4" in from the edge along 3 sides plus about 2 inches at either end of the fourth side, leaving a gap in the center of the fourth side wide enough to slip your hand into. You can do this using a sewing machine, or by hand. You'll be sewing through both layers of the pillowcase, plus the pleated edging near its sewn edge. Tie a knot and cut the thread. Cut off the excess linen at the corners in a rounded shape to parallel the seam, leaving 1/4" for seam allowance. Turn right side out. The pleated edging should form a ruffle around the outside seam of the pillow. Fold the raw edges of the gap along the chalk lines (1/4" in from the edge), and gently press the folds flat with the iron to set them in place. Slip the pillowcase over the canvas pillow insert. Using the sewing needle and a slip stitch, stitch the gap closed. Tie a small, neat knot and cut the thread. Brush off any chalk that still shows on the pillow.

Cut two pieces of the 1/8" ribbon about 1 foot long each, and using a small, neat stitch and knot, attach them near their centers to the center of the ring pillow top.

Download the template here.

Flower Girls Crown

1156lucky-6175 At Eunice's wedding, Lily sported an adorable sparkly crown to complete her sweet flower girl ensemble. Want to make one for your flower girl? Read on for our free how-to guide!

1515lucky-7686

1689lucky-3550

Photography by Gia Canali & Sara Remington

Glass Glitter Crown How-to Guide

You'll Need: (Makes 1 crown)

  • Crown template
  • Scissors or craft knife, ruler and cutting mat
  • 16 in. x 6 in. piece of chipboard
  • Pen or pencil
  • Piece of copy paper, or a file folder
  • Craft glue
  • Glue brush
  • Glitter (we used glass glitter from here)
  • Stapler
  • 2 sheets crepe paper scraps in gold and fuchsia, at least 6 in. x 10 in.
  • Hot glue gun
  • 2 17-in. pieces of 3/8-in. ribbon

How to:

  1. Make the crown. Cut out the template, trace crown pattern onto a piece of chipboard at least 16 in. long x 6 in. wide. Cut out the crown using scissors or a craft knife, ruler and cutting mat.
  2. Glitter the crown. Fold a piece of paper in half, open it back up and lay it flat on your work surface (or lay an open file folder on your work surface). You will use this to protect your work surface from glue and to collect excess glitter. Lay one end of the crown on the paper. Using a brush, apply a generous layer of white glue over a 3-in. section of the crown and cover entire area with glitter. Lift crown and flick the back to release excess glitter. Fold the paper in half and return excess glitter to its pot. Repeat this process until the entire crown is glittered. For each new section overlap the glue on the previous glittered section about 1/4-in. to insure thorough coverage. Allow to dry completely.
  3. Add the rosettes. Using scissors, cut a piece of 1-in. x 1-in. scrap crepe paper. This will serve as a backing for assembling each rosette. Cut a 1-in. x 10-in. strip of gold crepe paper, with the grain (the creases in the paper) running in the short direction. Accordion fold along the grain into 1/4-in. sections. When the entire strip is folded, align the two ends, pinch the center and allow the outer edges to flair. Holding center in place, squeeze a drop of hot glue onto the scrap paper. Press the center of the rosette onto the glue and hold in place until it dries. Cut a 1/4-in. x 3-in strip of fuchsia crepe paper and accordion fold into 1/8-in. sections, and pinch into a rosette. Apply a dab of hot glue to the center of the larger gold rosette, and press the small rosette down into it. Repeat of each rosette. When all 5 rosettes are complete, center each one below a point in the crown and hot glue the backing to the crown.
  4. Finish the crown. Match the ends of the crown together and staple into place. Cut two 17" pieces of 3/8" ribbon and glue one piece to the inside of each side of the crown with a hot glue gun.

Download the DIY template here.

An array of accessories

1178lucky-6251 More details from Eunice and Daniel's wedding! Eunice embellished her Steve Madden flats with vintage shoe clips found at the Alameda flea market, one of our favorite sources for vintage ephemera in the bay area. She also purchased woodland animal brooches from Poodle Breath for her bridesmaids.

1187lucky-6669

It's all in the details

1179lucky-6590 In addition to stationery, playing cards, custom stage and a multitude of other items, Eunice also designed a bunch of smaller pieces that served to tie her wedding together, including the signage and labels for slippers (above) and packages for confetti (below).

1229lucky-6372

A custom wine label featured two stags and a cheeky name.

1357lucky-2156

Drink flags added color to cocktails.

1365lucky-6693

Fun labels helped identify unique condiments on the dinner table.

1371lucky-6703

A cute sign indicated the couples signature cocktail (you can find the recipe here!).

1395lucky-8081

Eunice also designed labels for popcorn boxes and donut holes - yum!

1406lucky-2286

1433lucky-7010

Read on for how-to instructions for the donut hole labels, jelly labels, and slipper labels. We'd love to see your photos if you make your own!!

Slipper Labels How-to Instructions

You'll Need:

  • Slipper Label Template
  • Inkjet printer
  • 8 1/2" x 11" label stock (we used Strathmore writing label in Natural White) (8 labels per sheet, calculate quantity accordingly - we recommend allowing a few extra sheets for misprints and other mistakes)
  • Craft knife
  • Ruler
  • Cutting mat
  • Corner Rounder (optional)
  • Slippers in various sizes (we got ours in Chinatown - cheap and cheerful!)

How to:

  1. Fill out the labels. Open the labels in Adobe Acrobat. Fill in your information (you will need to have the fonts Rosewood and Buckle Bold, available through http://www.myfonts.com, installed on your computer. If not, a default font will be used).
  2. Print labels. On your ink jet printer, print out the labels.
  3. Trim labels. With your craft knife and a ruler, cut out labels, aligning the ruler to the crop marks.
  4. Round corners. (optional) Round all four corners on each label with a corner rounder.
  5. Apply labels. Peel backing from each label and apply to the center of the insole of each slipper, centering from side to side and top to bottom as you see fit (we applied the label to cover up the branding on the slipper's insole).

Download the template here.

Gypsy Pepper Jelly Label How-to Instructions

You'll Need:

  • Gypsy Pepper Jelly Label Template
  • Inkjet printer
  • 8 1/2" x 11" label stock (we used Strathmore writing label in Bright White) (4 labels per sheet, calculate quantity accordingly - we recommend allowing a few extra sheets for misprints and other mistakes)
  • Fiskars rotary trimmer
  • Craft knife or straight blade on the rotary trimmer
  • Ruler
  • Cutting mat
  • 8oz jelly jars
  • 1/4" corner rounder (available at arts & crafts stores) - optional

How to:

  1. Print the labels. On your ink jet printer, print out the labels.
  2. Trim the labels. With your craft knife and a ruler, cut out labels, aligning the ruler to the crop marks. This can also be done on your rotary trimmer with a straight blade.
  3. Round the corners (optional). Round all four corners on each label with a corner rounder.
  4. Apply the labels. Peel backing from each label and apply to a jelly jar, centering from size to side and top to bottom as you see fit.

Download the template here.

Recipe for Sweet Gypsy Paper Jelly

Ingredients

  • 1 1/2 lb gypsy peppers cut into 1-inch pieces (6 cups)
  • 2 teaspoons dried hot red-pepper flakes
  • 3 tablespoons Sure-Jell less- or no-sugar-needed pectin (from a 1 3/4-oz box)
  • 3 1/4 cups sugar
  • 1 cup apple cider vinegar
  • 1 tablespoon unsalted butter
  • 3/4 teaspoon salt

How to:

  1. Pulse gypsy peppers with red-pepper flakes in a food processor until finely chopped. (Mixture will measure about 2 1/2 cups.)
  2. Whisk together pectin and 1/4 cup sugar in a small bowl.
  3. Stir together pepper mixture, vinegar, butter, salt, and remaining 3 cups sugar in a 5- to 6-quart heavy pot. Bring to a vigorous boil over high heat, then continue to boil vigorously, stirring occasionally, 5 minutes. Gradually add pectin mixture, whisking constantly. Return jelly to a vigorous boil, stirring constantly, and boil, stirring constantly, 1 to 2 minutes (mixture will thicken slightly). Remove from heat. Season to taste.
  4. Fill processed jars and store.

You'll need:

  • Inkjet printer
  • 8 1/2" x 11" card stock in white or ecru
  • Craft knife
  • Ruler
  • Cutting mat
  • 1 1/2" ribbon long enough to hang the sign
  • Scissors

Drink Sign How-to Guide

How to:

  1. Print the sign. On your ink jet printer, print out the labels.
  2. Trim the labels. With your craft knife cut out the sign along the light grey outline. Use a ruler to cut slots on either side for threading the ribbon.
  3. Thread ribbon and hang the sign. Cut an appropriate length of ribbon and thread through the cut slots in the sign. Starting on one side, thread the ribbon through the front and out the back. Bring the ribbon across the back of the sign and thread it through the second slot, from back to front. Pull the ribbon through so that the sign is centered and tie around your drink container.

Download the template here.

Donut Hole Bags How-to Guide

You'll need:

  • Inkjet printer
  • 8 1/2" x 11" label stock (we used Strathmore writing label in Bright White) (4 labels per sheet, calculate quantity accordingly - we recommend allowing a few extra sheets for misprints and other mistakes)
  • Fiskars rotary trimmer with scalloped blade
  • Craft knife or straight blade on the rotary trimmer
  • Ruler
  • Cutting mat
  • 1/4 lb glassine pastry bags available at PaperMart

How to:

  1. Print the labels. On your ink jet printer, print out the labels.
  2. Trim the labels. With your craft knife and a ruler, cut out labels, aligning the ruler to the crop marks. This can also be done on your rotary trimmer with a straight blade.
  3. Trim the glassine bags. With a scalloped blade in your rotary trimmer, trim the top and bottom 1/4" off the glassine bags for a cute scalloped edge.
  4. Apply the labels. Peel backing from each label and apply to a glassine bag, centering from size to side and top to bottom as you see fit (we applied the label centered from side to side and closer to the bottom of the bag).

Download the template here.

Happy crafting!

Cake Topper

1397lucky-6358 One of the most unique elements of Eunice and Daniel's wedding was their adorable cake topper (featured on the Martha Stewart show!). Lian of Publique Living took the illustration of the couple from their save the date poster and laser cut it out of basswood. It was then stained a deep indigo with calligraphy ink, and mounted onto a styrofoam base covered in a pale green metallic crepe paper and trimmed with two tones of fuchsia grosgrain ribbon. The arch was created using floral wire, crepe paper, and tiny crepe paper flowers. The actual cake was made by Kelly Zubal of Inticing Creations.

1401lucky-3669

Because We Can

1222lucky-6137 We've mentioned Because We Can before, but the pieces that they created for Eunice and Daniel's wedding are worth mentioning again! In addition to the prop mustaches and word bubbles used for the photo booth, they also created the amazing stage that the ceremony was performed on. Inspired by Joel Dewberry's Woodland Damask pattern (also used on the invitations!), the stage was made of all sustainable wood or recycled fiber with water-based glue and finished with eco-friendly paint, hand painted by the couple and their friends (read more about the process here).

1565lucky-3673

Additionally, Because We Can also created an array of shadow puppets for guests to carry during the parade to the ceremony site. They even created a white unicorn for Daniel (above)!

1661lucky-2355

2032lucky-5387

Below, Because We Can founders Jillian and Toast enjoy the wedding festivities.

1580lucky-3503

Eunice & Daniel's Wedding Stationery

Eunice and Daniel's Save the DateSTDP_HIGHSEAS_COA-FUC-POO_F_L Since we're stationers, paper played a big role in designing Eunice & Daniel's wedding. The first piece of inspiration was Rob Ryan, the whimsical London-based paper artist. Eunice illustrated this letterpress save-the-date poster featuring silhouettes of her and Daniel, and their two dogs Indie and Simon, along with a save-the-date for their London reception.

Hello!Lucky Wedding Cake

We used the silhouettes again to create a DIY cake topper, with the silhouettes laser cut out of balsa wood by our pals at Publique Living, and embellished with crepe paper flowers.

Woodland Damask Wedding Invitation Suite

The wedding invitations were a variation Woodland Damask wedding invitation, created in collaboration with pattern designer Joel Dewberry inspired by his  Deer Valley collection.  The wedding invitations and save the dates were letterpress printed, while the details booklets and programs were digitally printed.

Hello!Lucky Paddle Fans

We used the pattern to create these program paddle fans, which doubled to keep guests cool during the ceremony...

Confetti pouches

...as well as these glassine confetti pouches, a tribute to the Beatle's All You Need is Love, Eunice & Daniel's exit song.

Check out more of the behind-the-scenes details on the Martha Stewart Weddings blog here.

Photos by Adi Nevo (stationery),  Gia Canali and Sara Remington.

Eunice and Daniel's Wedding, finally!

Eunice and Daniel's Wedding Eunice and Daniel's Wedding

We are SO excited we are to FINALLY be sharing photos from Eunice's wedding! Eunice, as many of you know, is our co-founder and Creative Director and her wedding last May 9 was one of the most unbelievable days ever!

Eunice and Rosette Crown

Eunice looked stunning in a dress of her own design, hand sewn by multi-talented Hello!Lucky London office head Iain Harris Bartlett, with makeup by Meaganne McCandess and headband by pal Jennifer Behr (available right here!).

Eunice and Daniel's Wedding

Eunice and Daniel's Wedding

Tons of our creative friends helped out with the details, including Tricia Roush (top left) of House of Nines Design. Magnolia Photo Booth was one of the highlights - guests had a blast taking mugs with all kinds of hilarious props!  Bottom row, Eunice and Sabrina celebrating the best day ever, and bridesmaid Erin Murphy trying on a tissue paper crown.

Eunice and Daniel's Wedding Puppets

A high point was a Tim Walker-inspired parade featuring animal shadow puppets designed by Eunice, fabricated Jillian and Toast at Because We Can, and then hand-painted!

eunicedaniel9

Introducing Mr. & Mrs. James!

Martha Stewart Weddings Spring 2010 Cover

Oh, yes! And the reason for the delay in sharing these pics!? The wedding is on the cover of the Spring 2010 issue of Martha Stewart Weddings!!  Check out the full gallery on their website here, and stay tuned for behind-the-scenes blog posts on The Bride's Guide. We'll also be posting lots more behind-the-scenes photos on our blog -- there's just so much great stuff to share!!

Stay tuned for more to come!

Stunning photos by Gia Canali and Sara Remington.

Happy holidays!

Such Pretty Things Boxes The holidays are upon us! We're looking forward to celebrating the season with friends and family near and far...

Such Pretty Things Candy Canes

We'll also be taking a break from our blog over the holidays, when we'll have plenty of new things to share, including new wedding invitation and save the date designs!

Such Pretty Things Tree

In the meantime, we wish everyone a joyful, peaceful holiday and a prosperous new year!

Enjoy these lovely images from Such Pretty Things!

Behind the scenes at our photo shoot

Joe De Leo Last month, we were in New York for a couple of weeks shoot our new DIY wedding book with co-author and stylist Shana Faust and photographer Joseph De Leo. It was an amazing and overwhelming experience, and has largely been responsible for the slow-down in blog posts!!

Photo Shoot 2

We spent a full 2 weeks crafting at Aloft Studio in mid-town - if you're wondering how much crafting goes into filling a book, look above! (Thanks to Kim and John for letting us turn the place upside down!)

Photo shoot 5Photo shoot 4Photo shoot 8

We were fortunate to have helpers - H!L's intrepid Chun Yee O'Neill and Tricia Roush of House of Nines Design - who crafted along side us every day!

Shana’s props

Shana brought tons of beautiful props for styling...

Photo shoot 6

And we all brought piles and piles of crafting materials, like these pretty ribbons from Mokuba Ribbon, which we'd collected over the past year. Believe us, great crafting starts with great materials!

Photo shoot 7

It was an incredible experience! Can't wait to share the finished book with everyone!

Shana Faust

Shana Faust 3Shana Faust Shana Fashion

We're super excited that Shana Faust's fabulous new website! Shana's an amazing freelance stylist in New York and former senior style editor at Martha Stewart Weddings. She's also co-author and stylist of our new wedding craft book, coming Fall 2009 from Chronicle Books (behind-the-scenes pics from our recent photo shoot will be posted here soon!).

Inspiration boards

One of the best parts of the site is her inspiration area, which contains links to all kinds of fabulous design resources. Check it out, and click here for some lovely pics of Shana's home and her sweet little daughter Sophie Bea we took back in March!

Tombées du Camion

Box of Bits We here at Hello!Lucky are hopeless addicts of fabulous vintage finds (our studio is a mad collection of bits and bobs picked up at the flea) and so we were delighted to come across Tombées du Camion (translated, it means, appropriately and hilariously, Things Fallen Off the Truck) on the Constant Gatherer...

Tombees du Camion

This fabulous little shop  is located in Paris (17 rue Joseph de Maistre, should one be so lucky as to be traipsing about Paris!)...

Bits

The shop is a collection of vintage bits and bobs, and many items are to be had in large quantities (fantastic for party favors, crafty endeavors etc.)

Smiley Guys

An online shop is supposedly forthcoming but in the interim, if something particularly strikes your fancy, such as these hilarious smiley guys, you can order via email.

Fish

Soldier Boxes

Love these little soldier boxes!

Globes

Wooden Whistles

Surely something fabulous can be done with these wooden whistles...

Tuna Tins

Trust the French to make tuna a fabulous and wonderful thing...

Mushrooms

If Paris is not on your agenda anytime soon, here are a few of our favorite places to find cool trinkets:

Of course, the Alameda Flea (obsessed with it!)

Bell'ochhio

Tail of the Yak in Berkeley

Castle in the Air

Paper Valise

Etsy, of course, including Buttermilk Sky and SnapCrafty

Felt mailing envelopes

How adorable are these felt mailing envelopes by Keiko of Small Adventure? We love how you can use them as gift wrap – they even come with "to" and "from" labels that are tucked into plastic sleeves on the front. With extra labels included, it's the gift that keeps on giving! Genius! 1.jpg

3.jpg

2.jpg

4.jpg

They are available for purchase at her etsy shop, along with other charming creations!

Shipwreck DIY table numbers

Table numbers Thanks to Christina Loff at Chronicle Books for sharing the adorable photos from her friends Julie & Joe's wedding.  Our favorite details were these embroidered table number flags -- in Christina's words, they gave the wedding a "shipwreck feel" - appropriate, since it was on the beach!

Flags in bottles

Here's how they looked placed in assorted found glass bottles, along with flowers and lanterns.

DIY process

Here are some in-process shots. The numbers were embroidered on small hoops, and then sewn into flags, which were mounted on twig crossbars. Simple, and so cute!

Thanks, Christina, and congrats Julie & Joe!

Hilary Lang, Nursery Cuteness and more...

Nursery We were so thrilled to spot our baby's first year journal and photo album making an appearance in this adorable nursery!

Nursery

The nursery belongs Phoebe, the daughter of the very talented Hilary Lang.  How cool is this vintage mobile?

nursery

Love the cross stitch and these teeny (and very comfy looking) booties!

Rabbit in Overalls

Aside from having a fabulous nursery, Hilary Lang makes many, many, super cute things - such as this hilarious overall-wearin' rabbit...

Turtle-y times

The patterns for hand-sewn projects such as this charming little turtle are available in her shop...

Animals on Wheels

Um, hilarious.

Dollies

You can also see pictures of her many projects here...

DIY Wedding Snap Station

Snap station 1 Another shout-out today to our talented intern Hillary Burgess for her DIY snap station, featured this week on Bride's Cafe! (Hillary won their DIY contest a few weeks back - what a star!)

DIY snap station

The basic idea: collect some vintage cameras, and give them to guests to play with!

Snap station 3

Accompanied by  some cute signage, of course!

Congratulations, Hillary, and kudos to Jess Epstein for the fab photos!