Bits, Glorious Bits!

dotty-butterflies

We're always on the lookout for fabulous details that might be used to add little touches of flair to wedding or party design.

ruffles

We came across The Gilded Bee via the lovely Head vs. Heart.  This adorable little shop has a selection of bits'n'bobs that would be a perfect addition to favors, cake décor, or...we're sure there are a multitude of uses to be had! Love this bit of ruffle...

poppies

oval_tag

Handy little tags!

velvetyflower

butterflies

Butterflies in a myriad of colors...all available here!

Ring pillow

1509lucky-8066 Yet another (!) fabulous element from Eunice and Daniel's wedding was this handmade ring pillow. Designed by Eunice & Tricia Roush of House of Nines Design, this ring pillow can be yours!  Read on for complete how-to instructions...

1547lucky-2264

In addition to the pillow, Tricia also made the cockades for the groomsmen. Learn more about Tricia and her impressive millinery skills here, and visit her etsy site here.

Pin-tucked Ring Pillow How-to Guide

This linen ring pillow is decorated with pin tucks and a narrow pleated edge. We used seam tape, an inexpensive, delicate ribbon that is available in a range of pretty colors, for the edging and to tie the rings onto the pillow.

You'll Need

Materials (Makes 1 ring pillow)

1/4 yard linen 1/4 yard medium-weight quilting cotton in a light, solid color (no patterns) 1 bag fiberfill 3 yards 1/2" seam tape or ribbon, or 1 yard pre-pleated edge trim 1 yard 1/8" seam tape or ribbon Thread to match the linen

Tools

Quilting ruler Rotary cutter Sewing machine, and/or sewing needle Steam iron Scissors Straight pins Light colored tailor's chalk or chalk pen, like the Clover Pen-Style Chaco Liner Circle template with a 1" circle (optional)

How to: 1. Make the pillow insert. It's important to make a pillow insert to ensure that the lumps in the fiberfill don't show through the fabric of your finished product.

Using your rotary cutter, cut 2 squares of medium-weight cotton measuring 8.25" x 8.25." This will result an insert that is 7.75" x 7.75", for an 8" x 8" ring pillow (1/2" is used for a seam allowance). If you would like your ring pillow to be a different size, use the following formula: Canvas insert = Finished size + 1/4". Ring pillow = Finished size +1/2".

On the wrong side of one of the pieces, using the ruler and chalk, mark a line at 1/4" in from each of the edges. You have drawn a square, centered on the fabric, that measures 7.75" square. Using the circle template and chalk, round off the corners of the chalk square. If you don't have a circle template, try using a round household item, such as a jar lid. Layer the 2 squares one on top of the other, wrong side out. Starting about two inches in from one of the corners, sew using a running stitch on the chalk line, at 1/4" in from the edge along 3 sides plus about two inches at either end of the fourth side, leaving a gap in the center of the fourth side wide enough to slip your hand into. You can do this using a sewing machine, or by hand. Tie a knot and cut the thread. Cut off the excess fabric at the corners in a rounded shape to parallel the seam, leaving 1/4" for seam allowance. Turn right side out. Gather a handful of fiberfill. Pull apart to smooth out any lumps. Gently stuff into the pillow insert, using enough fiberfill to get a padded, but not overstuffed shape. Sew the open side shut using a ladder stitch.

2. Make the ring pillowcase top. Using your rotary cutter, cut 1 rectangle of linen measuring 8.5" x 12.5". To make the pin tucks (Figure 1): Lay the rectangle out in front of you, right (exterior) side up, with the long edges running from side to side. Starting at 2.5" from the left side edge, using the ruler and chalk, mark 16 vertical lines on the linen from top to bottom, every half inch. Starting with the first two chalk lines on the left, fold the linen matching the first line to the second, with the ridge of the tuck sticking out on the right (exterior) side. Pin in place and sew from top to bottom along the joined chalk lines with a running stitch, and iron the tuck toward the left edge of the pillow. Repeat this process with the third and fourth chalk line, and so on across the face of the pillow top until you have created 8 tucks. The pillow top should now measure 8.5" square.

On the wrong side of the pillow top piece, using the ruler and chalk, mark a line at 1/4" in from each of the edges. You have drawn a square, centered on the fabric, that measures 8" square. Using the circle template and chalk, round off the corners of the chalk square. If you don't have a circle template, try using a round household item, such as a jar lid.

3. Make the pleated edging. Lay out your 1/2" seam tape and starting from one end, measure 1/2" to the right, make a mark. From there measure 1/4" over & mark. Measure 1/2" from there, mark, move another 1/4", mark. See the pattern? You're making a series of 1/2" and 1/4" wide sections. Keep going until you reach the end.

Once all the pleats are marked, snip at each mark (a very tiny snip, needless to say). Fold the first pleat by pinching together the two sides of the first 1/2" segment and folding it down to the right so that the fold meets up with the next 1/4" mark. Stitch in place. Continue along, holding each pleat in place while you sew it down. You can also pin all the pleats down first and then run them through the sewing machine.

To save time, pre-pleated edging may be used instead.

4. Make the ring pillowcase bottom and attach the edging. Using your rotary cutter, cut 1 square of linen measuring 8.5" x 8.5."

On the right (exterior) side of the pillowcase bottom piece, using the ruler and chalk, mark a line at 1/4" in from each of the edges. You have drawn a square, centered on the fabric, that measures 8" square. Using the circle template and chalk, round off the corners of the chalk square. If you don't have a circle template, try using a round household item, such as a jar lid.

Lay the pillowcase bottom in front of you, right (exterior) side up. Place one end of the edging along one edge of the fabric, with the edging's sewn edge facing toward the outer edge of the fabric, and the ruffled edge facing the center of the pillow. The stitch line on the edging should be positioned at 1/8" in from the edge of the fabric. Leaving a 'tail' of about edging about 1" long free at the beginning, sew the edging to the pillow bottom all the way around, following the rounded corners as you go, stopping when you are about 1" before the place where the beginning and end of the edging will overlap. If sewing by machine, remove the piece from the machine and cut the thread ends off. To create a seamless look to the place where the edging joins, cut off any excess from the beginning and end of the edging, leaving 1/2" extra on for overlap. Where the two ends meet, fold the overlap over so that the join is covered and hidden in the fold. Iron lightly and pin in place. Sew the remainder of the edging down as before, joining the beginning and end as you attach them to the pillowcase bottom. Remove the pin, tie off and cut off thread ends.

5. Complete the ring pillowcase. Layer the 2 squares one on top of the other, wrong side out. Starting about two inches in from one of the corners on a side without pin tucks, sew using a running stitch on the chalk line, at 1/4" in from the edge along 3 sides plus about 2 inches at either end of the fourth side, leaving a gap in the center of the fourth side wide enough to slip your hand into. You can do this using a sewing machine, or by hand. You'll be sewing through both layers of the pillowcase, plus the pleated edging near its sewn edge. Tie a knot and cut the thread. Cut off the excess linen at the corners in a rounded shape to parallel the seam, leaving 1/4" for seam allowance. Turn right side out. The pleated edging should form a ruffle around the outside seam of the pillow. Fold the raw edges of the gap along the chalk lines (1/4" in from the edge), and gently press the folds flat with the iron to set them in place. Slip the pillowcase over the canvas pillow insert. Using the sewing needle and a slip stitch, stitch the gap closed. Tie a small, neat knot and cut the thread. Brush off any chalk that still shows on the pillow.

Cut two pieces of the 1/8" ribbon about 1 foot long each, and using a small, neat stitch and knot, attach them near their centers to the center of the ring pillow top.

Download the template here.

An array of accessories

1178lucky-6251 More details from Eunice and Daniel's wedding! Eunice embellished her Steve Madden flats with vintage shoe clips found at the Alameda flea market, one of our favorite sources for vintage ephemera in the bay area. She also purchased woodland animal brooches from Poodle Breath for her bridesmaids.

1187lucky-6669

Michele Papineau calligraphy

MSWesddings_Spring2010_Cover_72dpi The stunning calligraphy gracing the cover of the current Martha Stewart Weddings was completed by Michele Papineau, one of our favorite calligraphers.

1345lucky-6659

In addition to the favor crackers (above), Michele also wrote out the evenings menu on colorful chalkboards that were hung inside the tent.

1286lucky-2566

To see more of Michele's beautiful work, please click here.

Jennifer Behr

When planning her look for the wedding, Eunice knew there was only one place to go for her hair accessories - good friend and hair accessory maven, Jennifer Behr.  Jennifer created a custom headpiece (available here!) after a consultation at her fabulous Brooklyn studio... DSC_0331

Initial thoughts included a dash of hand-dyed fuchsia feathers and something rather dramatic...

DSC_0274

DSC_0354

DSC_0228

An early assembly of feathers and crystals that would later get pared down into the final look...

DSC_0217

DSC_0222

DSC_0207

Jennifer, working her magic!

1837lucky-3584

The result was a delicate crystal tiara handwrapped in 1920's vintage metallic ribbons. A spray of elegant ostrich feathers and floating crystals finish this breathtaking headpiece.

2087lucky-5642

1665lucky-8169

Jennifer also created beautiful little hand-dyed feather poufs to match each bridesmaids' dress for a final perfect detail...

Working with Jennifer was a breeze - her work, as always, was pitch-perfect for the occasion and coordinated perfectly with the dress.

Bottom photos by Gia Canali and Sara Remington.

Magnolia Photo Booth

Little guests and photo booth One of the highlights of Eunice & Daniel's wedding was the photo booth from Magnolia Photo Booth. Guests of all ages absolutely loved it! In lieu of a traditional guest book, guests put their photos into an album with photo corners -- the photos were also posted online after the wedding.

Photo booth pic 5

Photo booth pic 3

Photo booth pic 4

A key to the fun was providing all kinds of creative and funny props, which we hung on the trunk of a tree...

Photo booth and prop tree

1249lucky-1080

A mad hatter hat with bunny ears...

1368lucky-7936

Chalk board word bubbles and mustaches designed by Hello!Lucky and fabricated by Because We Can.

Photo booth pic 7

Photo Booth Pic 10

Photo booth pic

The bride and groom!

Eunice & Daniel's Wedding Stationery

Eunice and Daniel's Save the DateSTDP_HIGHSEAS_COA-FUC-POO_F_L Since we're stationers, paper played a big role in designing Eunice & Daniel's wedding. The first piece of inspiration was Rob Ryan, the whimsical London-based paper artist. Eunice illustrated this letterpress save-the-date poster featuring silhouettes of her and Daniel, and their two dogs Indie and Simon, along with a save-the-date for their London reception.

Hello!Lucky Wedding Cake

We used the silhouettes again to create a DIY cake topper, with the silhouettes laser cut out of balsa wood by our pals at Publique Living, and embellished with crepe paper flowers.

Woodland Damask Wedding Invitation Suite

The wedding invitations were a variation Woodland Damask wedding invitation, created in collaboration with pattern designer Joel Dewberry inspired by his  Deer Valley collection.  The wedding invitations and save the dates were letterpress printed, while the details booklets and programs were digitally printed.

Hello!Lucky Paddle Fans

We used the pattern to create these program paddle fans, which doubled to keep guests cool during the ceremony...

Confetti pouches

...as well as these glassine confetti pouches, a tribute to the Beatle's All You Need is Love, Eunice & Daniel's exit song.

Check out more of the behind-the-scenes details on the Martha Stewart Weddings blog here.

Photos by Adi Nevo (stationery),  Gia Canali and Sara Remington.

Eunice and Daniel's Wedding, finally!

Eunice and Daniel's Wedding Eunice and Daniel's Wedding

We are SO excited we are to FINALLY be sharing photos from Eunice's wedding! Eunice, as many of you know, is our co-founder and Creative Director and her wedding last May 9 was one of the most unbelievable days ever!

Eunice and Rosette Crown

Eunice looked stunning in a dress of her own design, hand sewn by multi-talented Hello!Lucky London office head Iain Harris Bartlett, with makeup by Meaganne McCandess and headband by pal Jennifer Behr (available right here!).

Eunice and Daniel's Wedding

Eunice and Daniel's Wedding

Tons of our creative friends helped out with the details, including Tricia Roush (top left) of House of Nines Design. Magnolia Photo Booth was one of the highlights - guests had a blast taking mugs with all kinds of hilarious props!  Bottom row, Eunice and Sabrina celebrating the best day ever, and bridesmaid Erin Murphy trying on a tissue paper crown.

Eunice and Daniel's Wedding Puppets

A high point was a Tim Walker-inspired parade featuring animal shadow puppets designed by Eunice, fabricated Jillian and Toast at Because We Can, and then hand-painted!

eunicedaniel9

Introducing Mr. & Mrs. James!

Martha Stewart Weddings Spring 2010 Cover

Oh, yes! And the reason for the delay in sharing these pics!? The wedding is on the cover of the Spring 2010 issue of Martha Stewart Weddings!!  Check out the full gallery on their website here, and stay tuned for behind-the-scenes blog posts on The Bride's Guide. We'll also be posting lots more behind-the-scenes photos on our blog -- there's just so much great stuff to share!!

Stay tuned for more to come!

Stunning photos by Gia Canali and Sara Remington.

Wedding Inspiration: Factory 20

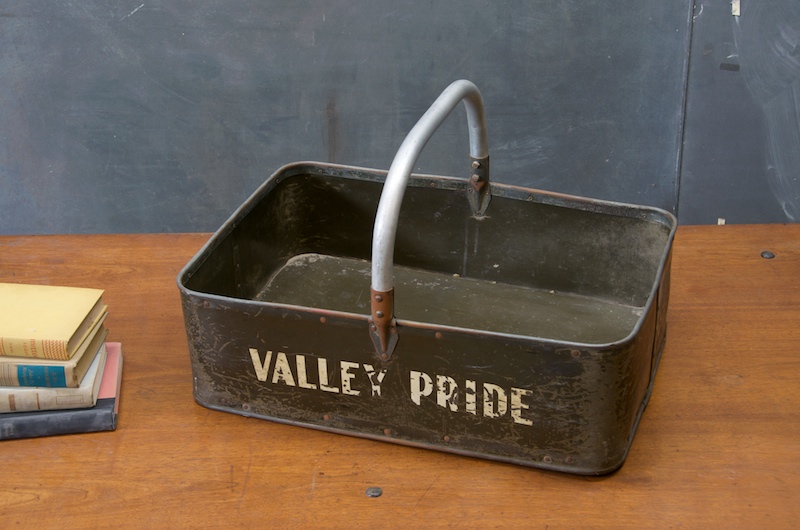
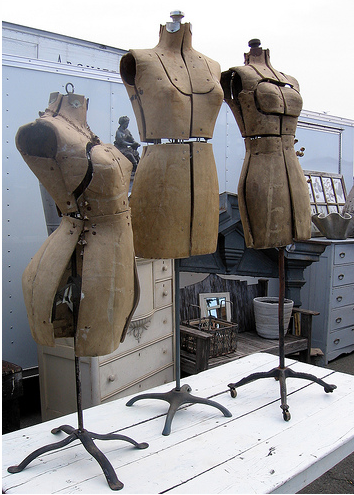
We're delighted to bring you one of our latest obsessions--Factory 20, a mecca of vintage furniture and rustic wedding bric-a-brac. This is a perfect place to get inspiration and potentially splurge for some personalized vintage flair to your special day.

For country chic weddings, we can only imagine what crafty minds could do with this vintage dairy farm metal basket.

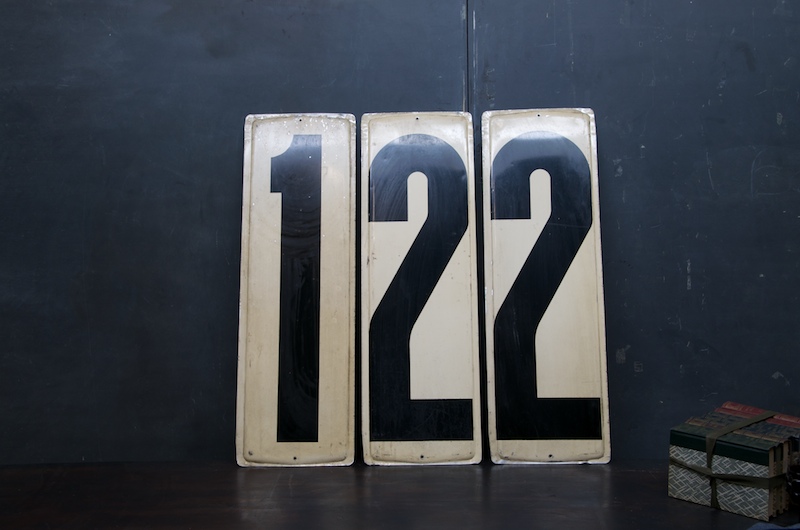
Vintage gas station numbers! Can we say Totally Adorable Idea for Table Numbers?

989_1558vintage-circus-carnival-games-counter4

And how cute would this be for a bar or welcome table at a big-top inspired wedding?

A lot of the pieces quite spendy and one-of-a-kind, so if budget allows, think about how to re-use in your home after the event.

View all the inspiring finds here.

Real Wedding: Marnie and Brian

Candle lighting at Grace Cathedral We were super excited to be involved in designing for this ceremony! Marni and Brian's wedding is the stuff plush Gothic romances are made of! We love the dark color palette interspersed with more traditional details.

The couple began their ceremony taking a lovers stroll through the labyrinth at San Francisco's hallmark Grace Cathedral, lighting candles as they passed.

Ceremony

They then met up with their guests, who had only been told they were to be driven to the woods, instructions awaiting. Each guest was then welcomed with "survival kits" of edible treats and well-stocked flasks. The understated ceremony took place beneath a simple white canopy in the redwoods of beautiful Muir Woods.

marni & brian letterpress invitations by Hello!Lucky

We started by creating custom designed letterpress invitations which summoned the Victorian details Marni knew she wanted--redwood trees, roses, birds, and Victorian embellishments.

Drink menu by Hello!Lucky

Carrying Marni and Brian's Victorian Gothic theme throughout the events of this two day affair, we also worked to design letterpress programs, menus, seating cards, and cocktail napkins.

Whisky Flask with graphic from H!L

One of our absolutely favorite parts? The couple even had the redwood tree graphic from the invitation etched onto whiskey flasks! Cheers to that!

Reception decor

The following night, Marni and Brian gathered everyone together again, this time for a reception party held in San Francisco at Hamlin Mansion. We love the playfully rich palette of rich green and purple fabrics for the table settings. Built in 1901 in Italian Baroque style, this venue offers stunning views of the Golden Gate Bridge.

Centerpieces

Decked out in whimsical charm, feathers, and purple and magenta accents, we're loving the floral arrangements by Cherries Flowers.

Donuts

Cigars with graphic from invitation on matchbooks

We adore the cigars and doughnut bar by Erin Bell!

marni & brian in car

Thanks to Erin Beach, who did an amazing job on photography and Moira Gubbins, the wedding coordinator from Hamlin Mansion.

Happy holidays!

Such Pretty Things Boxes The holidays are upon us! We're looking forward to celebrating the season with friends and family near and far...

Such Pretty Things Candy Canes

We'll also be taking a break from our blog over the holidays, when we'll have plenty of new things to share, including new wedding invitation and save the date designs!

Such Pretty Things Tree

In the meantime, we wish everyone a joyful, peaceful holiday and a prosperous new year!

Enjoy these lovely images from Such Pretty Things!

Healdsburg wedding

california-wedding-10 california-wedding-1

Once Wed posted this gorgeous real wedding yesterday! The wedding took place at Barn Diva in Healdsberg - such a lovely destination!

The couple, Lisah and Jeremy, came to us for their wedding invitations, a variation on our Heartland design. It's so lovely to see how everything came together!

california-wedding-9

california-wedding-7

See all the details here. Congratulations, Lisah and Jeremy!

Photos by Jen Curtis.

The Alameda Flea is back on!

At the flea The flea is back on, according to the official website!  Hurray!!

The Flea

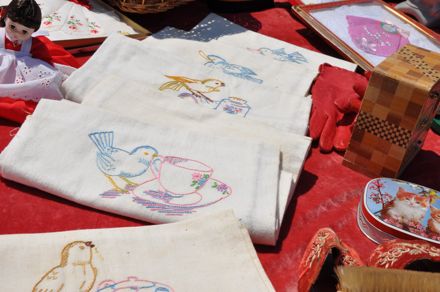
Tea towels

We're seriously tempted to brave the Bay Bridge closure and hoof it out there for fear that this may be the last. Tip for what it's worth:  last time the bridge was closed, we found that the San Mateo bridge got us there quickly in the morning. Returning, the Richmond bridge was a nightmare so we doubled  back and took the San Mateo bridge back to the city -- much better!  Hope to see you there!

Shana Faust

Shana Faust 3Shana Faust Shana Fashion

We're super excited that Shana Faust's fabulous new website! Shana's an amazing freelance stylist in New York and former senior style editor at Martha Stewart Weddings. She's also co-author and stylist of our new wedding craft book, coming Fall 2009 from Chronicle Books (behind-the-scenes pics from our recent photo shoot will be posted here soon!).

Inspiration boards

One of the best parts of the site is her inspiration area, which contains links to all kinds of fabulous design resources. Check it out, and click here for some lovely pics of Shana's home and her sweet little daughter Sophie Bea we took back in March!

Alameda Flea Market, noooooooo!

Alameda Flea Market 10/31/09 - IMPORTANT UPDATE: THE FLEA IS BACK ON!! (though how to get there quickly with the Bay Bridge still closed is a conundrum...)

We just learned via Paris Boutique Hotel that the Alameda Flea Market, which was to have happened as usual this Sunday, is canceled indefinitely due to some legal dispute among the organizers!

We were already fretting about how we were going to get there given today's indefinite Bay Bridge closure (due to a collapsed crossbeam - lord help us!), and now we're just, well...excuse us while we dab our eyes and honk our noses on one of the many precious vintage hankies we've purchased from the Flea over the years!

We'll keep fingers and toes crossed that this is not a permanent state of affairs, and that the Flea will rise again! In the meantime, spread the word to anyone you know who was planning to go...

Photo via Paris Boutique Hotel

Tombées du Camion

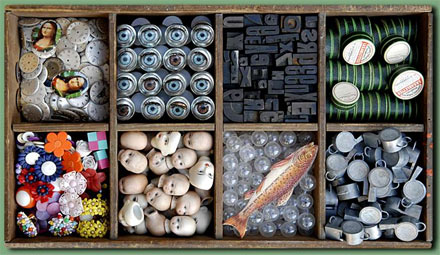
Box of Bits We here at Hello!Lucky are hopeless addicts of fabulous vintage finds (our studio is a mad collection of bits and bobs picked up at the flea) and so we were delighted to come across Tombées du Camion (translated, it means, appropriately and hilariously, Things Fallen Off the Truck) on the Constant Gatherer...

Tombees du Camion

This fabulous little shop  is located in Paris (17 rue Joseph de Maistre, should one be so lucky as to be traipsing about Paris!)...

Bits

The shop is a collection of vintage bits and bobs, and many items are to be had in large quantities (fantastic for party favors, crafty endeavors etc.)

Smiley Guys

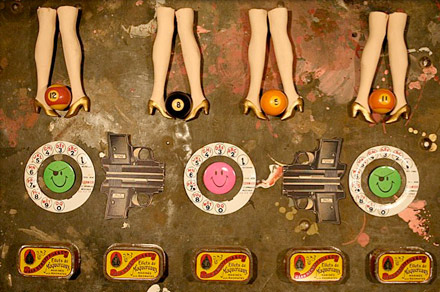
An online shop is supposedly forthcoming but in the interim, if something particularly strikes your fancy, such as these hilarious smiley guys, you can order via email.

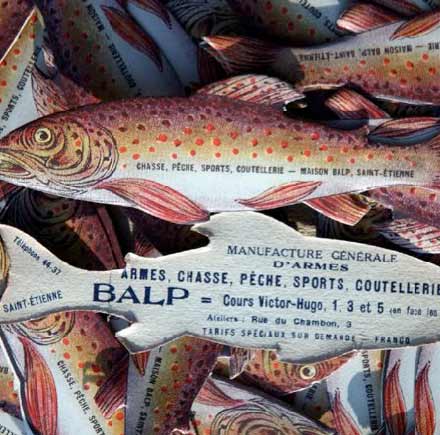
Fish

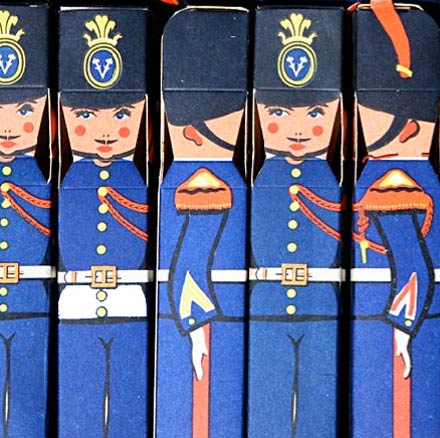
Soldier Boxes

Love these little soldier boxes!

Globes

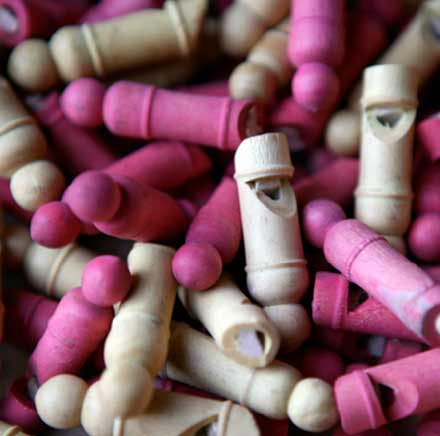
Wooden Whistles

Surely something fabulous can be done with these wooden whistles...

Tuna Tins

Trust the French to make tuna a fabulous and wonderful thing...

Mushrooms

If Paris is not on your agenda anytime soon, here are a few of our favorite places to find cool trinkets:

Of course, the Alameda Flea (obsessed with it!)

Bell'ochhio

Tail of the Yak in Berkeley

Castle in the Air

Paper Valise

Etsy, of course, including Buttermilk Sky and SnapCrafty

Moody Birds

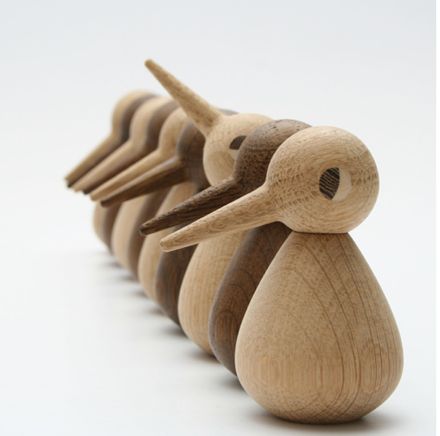
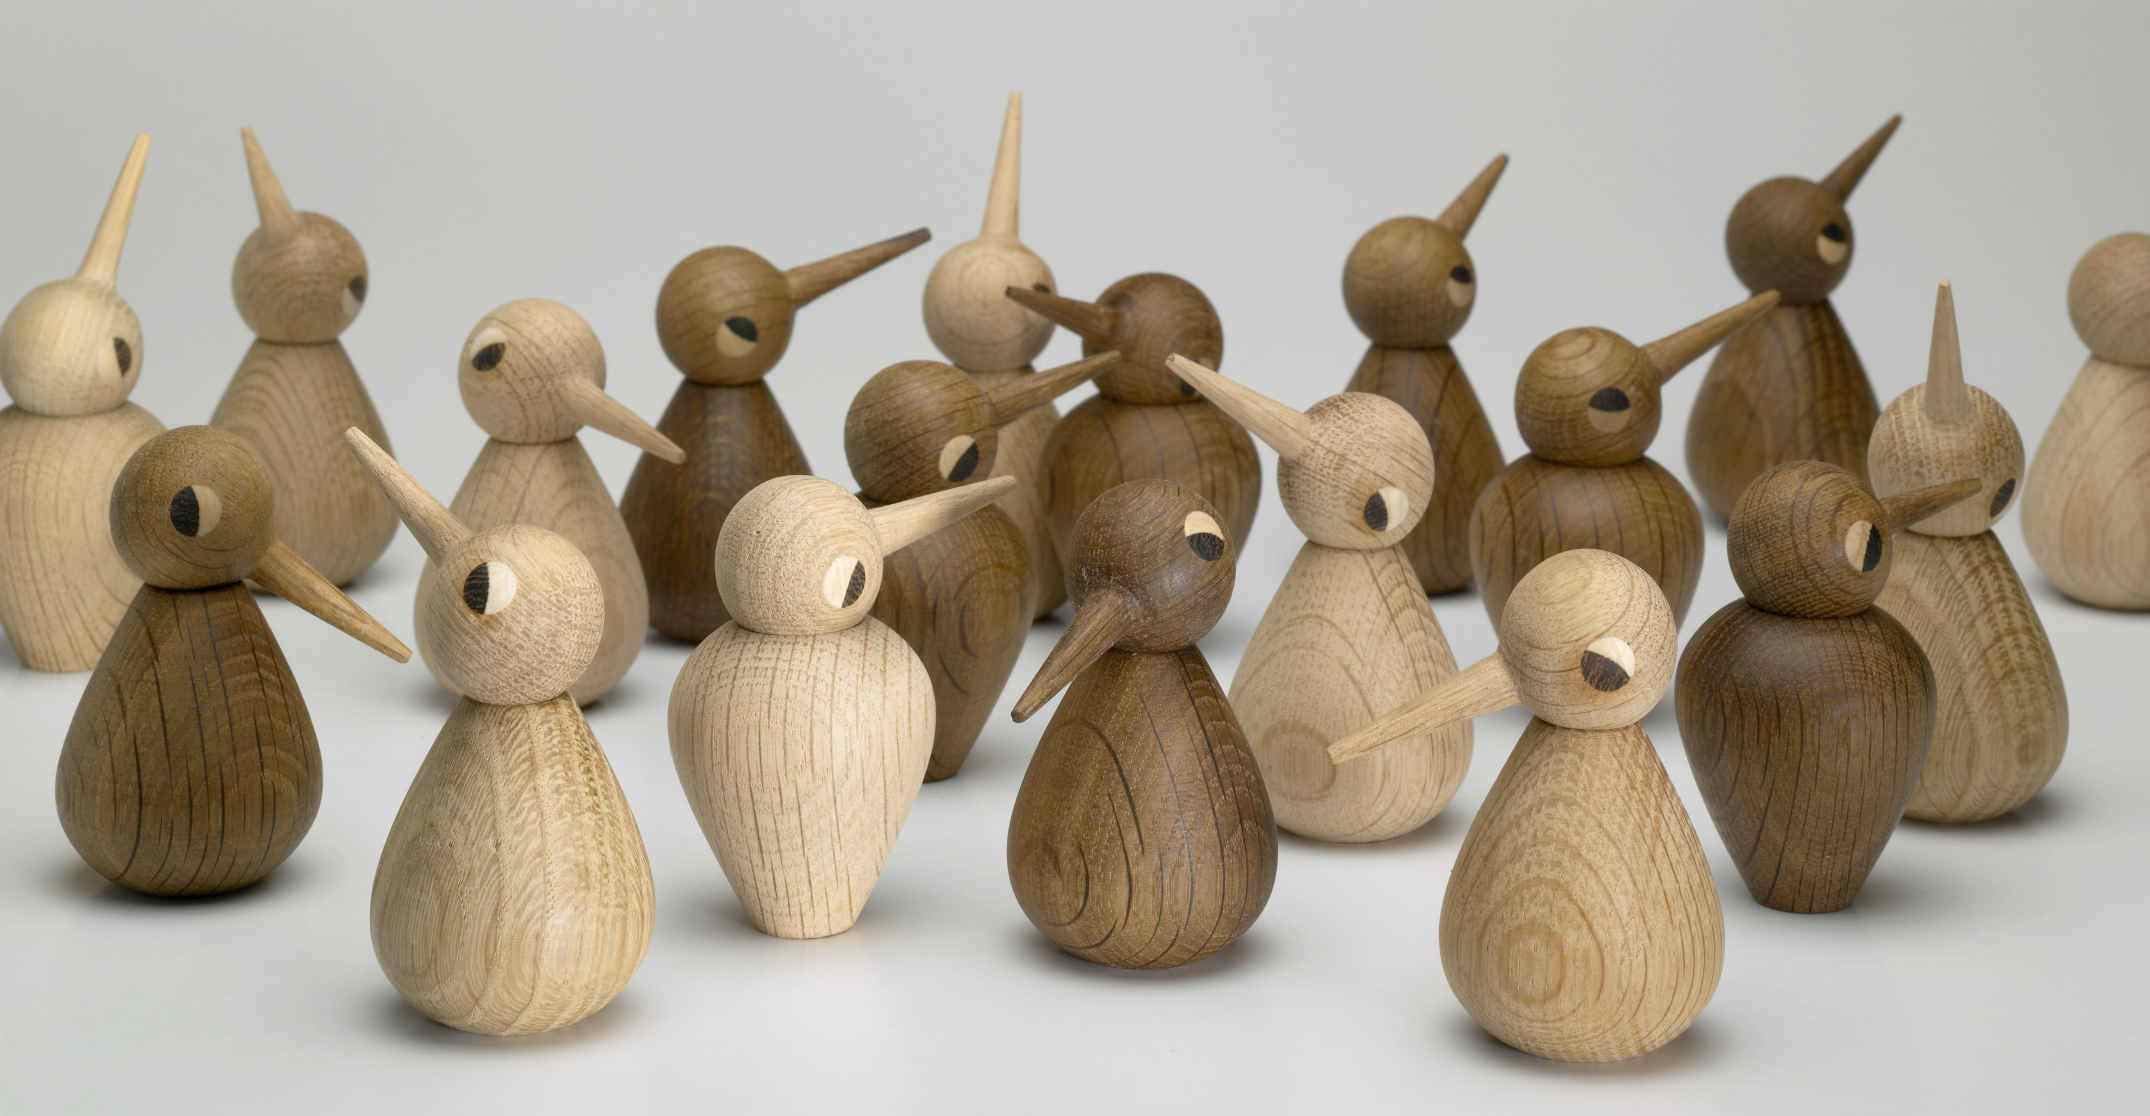
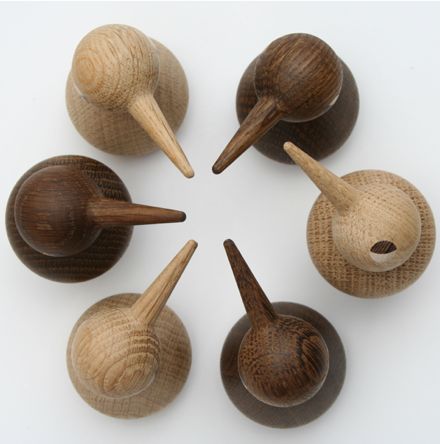
Kristian Vedel Bird On a recent trip to Copenhagen, these wooden birds (aptly named "Bird") designed by architect and furniture designer Kristian Vedel quickly became an obsession even though we've seen them before.  It is pretty remarkable for any one thing to consistently stand out among all the wonderfully inspiring Danish furniture, crafts, architecture...not to mention the remarkably attractive inhabitants of this lovely city.  In adorable shop after adorable shop, their removable heads beckoned us until, at last, we succumbed to the temptation and picked up a few.

Kristian Vedel Bird

Designed and produced in the 50s to great success, the birds have recently been reintroduced in all 3 sizes - parent, grandparent and child (awww) and 2 finishes.  You can tilt the head any which way you please (a nice way to express your ever-changing mood) and can flip the body to be either male or female.  A great addition to any mantle, bookshelf, child's room, place setting....the possibilities are endless!

Kristian Vedel Bird

Wouldn't this type of circle arrangement be adorable as a centerpiece?   They are readily available for purchase online in the US here among other places.  Learn more about Bird and see more photos here.