Free Father's Day DIY Templates Updated for 2015

We've been getting requests for a version of our father's day diy templates updated for 2015. We aim to please, so here they are!  Download the links below and print these puppies up for your favorite father figure! 

 Father's Day is right around the corner and this year we've got your one-of-a-kind gifts covered. You can jazz up a simple pair of socks, a bottle of wine, or a bottle of beer with these manly labels we've designed. Do you have a handsome and debon…


Father's Day is right around the corner and this year we've got your one-of-a-kind gifts covered. You can jazz up a simple pair of socks, a bottle of wine, or a bottle of beer with these manly labels we've designed. Do you have a handsome and debonaire Dad? Print out our matching labels for a black pair of socks and a nice bottle of wine. We even created a slick card to match!

 Is your Dad more on the rugged side? Why not make some beer and a pair of white socks a little more special with our free matching labels?


Is your Dad more on the rugged side? Why not make some beer and a pair of white socks a little more special with our free matching labels?

 We printed ours on label paper which made sticking them to the bottles and socks a little easier, but these would look just as nice printed on regular white paper or card stock.Simply click on the links below to print your free Father's Day cards a…


We printed ours on label paper which made sticking them to the bottles and socks a little easier, but these would look just as nice printed on regular white paper or card stock.

Simply click on the links below to print your free Father's Day cards and labels. Enjoy!

Sock Bands

Father's Day Card in White

Father's Day Card in Black

Wine & Beer Labels


And as always we love seeing our printables in action - so send us pics or post them directly to our Facebook page. And tell Dad we said Happy Father's Day too.


Free Printable Halloween Party Invite

Hosting a spookfest at your place this Halloween? We designed a few fill in invitations that you can print at home and send to your friends! 

* We recommend white cardstock and A6 envelopes (you can find them at Paper Source!). If you go for a black envelope try Gelly Roll's white ink pen for addressing.

Find our printable PDF's below!

Free printable PDF's:

Free printable Ghosties invite

Free printable Monsters invite

*Designed by Hello!Lucky

DIY STAMP KIT + GIVEAWAY!


was kind enough to let us pick out a little somethin’ for a DIY project! Naturally we were drawn to SF local- Yellow Owl Workshop’s stamp-carving kit, though it was a tough call since they offer a ton of great DIY kits. We decided we wanted to do a bandana using a neon color palette, our most recent obsession. Follow the instructions below to create your own stamped bandana. In addition we will offer up $40 gift cards to UncommonGoods to TWO lucky winners. Find contest guidelines below!

Happy crafting!


created this genius Carve-A-Stamp Kit that contains everything you need to master the art of stamp carving.

The kit comes equipped with: • 2 rubber blocks mounted on wood for carving • 1 brilliant red ink pad • 1 pencil • 1 wood carving knife with five tips & a tip remover • 1 template featuring different designs • 1 piece of tracing vellum • 1 muslin bag


What you will need in addition for this project: • 1 yard of muslin • washable/ fabric friendly neon ink pads • scissors • neon thread (optional) • a sewing machine (optional) • one extra block of rubber (optional)


*All of these items can be found at Michaels, or the craft store of your choice. STEP ONE:

Carving the dot pattern stamp-

We used the semi circle tip in order to cut out our dots for our reversed dot stamp. First use your pencil to draw scattered dots. Then push the semi-circle into the rubber, rotate 360 degrees, and pop the rubber out. Repeat until your pattern is complete.

STEP TWO:

Carving the star pattern stamps-

Draw the star onto the rubber with your pencil. Then use the flat knife to trace the outline of your star. After, use that same tool to remove ¼ inch of the entire surrounding area. In order to achieve only the outline of the star, you will then use the wide “V” carving tool to remove the rubber from the inside of the star.

*note: If you wish to create another star stamp, repeat the steps listed above with your extra rubber pad.


STEP THREE:

Cutting out your bandana- Cut a 23 inch square out of your muslin. This allows for a ½ seam allowance on each side. Using your neon thread, iron, pin, & sew the edges in.

*note: if you would not like to sew the edges, cut out a 22 inch square & leave it raw!

STEP FOUR:

Stamping your bandana- Using the dot stamp you have created, line up the block along the edge and make a border all the way around. Then fill the center with your star stamps as seen above.

STEP FIVE:

Protect your fabric- Wait until the ink has dried (a few hours). Place a piece of muslin over your pattern and iron each side without water/steam. Allow for a week or so before washing, then hand wash or machine wash alone for first rinse.


STEP SIX:

Strut around in your new bandana.

We made two bandanas, one for our pen pal, and another tiny one for Imogen because we couldn’t resist, duh.

Jump the gun and make one for mom for Mothers day! Get your own kit here! Or check out more great mom day ideas here.

CONTEST GUIDELINES:

Enter to win a $40 gift card to UncommonGoods to snag your own stamp carving kit and then some!

All you gotta do is like UncommonGoods on facebook & comment on this post! Don’t have a facebook? Join their newsletter instead!

Our winner's will be announced Friday the 21st!

DIY Animal Envelope Valentine

We got super into this animal envelope DIY by Mer Mag Blog. Super easy, cheap, & adorable. Stuff them with candy for the kids, or fill it with a card for your sweetie! Head to Mer Mag for the full tutorial!animal envelope diy

Shine On This New Years Eve


We recently collaborated with West Elm and Style Me Pretty to create a NYE party tablescape. Naturally we were thrilled to partake in this project. This resulted in DIY projects galore! We created coasters, fringe numbers, and a table runner all dipped in gold! Head to Style Me Pretty for our full DIY break down.

Happy New Years Eve!

Photos by Blake Bronstad


DIY Dino Tee


Sabrina's twins James and Alex wanted matching dinosaur tees based off their favorite Byron Barton book Dinosaurs, Dinosaurs, so she drew a few up! All you need is a blank tee, a sharpie, and your kids favorite illustration! Quick tips to avoid fading after wash: Soak overnight in a quart of cool water with a cup of white vinegar. Always turn the tee inside out before washing.

Halloween Wreath


Welcome your guests with a glow in the dark creepy crawler wreath! Follow the steps below... Find your materials at your local craft store. We chose Michaels! And there you have it, a warm welcome. There's only one thing you're missing to complete your Halloween party decor... attendees! And we have the invites. We are offering 20% off Halloween cards until Oct. 22nd. Enter code SPOOKY at checkout. Halloween cards here.

Free Halloween Printables


Take your table to the next level by adding place cards and poison wine labels! We created free downloadable templates so you can print your own matching cards and labels!


Try using a plastic bug as a place card holder. We spray painted ours black, but you can also find them black to cut out a step!

We recommend you print your wine labels on sticker paper found at most craft stores, or simply cut out using the markers and stick on using double stick tape!

Print your free place cards here!

Print your free wine labels here!

Bat Cake Topper DIY


Try this sweet and spooky cake/ cupcake topper DIY using our free printable template! Materials + Template + Printer + Black cardstock + Craft knife + Cutting mat/ magazine + Tape + 5 bamboo skewers + Hot glue gun & glue + Scissors 1. Print out template here 2. Tape the template to your piece of cardstock so it doesn't move around. 3. Cut out each bat with craft/ exacto knife. 4. Cut each skewer at a different height. 5. Using your hot glue gun, glue the back of each bat to top of skewer 6. Place in cake and voila! Enjoy!

Halloween Tablescape


Charm your dinner party guests this Halloween with a themed tablescape. With easy and affordable creepy crawler place card holders, printable poison wine labels, and a corpsy succulent centerpiece, your table will be the talk of the town.

This week we will be posting DIY’s and free printables so you can create a spooky tablescape of your own!

Stay tuned for these DIY’s and printables:

+ Glow in the dark serpent wreath- DIY

+ Lend me a hand centerpiece- DIY

+ Bats cake topper- Printable

+ Poison wine bottle label- Printable

Wild & Free: Vintage Map Envelope Liners

allgoodthings

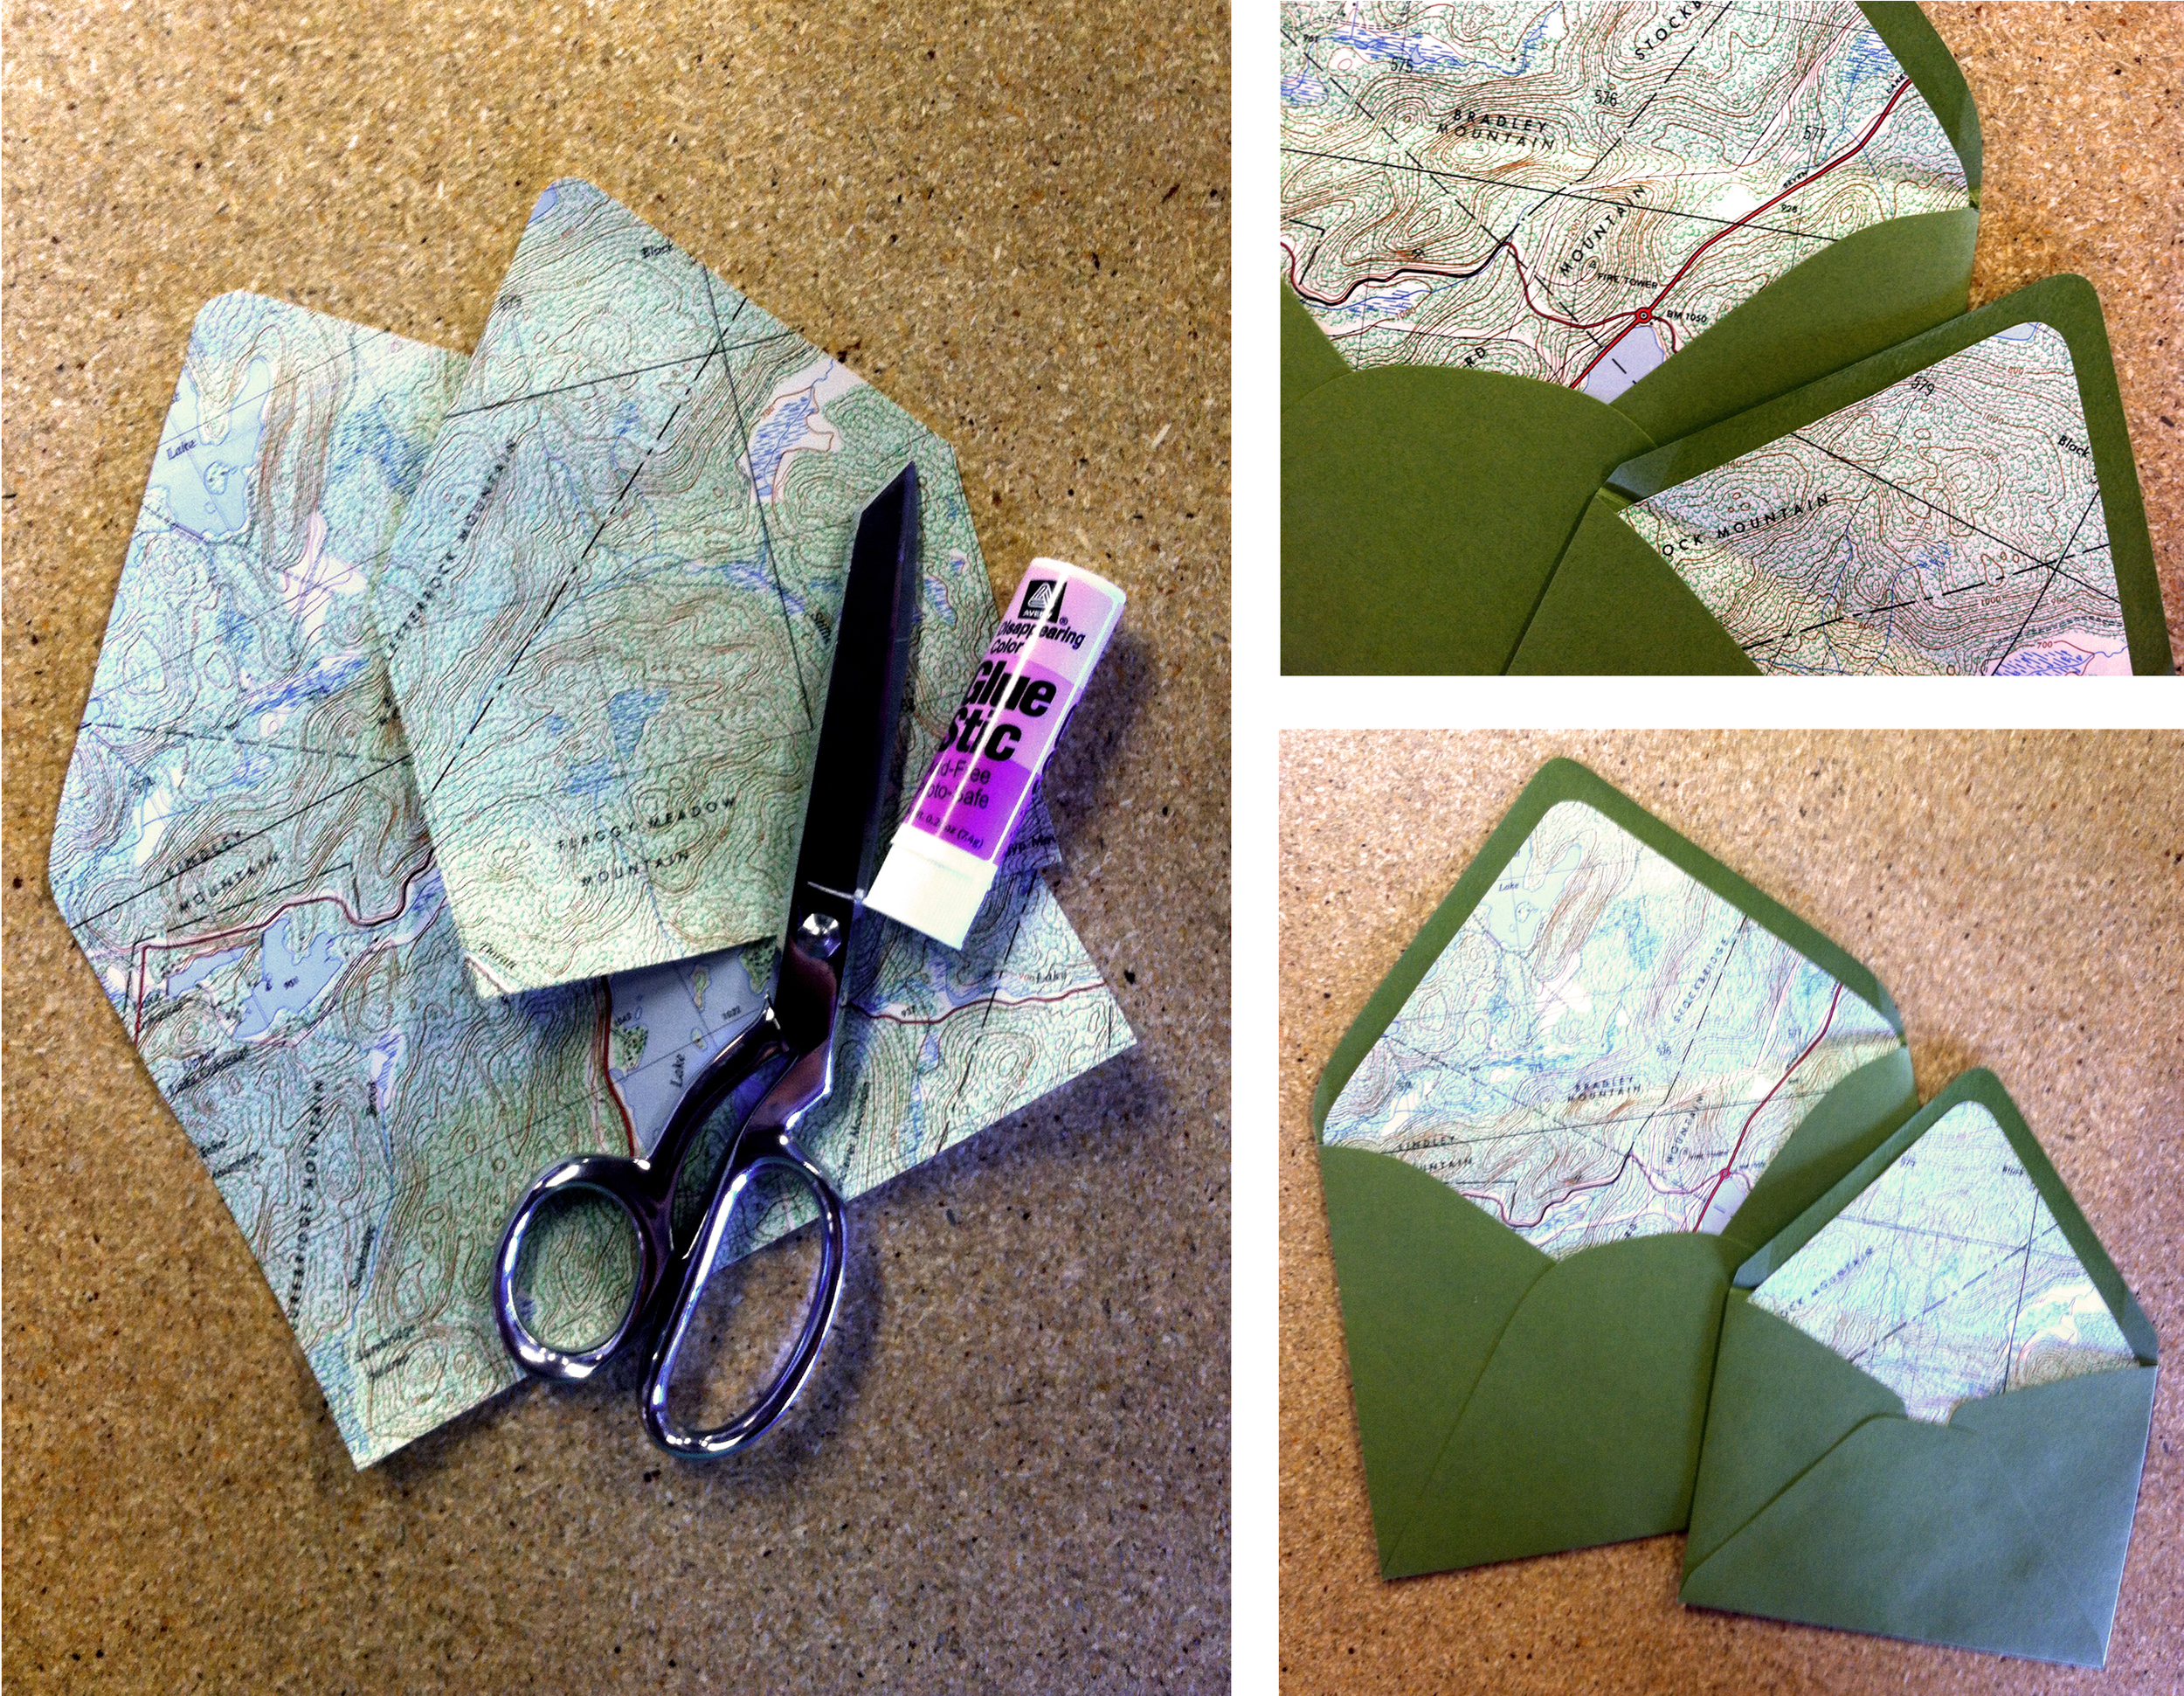
As summer comes to a close, we can't help but reflect on all the adventures that have filled our days for the past few months. In that spirit of adventure, we decided to put some old maps to good use and make envelope liners. Liners are a great way to utilize old magazine pages, scraps of gift wrap or calendars that have served their time.

liner_process

DIY Envelope Liners (Check out our handy how-to video!)

Supplies needed:

Envelopes Paper Templates Scissors Glue stick Bone folder

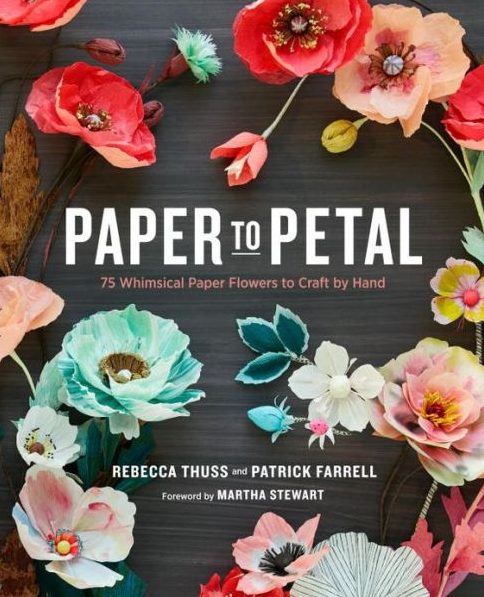
Inspired by: Rebecca Thus, Paper to Petal

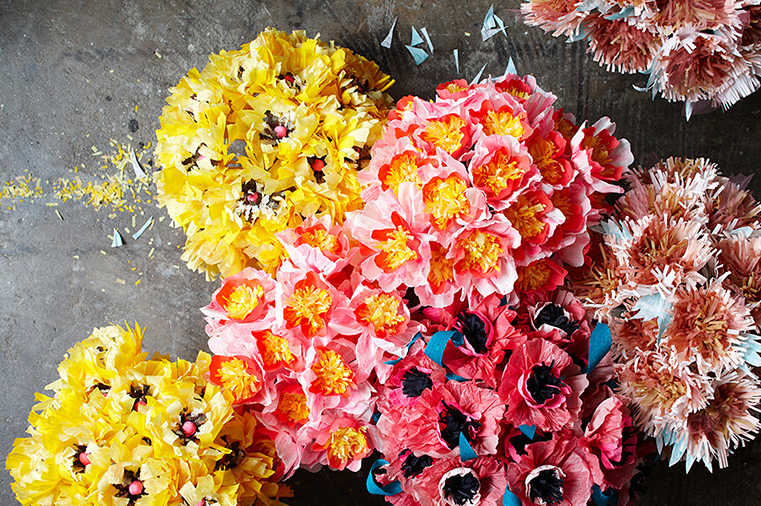
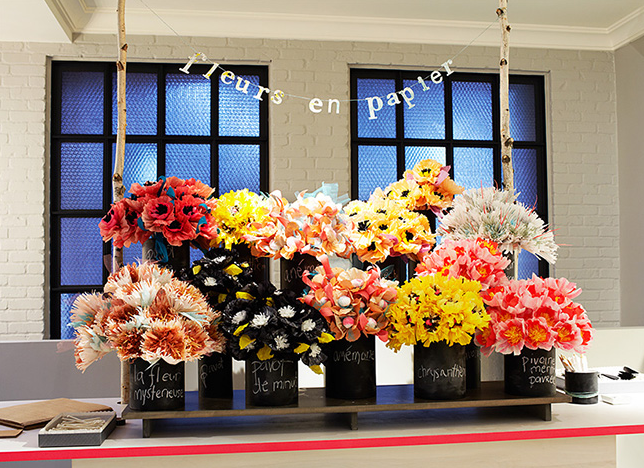
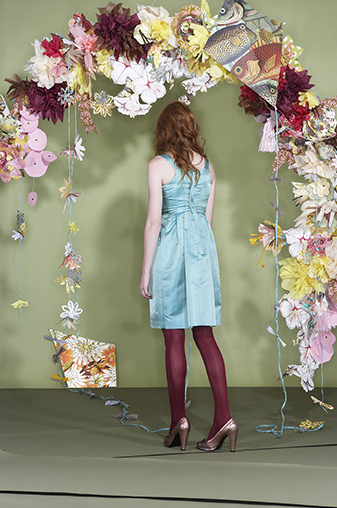
We can not wait to get our hands on Rebecca Thus's new book, Paper to Petal. Rebecca's book features 75 projects to create with paper flowers. There are craft recipes for everything you can imagine from party decorations, bouquets, to floral centerpieces. Even if you've made paper flowers before -- as we have many times, this books looks like it has some sweet new takes on turning ordinary paper into gorgeous flowers.

Buy Paper to Petal here.

Head to Rebecca's blog for constant inspiration.

Easter Craft Projects

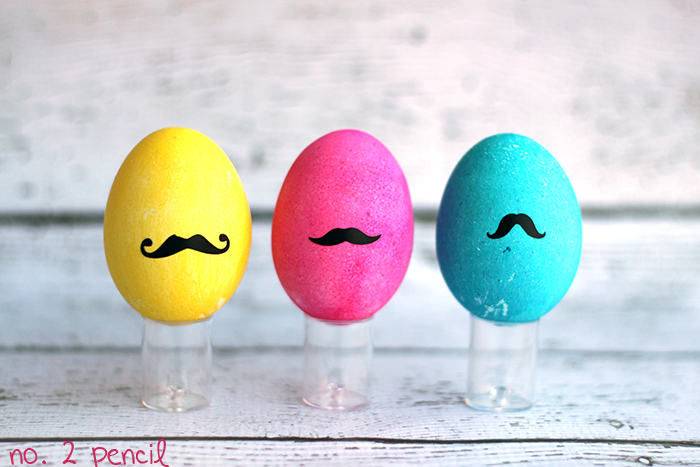
While we haven't had a chance to come up with a fun craft project for Easter yet we love seeing everyone else's projects popping up online. To celebrate the season here are some of our favorite Spring projects from around the web. Shown above are Moustache Easter Eggs from the blog No.2 Pencil. She uses a craft cutting machine to make the vinyl moustaches, but it would be just as fun for kids to draw them on the eggs with a Sharpie. Adding eyes and some hair would give these eggs even more personality.

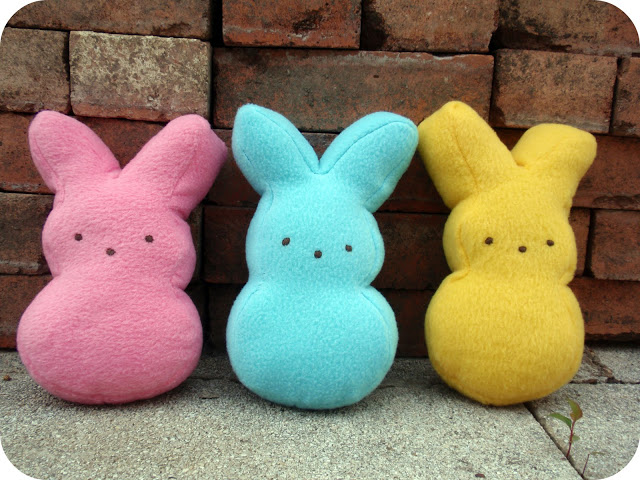
How sweet are these marshmallow plush bunnies? They're like giant bunny peeps! You can find the full tutorial over at Dandelions & Lace.

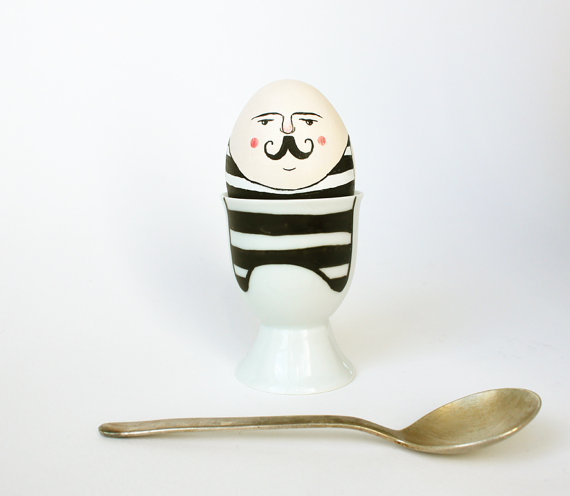
You probably noticed we have a thing for circus characters around here. So we fell in love when we spotted this guy over on Etsy. Who wouldn't love this illustrated cup and matching wooden egg? He can be found in Sweet Bestiary's shop here.

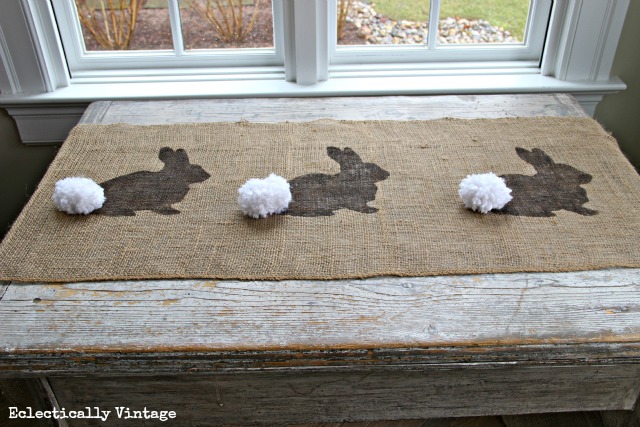
How adorable is this burlap bunny table runner? We love the little bunny silhouette and the yarn cotton tail. You can find the instructions to make this sweet table runner over at Eclectically Vintage.

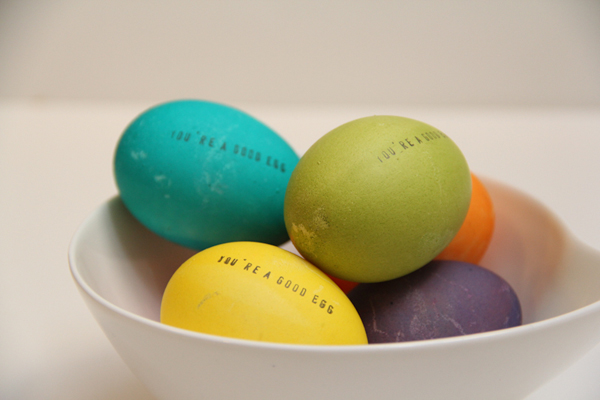
How could you go wrong with old school egg dying and stamping? We love the way these eggs look and it's such a simple project. Read more over on Lovely Indeed.

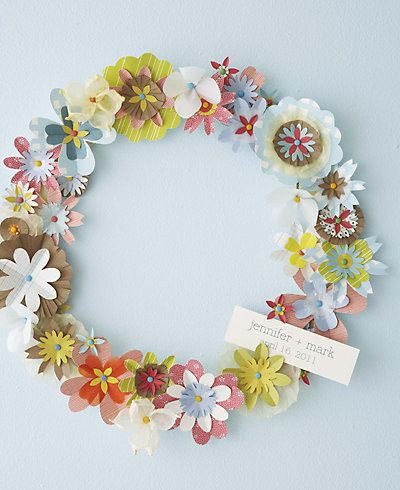
And finally we had to share one of our own projects. This is from our book Handmade Weddings, but it's the perfect project for Spring. You can download the template to make this spring wreath here.

Do you have any fun Easter craft projects you want to share? Leave us a link in the comments!

DIY Valentine's Day Geo Heart Bulletin

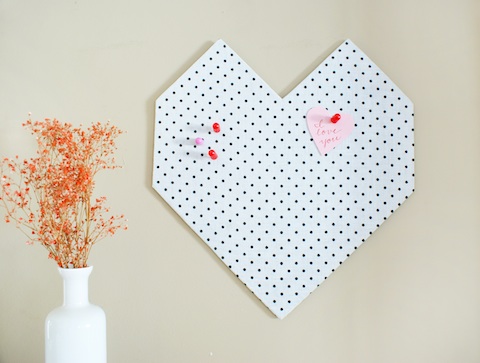
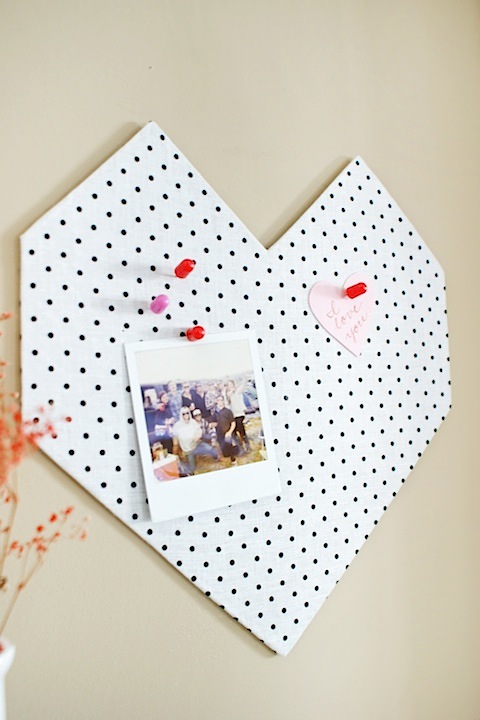
Our next DIY doesn't just have to make an appearance for Valentine's Day. It's a nice addition to any home decor and it's sleek shape would look great year round! Geometric shapes are trending around the blogosphere lately, and we're really into the look. This DIY Geo Heart Bulletin is fun and functional, and the perfect way to show your home some love. Instructions below!

Materials:

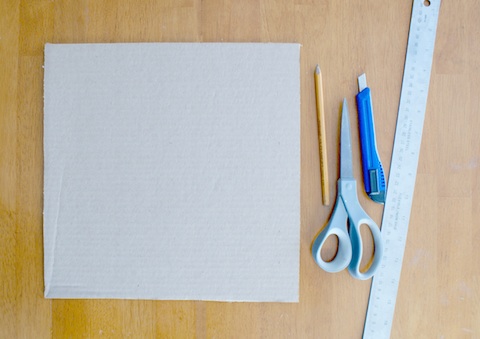
12" x 12" cardboard* (recycle from an old box!), Pencil, Box cutter or sharp scissors, Ruler, 18" x 18" fabric, Spray adhesive, Hot Glue and gun, Foamfast hanger or command hook for hanging

*Make sure your cardboard is 1/4" thick, so pins don't poke through to the back

Instructions:

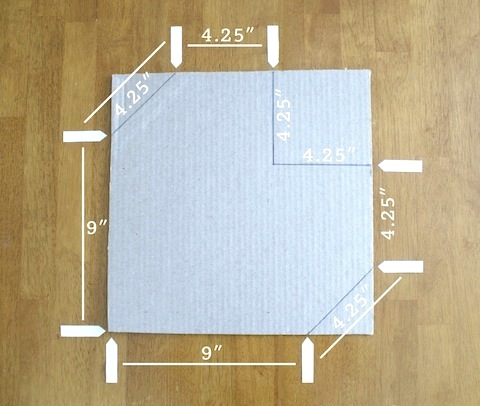
Step 1. Measure your heart shape. The two long sides are 9", the rest are 4.25". See below for reference.

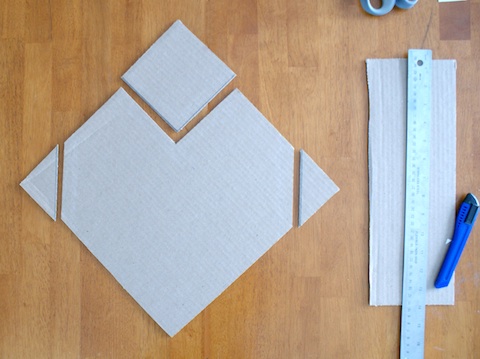
Step 2. Use your box cutter or scissors to cut out your shape. Discard scraps. Be sure you use a scrap of cardboard or a magazine underneath to prevent cutting your work surface!

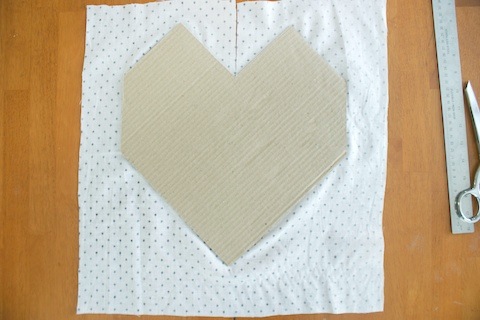
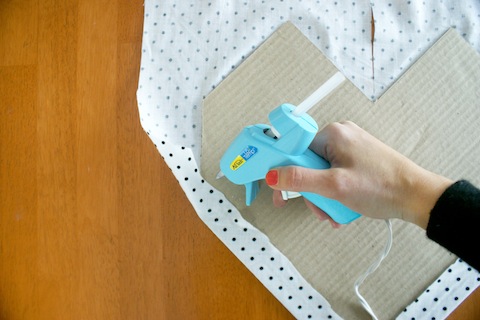
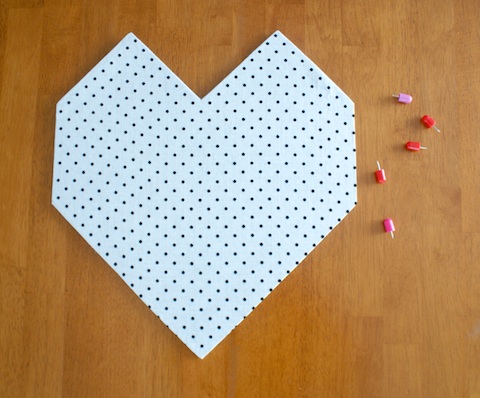
Step 3. Apply a thin, even layer of spray adhesive to one side of the heart and smooth on the fabric. Use your fingers to smooth any bubbles. Use scissors to make a slit directly above the point of the heart.

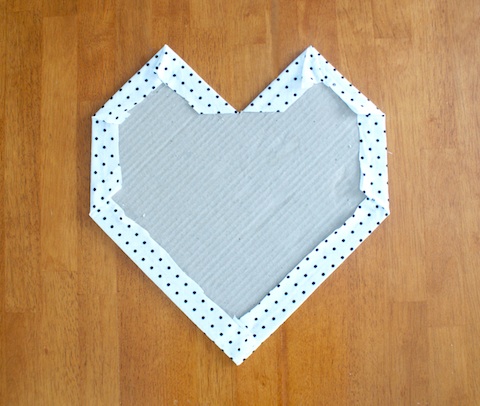
Step 4. Fold the edges of fabric over to the back side. Secure with hot glue, about 1/2" from the edge. Snip any excess fabric off and discard.

Step 5. Voila! These Foamfast hangers or command strips will work well for hanging.

Leave your loved ones a special note on Valentine's Day or use it to pin up special photos. It's lightweight and easy to make!

For more festive DIY ideas, visit our website!

DIY Valentine's Day Candles

Valentine's Day is definitely one of our favorite holidays to celebrate. Christmas, Thanksgiving, Fourth of July, they're all a blast, but when we're given the thumbs up to decorate with all the pinks, fuchsias and reds we wish, we're overjoyed. Our Love/Valentine's card collection is one of our strongest (especially with the latest additions by Lisa Congdon) and our Big Day Pinterest Inspiration Board is overflowing with hearts and love. But it's really gearing up for the big 2/14 that get's us in the mood. The beauty of this DIY (found and inspired by the ladies at Design Mom!) is that you can use any color of wax, and cut in any shape you want, but we're going all out in hearts and XO's.

Materials: Colored candles or wax, candle wick, toothpicks, double-boiler or two pots, wax paper, small cookie cutters or knife

How To: Step 1. Using a double-boiler melt your wax. If you don't have a double-boiler, just stack one pot on top of anther. Add a little water to the bottom pot and bring to a boil. Rest the other pot on top (without touching the water).

*Try recycling those used or unwanted holiday candles for this project. It's a shame tossing out the bottom half of those delicious apple-pie scented wonders, so throw them in a pot and melt it down for a new facelift. Most wax will melt down well but we recommend you steer clear of beeswax.

Step 2. While your wax is melting, cover a flat work surface with wax paper, and snip your candle wick to about 1" stems. The length will depend on the shape so check your cookie-cutters in advance. You want the wick to reach about 1/3 or half of the way down your shape.

Step 3. After your wax is completely melted, allow to cool. *If you're using a recycled candle, remove any wick or wick stands.

Step 4. Once the wax starts to stick to the side of the pot, or a thin layer of skin forms at the top, you're ready to pour.

Step 5. Carefully pour the wax onto your covered work surface. You want to aim for 1/8 "- 1/4" thickness.

Step 6. Now you need to let the wax cool for about a minute before you start cutting your shapes. You can test the wax before cutting by pressing your finger into a corner. It should be firm but still hold the shape of your finger. You will need to pay close attention so that the wax does not get too firm before you cut.

Step 7. Cut your shapes out of the wax with your cookie cutter and remove excess wax.

Step 8. Carefully drive a toothpick up the center of the wax (about 1/2" - 1" depending).

Step 9. Finally, set your pre-cut wick into the top of the wax, leaving about 3/8" - 1/2" exposed.

Step 10. Allow to dry completely before use. You can reuse the excess wax again by simply melting in the same pot.

*Clean up tips: Allow the wax to completely dry in the pot and use a knife to gently pick it out. If you find there's still residue, boil water in the pot and while still warm, wash with soap and water. If it still doesn't come out, melt the dry wax and wipe with a paper towel, then wash with soap and water.

Happy crafting Valentine's Day lovers! For more fun DIY ideas, head over to our website!

DIY Neon Ornament Wall Decals

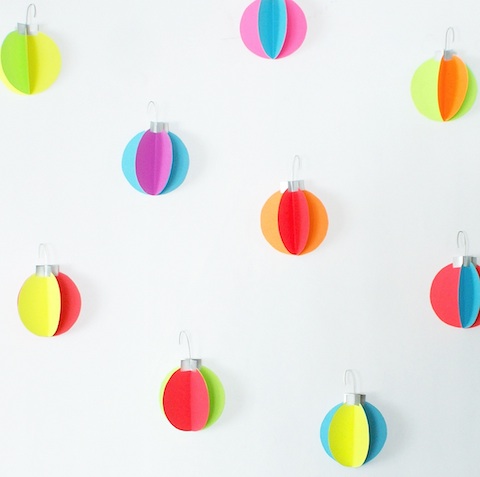
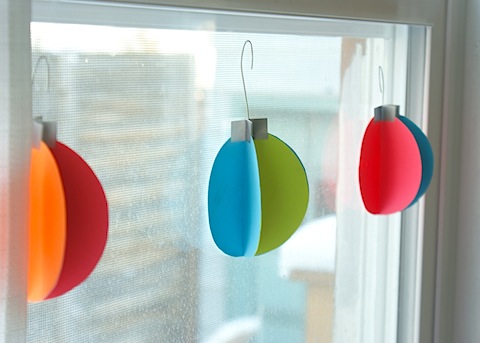
Christmas is literally almost here but there's still time to spread some cheer around your home! We're big fans of decorating with items already found around the house, and since we're paper geeks, this DIY is dear to our hearts. Looking back at 2012 it was definitely the year of neon. Remember the boys' second birthday party? And our new neon kids birthday party invitations? We thought we'd spend one last time this year indulging in our neon fix before another fabulous trend comes in 2013. These DIY neon ornament wall decals were inspired the hot air balloon decals made by Gosh and Golly shown in Sabrina's nursery. Full instructions below!

Materials:

Neon Paper, Silver Paper, Mug & pencil - or circle-cutter, Scissors, Glue stick, Silver wire or ornament hooks, Hot Glue + Gun, Glue dots or sticky-tac

How To:

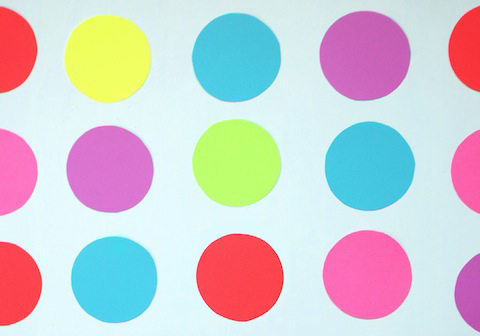
Step 1. Trace your circles onto sheets of colored paper and cut out with scissors. This part takes patience, unless you have a handy circle cutter at home. They come in all sizes, but 4" is a happy medium. As long as your circles are all the same size it will work.

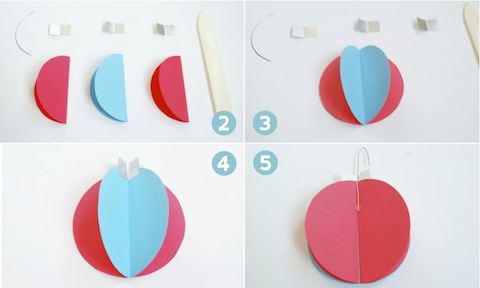
Step 2. Choose three colored circles and fold them in half.

Step 3. Glue the back of both sides of the center circle, then adhere to one side of the other two.

Step 4. Cut your silver paper into three 1" x .5" strips. Fold in half (hamburger style!) and glue one half of the back (hotdog style!) Then place at the top end of each of your folded circles.

Step 5. Cut your wire into 3" strips and fold the top .5" over with your finger. Or, if you have spare ornament hooks lying around, you can use those just as well. Place a small dab of hot glue on the back (flat side) of your paper ornament and set the flat end of the wire in place.

Step 6. When you're ready to display, place a dab of sticky-tac or a small glue dot on the back and you're done! Be careful when you remove the wall decals that you do not remove too quickly. With glue dots you can slowly peel of and rub the excess off with a finger, or twist to remove. Sticky-tac is probably more gentle on paint but the decals might not stay in place as long.

Happy crafting and Happy Holidays!

Handcrafted Holiday by Creativebug

Join Creativebug in their mission to take back the Handcrafted Holiday! Our friends and craft extraordinaire's are offering a weeks worth of FREE handcrafted holiday workshops! It's a great way to get involved with Creativebug and their fabulous DIY ideas. Plus, it makes a terrific gift for your crafty friends. A gift subscription comes with 1-6 months worth of drool-worthy DIY and who knows, maybe your friend will even invite you along for the fun. You can get detailed instructions on our pom pom garland, cake toppers, and photo booth backdrop, along with tons of other inspiring tutorials. Check out the free holiday workshops here!

DIY Holiday Tassel Garland

We pretty much love all holiday decor, but when it comes to our favorite, it's gotta come on a string. Garland is the best way to spruce up any room, especially during the holidays. With plaid fabrics popping up more and more this time of year, we couldn't wait to get crafty with it. This DIY does require a bit of handywork, but materials are very inexpensive. Instead of heading out to your local craft store, look in your own home for materials first! You might have an old flannel pillowcase that's missing it's match, or a plaid shirt you've outgrown from last year. And the twine can be replaced with ribbon or fishing line. The best part about this DIY holiday tassel garland? There's no-sewing required!

Drape these tiny tassels over your apartment-sized Christmas tree, or gather them up for a front seat on the mantle. Here's the how-to below!

Materials:

1/2 yard plaid fabric (or an old shirt or pillowcase), 1/8" gold ribbon, jute twine, scissors, ruler (optional)

How to:

Step 1. Cut your fabric into 4" x 6" pieces (This DIY can easily be made bigger! Just cut bigger rectangles of fabric)

Step 2. Cut your ribbon ahead of time. 5" strips is plenty to work with. Set the ribbon aside for later.

Step 3. From each end, cut 5 even slits, 2" long. This part doesn't have to be exact. It just gets rolled up, anyway.

Step 4. Pinch the bottom where the slits on both sides end and roll up.

Step 5. After rolling, pinch the ends of the fringe and fold together.

Step 6. Hold the tassel with one hand while grabbing the ribbon with another. Tie the ribbon around the neck of the tassel in a double knot, leaving a 3/4" loop. Cut any excess ribbon. (Friendly help encouraged here!)

Step 7. String your twine through the loops of your tassels and display!

These mini tassels can be made with any pattern, and can be hung just about anywhere! For more festive DIY ideas, visit our website!

DIY Color Block Holiday Cards

It's hard to believe Thanksgiving has passed and we're in the home stretch toward the holidays. Over the Thanksgiving weekend we were thankful for down time with family and friends, but itching to get decorating and DIY-ing for what's next. This can be a hectic time of year, so we're all about keeping things simple. This DIY Color Block Holiday Card project is a simple and inexpensive way to send cheer to your loved ones. And, you most likely have the majority of the supplies at home. It was inspired by our Color Block Kids Party Invitation (also available in pinks!) made for the boys' 2nd birthday party earlier this year, but we also have a new Color Block Holiday Photo Card with convenient customization. With some quick snips of colored tissue paper, you can recreate this bold typeface design into a one-of-a-kind Christmas card. Instructions below!

Materials needed:

Tissue Paper - We used green and red, but any combination would work! Just one sheet of each color will be plenty.

Blank Cards or Card Stock paper - Most craft stores sell 5" x 7" blank cards and matching envelopes, or you can cut a 10" x 7" sheet of card stock and fold in half. Use some spare envelopes or buy some from the craft store as well.

Bone Folder - For trouble-free folding!

Glue Stick - Make sure the glue stick is new - or retains its moisture. If it's too sticky you will have trouble working with the tissue. Also be sure it dries clear.

Scissors - The sharper, the better! Cutting tissue paper is tricky because the paper is very delicate. Sharp scissors will make cutting a breeze.

Craft Knife (optional) - Some people are more comfortable cutting small pieces with a craft knife. Just be sure it's super sharp, to get a clean cut of tissue paper.

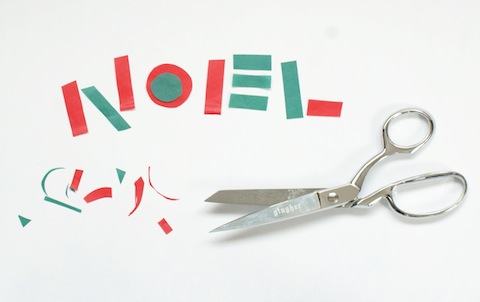
Step 1: Using just a small corner of tissue, start by cutting your shapes. For "Noel" each vertical line was about 2" x 1/4" and each horizontal line was about 1" x 1/4" but we say, the more imperfections the better.

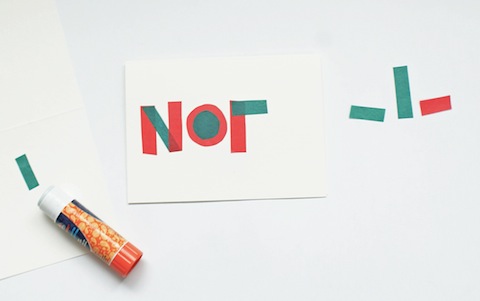
Step 2: Glue your shapes onto your card, one at a time. This step can be frustrating, so bring on the patience. A nice, new, moist glue stick will be a tremendous help. We suggest using a blank piece of paper as a gluing surface. Gently (and we mean ever-so-softly) apply glue to one side of the tissue <insert frustrations here> It will be ok, just be gentle. Lay your piece of tissue down on the card and smooth with a glue-free finger. What we like best about the look of this DIY is the overlapping of colors. You can just apply glue directly on the card, then lay the tissue on top, but you will see the dried glue surrounding the shapes.

All done! You can get creative with this DIY and come up with any shapes you like. Our Color Block Kids Party Invitation had some fun arrows and scalloped edging, so we definitely wanted to include that in our cards.

We'd love to see the cards you come up with. Be sure to share any pictures on our Facebook page!

Happy crafting!

For more fun DIY ideas, visit our website!

DIY Thanksgiving: 5 Uses for Patterned Papers

Thanksgiving happens to be one of the favorite holidays among our team. Something about the cold air, gathering of families, and cooking together warms our hearts. While it's meant to be a time to reflect and give thanks, sometimes the preoccupation with the perfect holiday decor takes its toll. We're flooded with images of the fanciest table tops and gourmet recipes, but not all of us have the time (or budget!) to go all-out for the big feast. If you are the lucky one hosting Thanksgiving this year and are looking for affordable, simple, and festive decor, our patterned papers are a great go-to. We've come up with 5 uses for patterned papers that you can make in no time, and just in time for your guests to arrive. Shown here is our classic Marquee pattern, but there are lots to choose from!
1. Patterned Paper Jar Lids: You may have to fight for the leftovers, but sending friends and family members home with equal portions is a great way to share. Or, send them home with a hand-made treat as a thanks-for-coming favor. Simply cut a 4.5" square (or 5.5" square for wide-mouth jars) of patterned paper. Place the metal lid cover over the jar, then set your paper square on top. Twist the screw-on cap over the paper and lid to ensure closure. You may need to press hard!

2. Patterned Paper Napkin Rings: The possibilities are endless here. With a starter shape of 1.5" x 7" you can double the napkin ring as a personalized place card by gluing a .5" x 2" piece of paper on top. Or, take a 2.5" x 8" strip, cut out a leaf shape on one end, and trim the other end to 1" wide. Apply glue to 1/2" of one side and seal under the other.

3. Patterned Paper Thankful Chain: Keep the kids busy or adults guessing with this paper Thankful Chain! It's a new twist on the Christmas paper chain, with a whole new meaning. Cut 1.5" x 7" strips of paper and ask your guests write a few things they are thankful for on one side. Glue one end of the strip under the other end and repeat, looping the next strip through your first chain. When assembled, hang above the table for decor or spread around the table. Throughout the meal you (or the kids) can read each strip and reflect - make it a game and guess who said what!

4. Patterned Paper drink flags/stirrers: Every party needs some of these. Celebrate the autumn weather by cutting your flags into leaf shapes. Start with a 1.5" x 5" strip and fold in half. Open it back up, draw your shape on one half of the blank side of the paper, fold in half again, then cut out. Reverse the fold, apply glue to one side, place a skewer or straw in the center then hold to adhere.

5. Patterned Paper Place Card Holders: Thanks to Martha Stewart for this idea, keep things simple with a folded paper place card holder. We scaled ours down to a 3" x 3.75" piece of paper, folded in half, then folded in half again, creating three 3/4" folds. Unfold the paper, and reverse one fold, making an "M" shape. Place your place card inside and voila!

For more pretty patterned paper ideas and DIY crafts, visit our website here!