We got super into this animal envelope DIY by Mer Mag Blog. Super easy, cheap, & adorable. Stuff them with candy for the kids, or fill it with a card for your sweetie! Head to Mer Mag for the full tutorial!
Valentines Day Gift Guide: For Him
1. Iphone 5 USB cable, 2. Men's facial elixer, 3. Hair of the dog flask, 4. Wool felt necktie (15% off before 2/14/14 with code: luckyvalentines), 5. iphone 5 case, 6. you're a stud card See more ideas on our Valentines Day gifts for him board!
Hello!Lucky & Couple Giveaway!
Read below for instructions on how to enter to win two Couples tee's, a Hello!lucky card, & free app stickers! Valentines Day is one of our all time favorite Holidays because it instigates positive language & reassurance. What we love most about the app Couple is that it allows you to do this on a daily basis. Whether you’re in a long distance relationship, have conflicting schedules, or just enjoy having a common place to connect, this app makes sharing sweet nothing’s a piece of cake. It’s the ultimate share app with Couple, creating archived moments including videos, voice messages, photos with filters, and drawings. It offers facetime, shared to-do lists, an interactive calendar, and even the option to share locations. It’s all the apps you use with your honey rolled into one. Learn more about them here! We thought we would couple up with them this Valentines Day to offer their loyal customers a tangible way to say I love you, and share their approach with our fans! Contest guidelines below!
Enter to win a Hello!lucky Valentine, two Couple tee’s, and a few Couple stickers to use on their FREE app by commenting on your favorite Hello!lucky card featured on their blog here. Then be sure to “like” Hello!lucky & Couple on facebook between February 3rd- 8th. The 5 winners will then be chosen at random. It’s easy to enter, just comment on the post found here stating your favorite featured card, and like Hello!lucky and Couple on Facebook.
*Additional contest information here.
DIY: I Lava you pop-up card
We wanted to create a simple & fun (and gender neutral) Valentines Day card the kids would be excited about! Using few materials, our free printables, and following the steps below, you can create an I lava You Pop-up Card of your own! Mess around with different color card stock & glitter to make it unique! Happy crafting! MATERIALS
- 8.5 x 11 sheet of blue or green card stock
- 8.5 x 11 sheet brown card stock
- 8.5 x 11 sheet white card stock
- Printer
- Scissors, or a craft knife, ruler and cutting mat
- Gluestick
- Liquid glue & brush
- Bone folder (optional)
- Pink and orange glitter (optional)
HOW TO
1. Print the background template on the green cardstock, the volcano on brown cardstock, and the cloud template on white cardstock.
Note: you only need one volcano, & one cloud per card. We included multiples in case you would like to make more than one, in which case you will need to print additional background templates
2. Cut out and fold the blue cardstock: cut off 1/2 inch along the solid grey line; cut out the circle and around the palm trees. Fold along the light grey lines (use a bone folder if desired) to form a diamond shape with a glue tab. Glue & add glitter to the asteroid (we used orange).
3. Cut out the volcano, crossbar, and the cloud. Fold the glue tabs as indicated by the light grey lines and cut small slits in the volcano and cross bar along the solid black lines. Glue & add glitter to the top of the volcano to represent lava (we used pink). 4. Glue the cloud to the back of volcano. 5. Slot the cross tab into the volcano and glue the tabs to the background. 6. Glue the volcanos tabs matching the letters as shown in the diagram.
Note: line cut out card with diagram from original print-out. 7. Glue the tab of the background template to complete the diamond shape. 8. Flatten & press down firmly until glue dries. And there you have it!
Looking for more DIY projects and free downloads? Head over to our site here.
Hello!Lucky Loves Love
We love celebrating all holidays around the studio, but Valentine's Day is the one we get most excited about. This year we decided to do a 'secret valentine' exchange, we all drew names and brought in a sweet little something for the co-worker we picked. Of course the creative packaging, original presentations, and handmade gifts were so very Hello!Lucky. Did you see how all out we went for Christmas? Here are some scenes from Valentine's Day around the studio. Enjoy!
Lia brought in chocolate covered strawberries for everyone.
Lillian gifted Holly with this amazing package of candy. Holly is the biggest candy lover among us and is the go to person when we need a little sugar fix, she's always holding.
How adorable is this hand stitched bag Lia made Stewey and filled with a seed bomb?
Heather's amazing package to Shayna. What was in there? Girl Scout cookies!!
Lyndsey gave Christina this sweet little rose bush in a heart container and some delicious chocolate.
The note from Heather's package to Shayna. And Shayna looking adorable holding her cookie from Stewey - who, like the sweet little cupid he is, brought in his famous 'Stewey's Chewies' for everyone in the studio.
We hope you had a sweet Valentine's Day! xoxox
Valentine's Cards for Meals on Wheels
Our employees love to get together after hours for holiday craft nights, especially if they benefit a good cause. Meals on Wheels has been providing meals to seniors since 1940 and has evolved into an extraordinary foundation for fighting hunger. For holidays the good people like to deliver cards to the seniors as a gift of love, and this year we decided to join in. All of our cards were handmade with love for the people supported by Meals on Wheels, and to know they were going to a good home was a beautiful thought.
As stationers, paper is our primary medium, so coming up with materials was a cinch. We try to save as many scraps as we can, knowing that they could come in handy for a card-making craft night.
Our team is the best at coming up with witty one-liners. We loved this "I a door you" card.
To support the Meals on Wheels Association of America, visit their website!
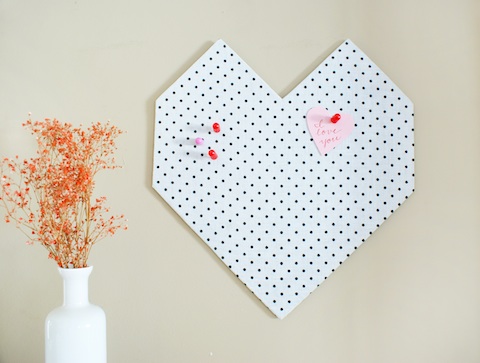
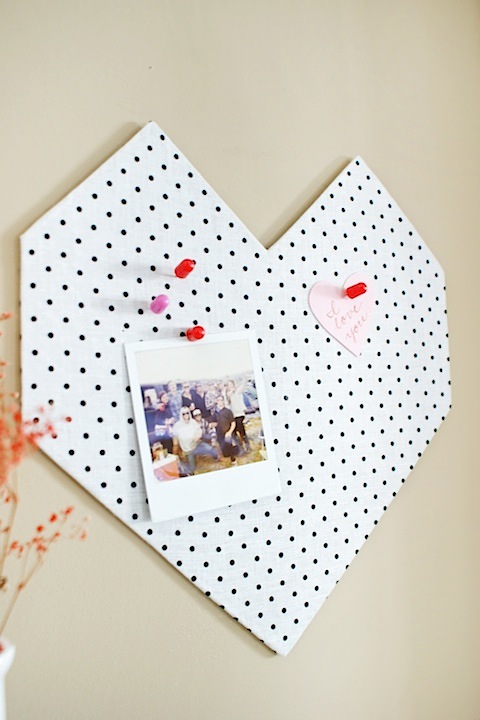
DIY Valentine's Day Geo Heart Bulletin
Our next DIY doesn't just have to make an appearance for Valentine's Day. It's a nice addition to any home decor and it's sleek shape would look great year round! Geometric shapes are trending around the blogosphere lately, and we're really into the look. This DIY Geo Heart Bulletin is fun and functional, and the perfect way to show your home some love. Instructions below!
Materials:
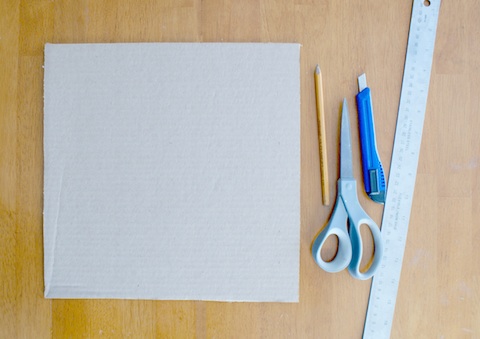
12" x 12" cardboard* (recycle from an old box!), Pencil, Box cutter or sharp scissors, Ruler, 18" x 18" fabric, Spray adhesive, Hot Glue and gun, Foamfast hanger or command hook for hanging
*Make sure your cardboard is 1/4" thick, so pins don't poke through to the back
Instructions:
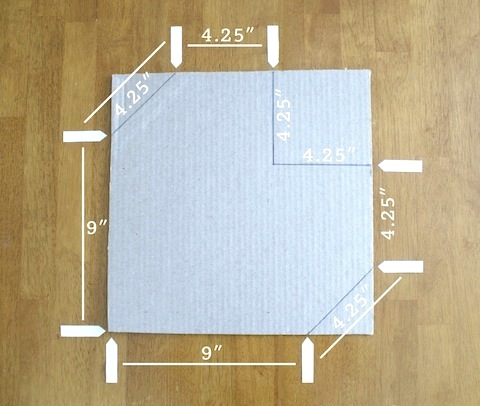
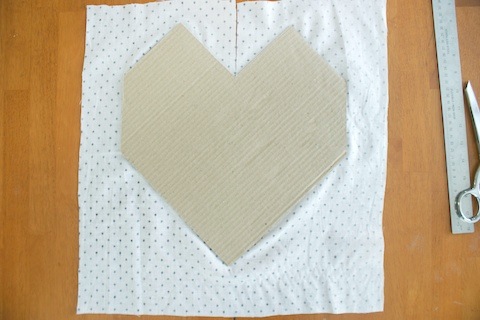
Step 1. Measure your heart shape. The two long sides are 9", the rest are 4.25". See below for reference.
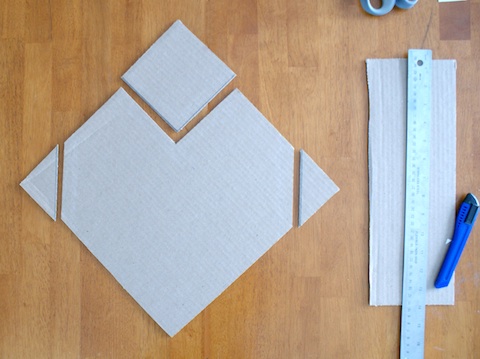
Step 2. Use your box cutter or scissors to cut out your shape. Discard scraps. Be sure you use a scrap of cardboard or a magazine underneath to prevent cutting your work surface!
Step 3. Apply a thin, even layer of spray adhesive to one side of the heart and smooth on the fabric. Use your fingers to smooth any bubbles. Use scissors to make a slit directly above the point of the heart.
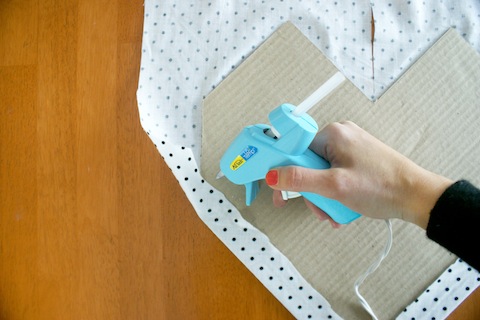
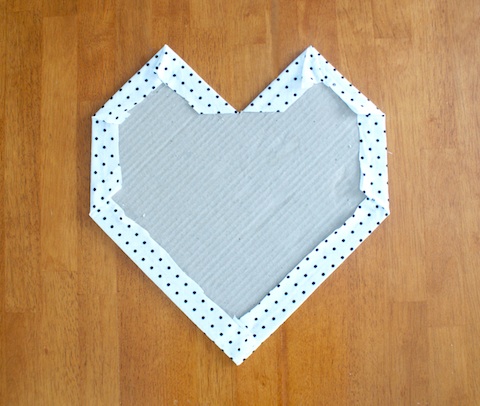
Step 4. Fold the edges of fabric over to the back side. Secure with hot glue, about 1/2" from the edge. Snip any excess fabric off and discard.
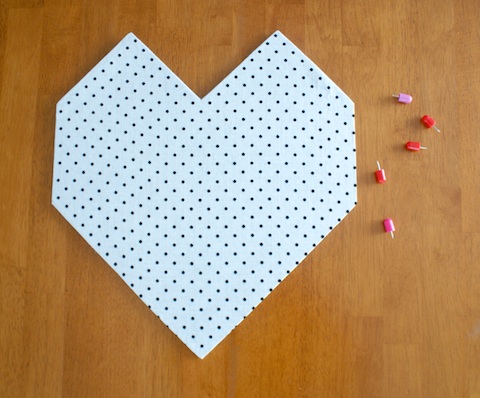
Step 5. Voila! These Foamfast hangers or command strips will work well for hanging.
Leave your loved ones a special note on Valentine's Day or use it to pin up special photos. It's lightweight and easy to make!
For more festive DIY ideas, visit our website!
Valentine's Day Discount
It's almost Valentine's Day! Are you feeling the love yet? Well you can start today because we're offering 10% off all Valentine's Day cards and gifts. From now until February 13 you can send your family and friends some love for less with tons of letterpress cards to choose from. If you can't get your list together on time, be sure to get your hands on our free printable Valentine's Day cards for a quick hello. Check out our newest love and friendship cards here, and enter the code SMITTEN2013 at checkout for your discount!
DIY Valentine's Day Candles
Valentine's Day is definitely one of our favorite holidays to celebrate. Christmas, Thanksgiving, Fourth of July, they're all a blast, but when we're given the thumbs up to decorate with all the pinks, fuchsias and reds we wish, we're overjoyed. Our Love/Valentine's card collection is one of our strongest (especially with the latest additions by Lisa Congdon) and our Big Day Pinterest Inspiration Board is overflowing with hearts and love. But it's really gearing up for the big 2/14 that get's us in the mood. The beauty of this DIY (found and inspired by the ladies at Design Mom!) is that you can use any color of wax, and cut in any shape you want, but we're going all out in hearts and XO's.
Materials: Colored candles or wax, candle wick, toothpicks, double-boiler or two pots, wax paper, small cookie cutters or knife
How To: Step 1. Using a double-boiler melt your wax. If you don't have a double-boiler, just stack one pot on top of anther. Add a little water to the bottom pot and bring to a boil. Rest the other pot on top (without touching the water).
*Try recycling those used or unwanted holiday candles for this project. It's a shame tossing out the bottom half of those delicious apple-pie scented wonders, so throw them in a pot and melt it down for a new facelift. Most wax will melt down well but we recommend you steer clear of beeswax.
Step 2. While your wax is melting, cover a flat work surface with wax paper, and snip your candle wick to about 1" stems. The length will depend on the shape so check your cookie-cutters in advance. You want the wick to reach about 1/3 or half of the way down your shape.
Step 3. After your wax is completely melted, allow to cool. *If you're using a recycled candle, remove any wick or wick stands.
Step 4. Once the wax starts to stick to the side of the pot, or a thin layer of skin forms at the top, you're ready to pour.
Step 5. Carefully pour the wax onto your covered work surface. You want to aim for 1/8 "- 1/4" thickness.
Step 6. Now you need to let the wax cool for about a minute before you start cutting your shapes. You can test the wax before cutting by pressing your finger into a corner. It should be firm but still hold the shape of your finger. You will need to pay close attention so that the wax does not get too firm before you cut.
Step 7. Cut your shapes out of the wax with your cookie cutter and remove excess wax.
Step 8. Carefully drive a toothpick up the center of the wax (about 1/2" - 1" depending).
Step 9. Finally, set your pre-cut wick into the top of the wax, leaving about 3/8" - 1/2" exposed.
Step 10. Allow to dry completely before use. You can reuse the excess wax again by simply melting in the same pot.
*Clean up tips: Allow the wax to completely dry in the pot and use a knife to gently pick it out. If you find there's still residue, boil water in the pot and while still warm, wash with soap and water. If it still doesn't come out, melt the dry wax and wipe with a paper towel, then wash with soap and water.
Happy crafting Valentine's Day lovers! For more fun DIY ideas, head over to our website!
New! Free Printable Valentine's Day Cards
Last year we released our first free printable Valentine's Day cards on the blog and they were a huge hit! Lots of readers downloaded the cards and we were really feeling the love. This year we're vamping things up with our newer designs, just for you! Simply visit the free printable page on our website and click each product to download. There you will also have access to last year's cards, so there are plenty to choose from.
Each download is formatted to fit four cards on an 8.5 x 11" paper, so simply print on a home computer, cut, sign, and send! We recommend using a thicker card stock for a more durable card. They're great for classrooms, coworkers, or even sending a little love to your honey.
When Valentine's Day comes you'll be well prepared to spread your love with these witty wonders. To download all cards, click here!
New! Lisa Congdon for Hello!Lucky
When Lisa Congdon agreed to do a line of cards with us for 2013 we were beyond thrilled. We love Lisa's colorful illustrations, hand lettering, and imaginative renderings of nature and animals. We think her cards are perfect for any occasion but we're especially excited to launch the line just in time for Valentine's Day. Check out these images of her studio (Taken by Victoria Smith of SF Girl by Bay). No wonder her designs are so bright and cheerful, her space is an inspiration in itself!
We asked Lisa a few questions about her process and what she has in store for 2013:
What is your process like? Does it change with every project?
It does depend. Sometimes I draw things straight from my brain, especially if I am making a simple drawing without much nuance. The cards I did for Hello!Lucky were all things I drew that just came from my imagination. When I paint or draw something more realistic or complex, I find images (photographs) to use as reference, so I can get the proportions and lighting right. Typically, especially in my commissioned illustration work, I make sketches first. And then I move to making the final artwork.
I always start by drawing things by hand. Always. None of my work starts as digital work, even if it ends up as digital work. In the case of the card line for Hello Lucky, I drew the designs in pen on paper, then scanned them and turned them into vector so they could be reproduced as plates for letterpress printing.
What was your inspiration for this line?
I remember I got really simple, straightforward art direction for this line: create designs in your own style around the theme of love. So I brainstormed different sayings that would lend themselves easily to colorful illustration: things like You are My Sunshine, You are my Queen, You Light up My Life. It was really as simple as that! I really enjoyed it!
Do you have a favorite in the collection or do you love them all equally?
I think You Light Up My Life is my favorite! But I like them all.
(My Sunshine, Sailboat Love, Falling for You, Lighthouse)
We loved your 365 days of hand lettering project you did for 2012. Is there a favorite quote/motto you have from that project?
One of my favorites is: "Leap and the net will appear," which John Burroughs is quoted as saying. It's the motto for many things in my life.
What are you currently working on or what's your latest release? Is there a 365 day project for 2013?
I just launched a weekly project for 2013 with Maria Popova of Brain Pickings called The Reconstructionists. It's a a yearlong celebration of remarkable women who have changed the way we see the world. Every Monday in 2013, we'll publish an illustrated portrait (by me) of one trailblazing woman (artist, scientist, writer), along with a hand-lettered quote that captures her spirit and a short micro-essay (by Maria) about her life and legacy. I'm pretty excited about it!
Thank you Lisa for being such an inspiration and so much fun to work with! Visit Lisa's website for more lovely illustrations and follow along with her blog here. Shop Lisa's new collection for H!L here!
Product Photos by Edyta Szyszlo Photography
Portrait of Lisa by Leslie Sophia Lindell Photography
New Designs and Heart Inspired Wedding Suites
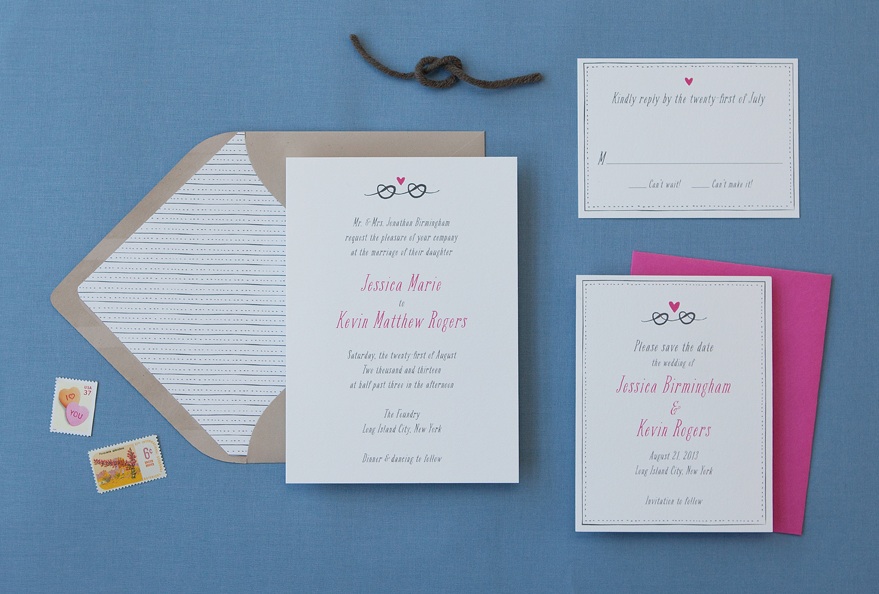
Valentine's Day is right around the corner! In just a few days we will be showering our loved ones with handmade notes and heart-shaped treats. While brainstorming ideas for our valentines, we looked to our wedding stationery for inspiration. Lots of our invitations include hearts in the design, so we are excited to show them all together. We also figured now would be the perfect time to release our newest wedding invitation suites! Love Knot ties together perfectly (pun intended!) with the whimsical hand drawn details and bright fuchsia accents. These colors are customizable so you can match your wedding details!
Pixel Perfect brings out the gamer in all of us. Inspired by 8-bit design, this suite brings high score to a whole new level.
Sweetheart, inspired by 1950s retro paraphernalia, has lots of love to share. Not to mention, polka dots are very chic right now!
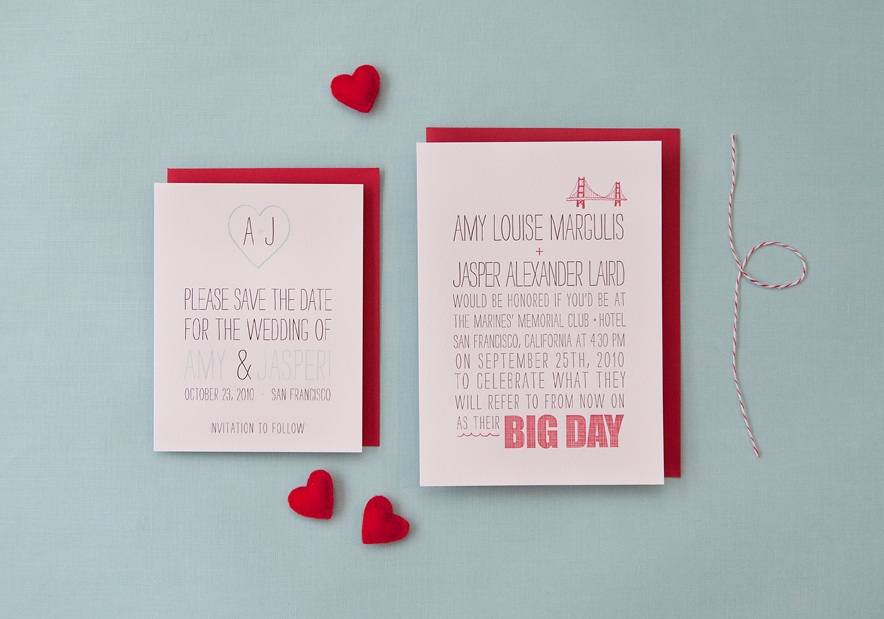 Of course we have to include the Big Day save the date. The heart icon is easy to recreate throughout your wedding just like Katie and Ashley did in their wedding.
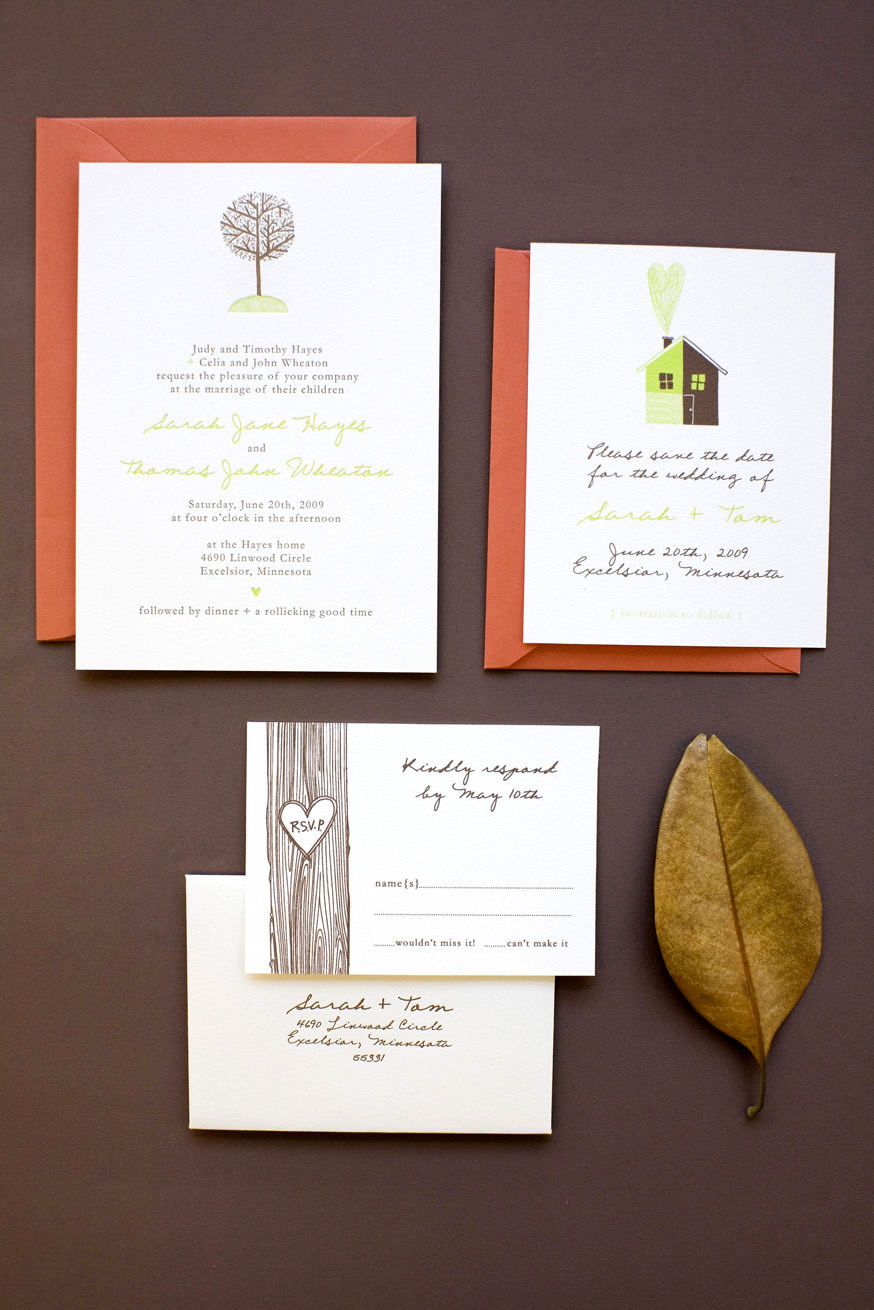 It's Mother Theresa that said it best, "Love begins at home" so we couldn't imagine a better invitation that says just that. Our Home Sweet Home invitation suite designed by the unstoppable Julia Rothman will have you cozying on up to your honey in no time.
Photos by Edyta Szyszlo
Porcelain Valentines
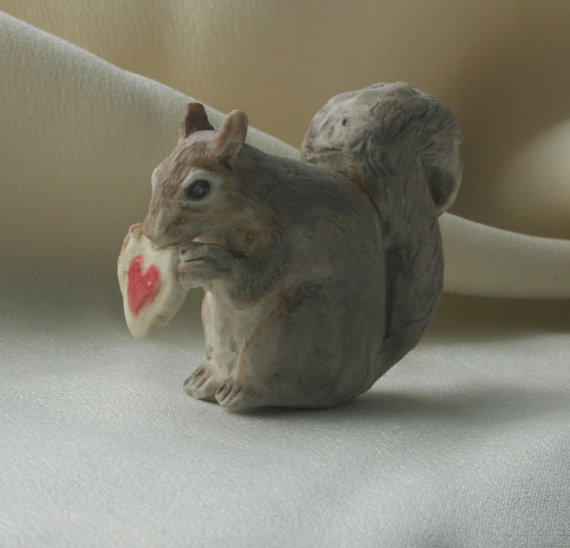
Happy Rustic Farm week everyone! To wrap up the end of our country chic themed posts, we want to share the artistic creations by our friend and colleague Corie. Every week we look forward to her Lucky Friday posts, and always get a kick out of her cheeky greeting card descriptions. Corie carries on her humor in her own art, too! Her etsy shop coriejcole is filled with miniature porcelain figurines, that are equally as hilarious as her posts. We're loving her Gray Squirrel Eating Heart-Shaped Cookie, especially because Valentine's Day is right around the corner!
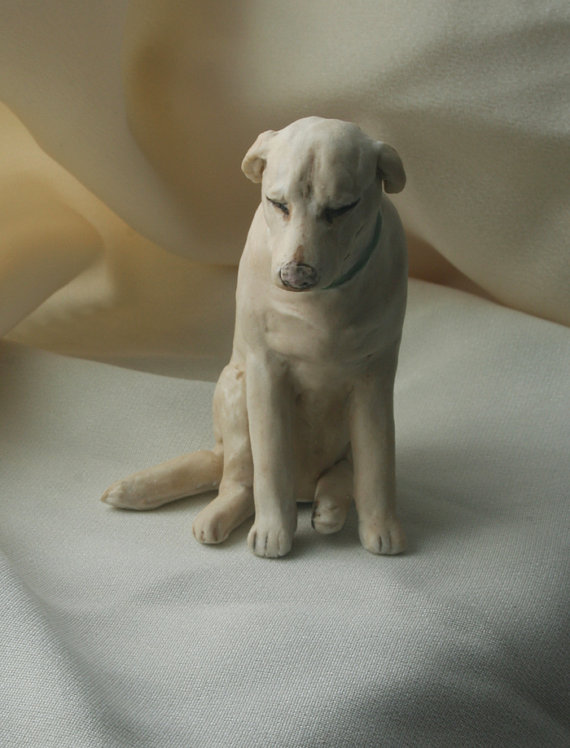
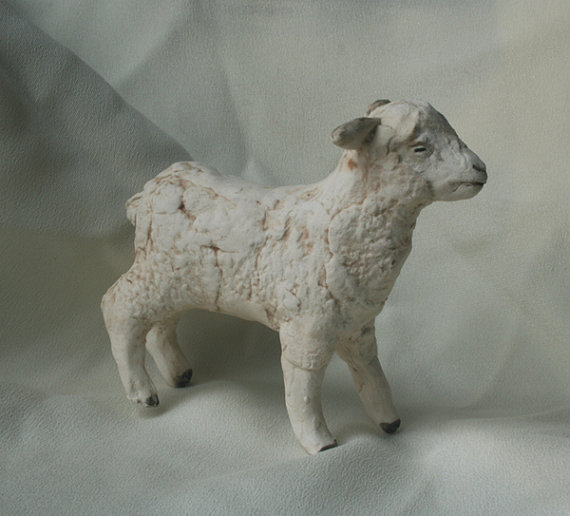 Porcelain Lamb (above) and Denver the Guilty Dog (below)
 Check out Corie's etsy shop here!
Lucky Friday # 48, We Belong
 Hello all you lucky folks out there! This is the 48th edition of our Lucky Friday Giveaway! Each Friday we feature one of our letterpress greeting cards. We’ll choose THREE LUCKY WINNERS to get a free card. Post a comment by 12 p.m. PST the following Thursday, and we’ll announce the winners on the following Friday!
The three winners from last week are (drum roll, please): Cindy, Stacy and Terri! We’ll contact you next week to arrange sending your You're Striking card!
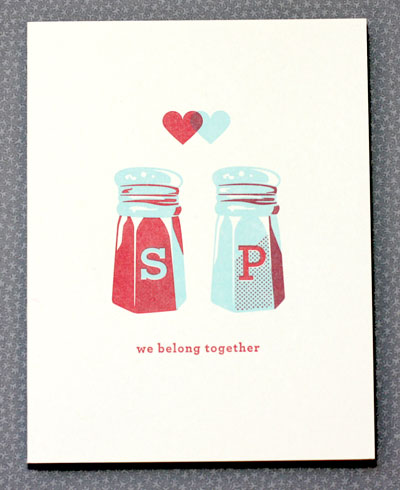
Design: We Belong Artist: Eunice Moyle Inspiration: Our salty tongues pepper our design dialogue with pithy one-liners, and somehow the perfect balance of savor and spice emerged. Who to send it to: Your better half, your perfect match or perfect opposite. Ideas we scrapped in favor of this one: The alternate text for the card read: "Come in for two shakes and I'll show you what I keep in my cellar." Favorite detail: The simplicity, really. Sweet and simple. Or salty, rather. Why Letterpress? The subtle and simple design calls for the restraint of a limited palette.
Don’t forget to post your comment and tune in next week, same time, different stationery, to see if you’ve won!
Lucky Friday # 46, Let's Be Frank

Hello all you lucky folks out there! This is the 46th edition of our Lucky Friday Giveaway! Each Friday we feature one of our letterpress greeting cards. We’ll choose THREE LUCKY WINNERS to get a free card. Post a comment by 12 p.m. PST the following Thursday, and we’ll announce the winners on the following Friday!
The three winners from last week are (drum roll, please): Ruth, Lisa and Heather! We’ll contact you next week to arrange sending your Warm Things card!
Design: Let's Be Frank Artist: Eunice Moyle Inspiration: We mustard up all our creative juices while playing ketchup on a deadline. Feeling saucy, we wanted a red-hot Valentine's card that everyone would relish. Who to send it to: Anyone named Frank, Oscar or Mayer, or any adorable little brat. Ideas we scrapped in favor of this one: Though we don't want to knock the knock-knock knackwurst joke card, writing chorizo jokes was a chore, brat jokes are the wurst, and the mortadella jokes left us mortified. Favorite detail: We're still snickering at the little casing end. Why letterpress? Our list of links between fine pressmanship and fine sausage is more than a foot long.
Don’t forget to post your comment and tune in next week, same time, different stationery, to see if you’ve won!
Wishing you something sweet and petite for Valentine's Weekend


Love the cherry blossom petit fours, epecially! They were featured on Martha Stewart a bit ago, but we thought these pretty pink pastries needed a review.
Felted, Crocheted Animals
Prepare yourself for some intense cuteness... we thought we'd indulge ourselves a little for Valentine's Day. We have a nostalgic weakness for crocheted stuffed animals. But then, the felted ones are a double-whammy of adorability (pardon the new word.)

Oh heavens! So cute! We have to share our Beaver Love for Valentine's Day.


A chenile duckie! We can't decide which is our favorite. But how great are these for a baby shower, or for a new arrival?
MillieFern on Etsy made these— they are some of the best we've seen. And of course, I bet you might find or commission a sock monkey.
Heart Cake

Speaking of Valentine's day treats, how sweet is this Heart Cake?!
Click here for the tutorial. Via Swiss Miss.
DIY Hello!Lucky Valentines on Gifts.com!
Gifts.com featured a super fun Hello!Lucky DIY project on their Gift Rap blog! Along with fun instructional videos (complete with bluegrass music!), they include a printable PDF version of several of our Valentines cards so that you can print and personalize them to your heart's content!
Our Guess Who owl is one of six Valentine card designs to choose from.

Happy crafting!
Valentine's Cup of Tea
Esther Aart's darling new Valentine card, Cup of Tea made us think of the beautiful, handmade ceramic work of Sam Chung.


Love the cloud cups. And the graphic style. And the gleaming porcelain.
If you'd like to see more of Sam's work, look here.
And there are more brand new Valentine's day card designs to choose from, here.


