
We got super into this animal envelope DIY by Mer Mag Blog. Super easy, cheap, & adorable. Stuff them with candy for the kids, or fill it with a card for your sweetie! Head to Mer Mag for the full tutorial!
Family Photo Shoot with Leah McCormick
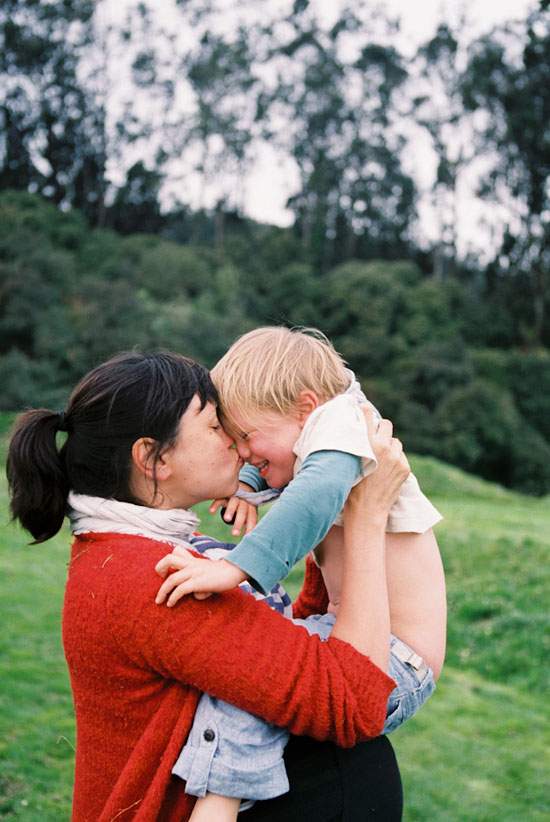 Just before Imogen was born, we were lucky enough to squeeze in a family photo shoot with the AMAZING Leah McCormick...
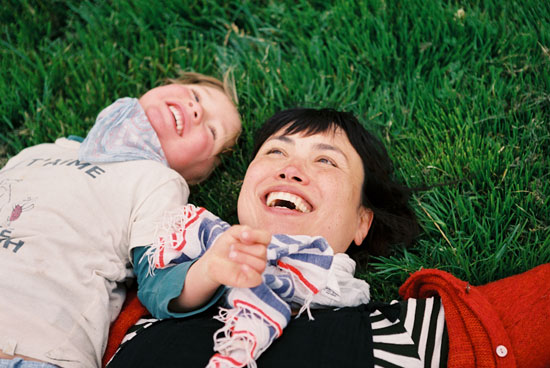
We just got the photos back this week, and I couldn't resist sharing them - Leah did such a fabulous job capturing our family (and all accompanying silliness)...
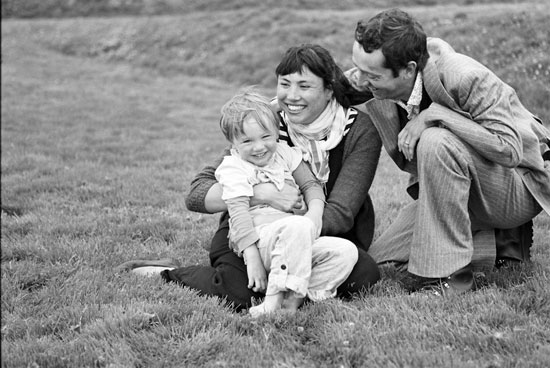
The shoot was so relaxed and fun that even my husband Daniel, who is usually a bit grumbly about being made to participate in such shenanigans, had a great time - and was super pleased with the results...
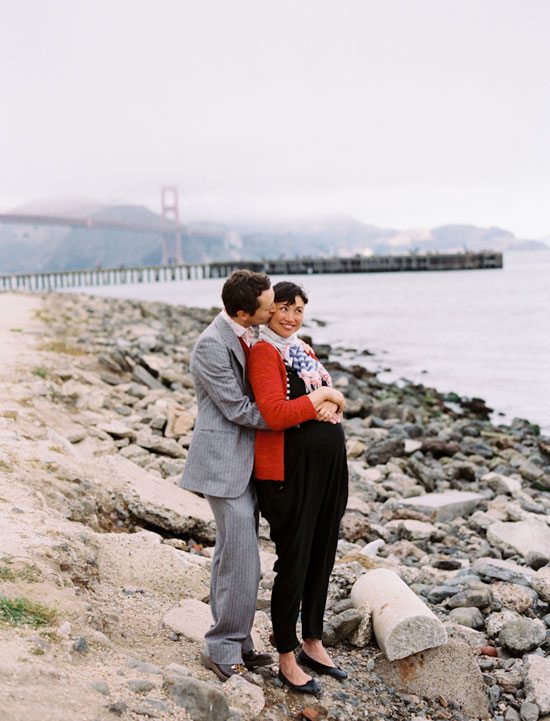
Love her sense of composition and the way she captures light and color!
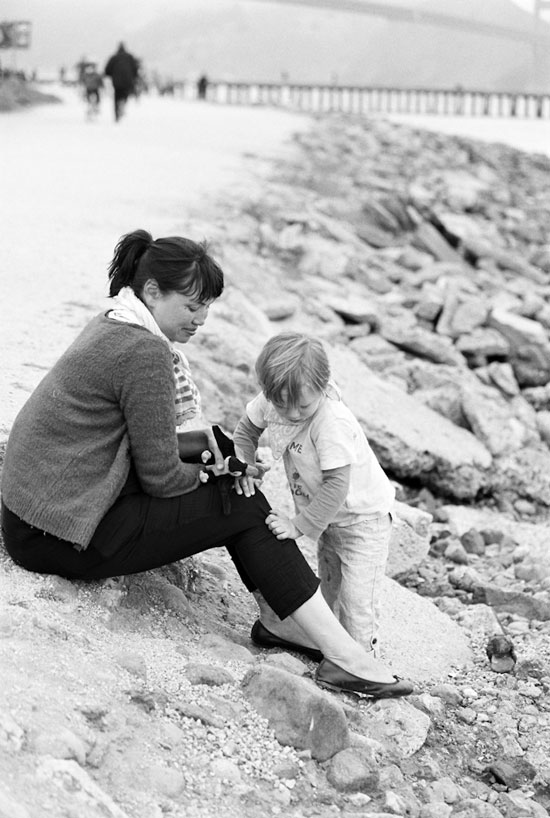
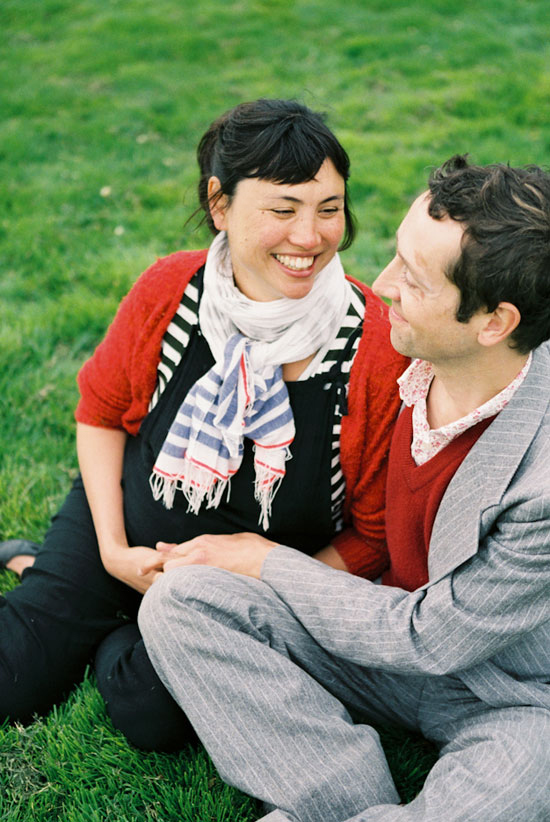
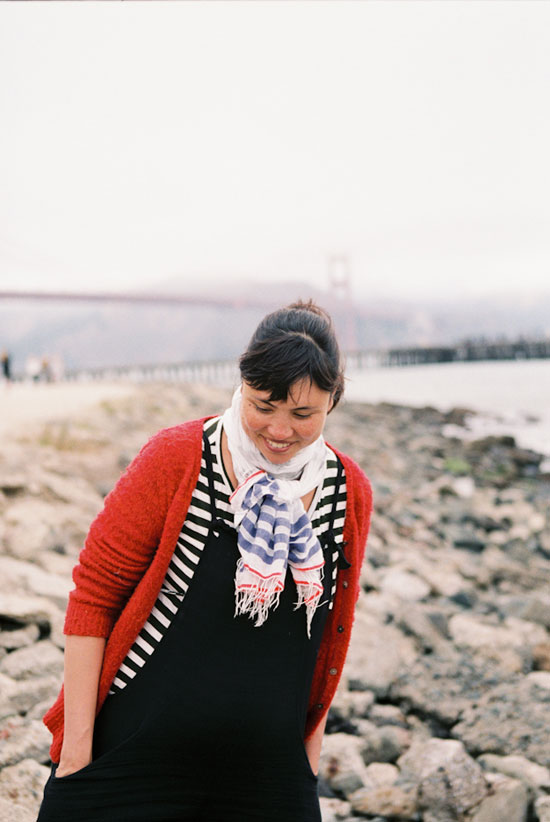
You would never guess that I was incredibly exhausted and quite whale-ish at the time!
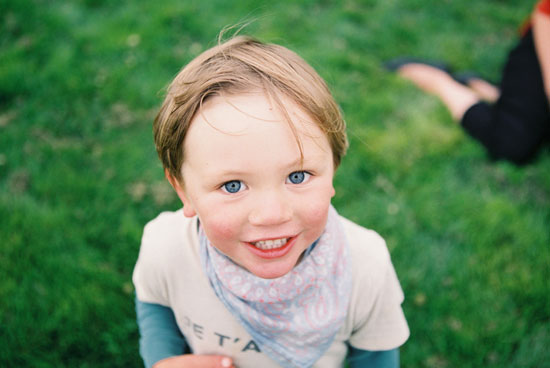
Leah does beautiful wedding photography as well - check out her work at www.byleah.com!
Filex & Milou
") I have two dogs and thus can tell you, with some authority, that a truly fabulous dog bed (and by that I mean one that isn't varying shades of neutral or plain ol' preppy striped) is tough to find. Needless to say, I was super excited to discover Felix & Milou, a brand new dog bed line by Tove Jakobsson -huzzah! Finally, something with a little style!
I have two dogs and thus can tell you, with some authority, that a truly fabulous dog bed (and by that I mean one that isn't varying shades of neutral or plain ol' preppy striped) is tough to find. Needless to say, I was super excited to discover Felix & Milou, a brand new dog bed line by Tove Jakobsson -huzzah! Finally, something with a little style!

Her cushions are all made by hand from lovely graphic Swedish fabrics. They're sized for a cat or small dog, hopefully soon, a bigger size to come! I fear poor Indy is getting the shaft, being more in the medium to large range. But wouldn't they make great floor cushions around a low table as well?

This is the one I purchased - a fabric by Cecilia Hall Åhlens that has a lovely Josef Frank vibe - beautifully made and adorable in person!
")
All the cushion covers are removable and washable. Check out the rest of her products here.
Handcrafted Holiday by Creativebug

Join Creativebug in their mission to take back the Handcrafted Holiday! Our friends and craft extraordinaire's are offering a weeks worth of FREE handcrafted holiday workshops! It's a great way to get involved with Creativebug and their fabulous DIY ideas. Plus, it makes a terrific gift for your crafty friends. A gift subscription comes with 1-6 months worth of drool-worthy DIY and who knows, maybe your friend will even invite you along for the fun. You can get detailed instructions on our pom pom garland, cake toppers, and photo booth backdrop, along with tons of other inspiring tutorials. Check out the free holiday workshops here!


Crafts, Cocktails, and Cake Toppers!

Remember our creativebug Video Shoot? Well after the release of our first two tutorial videos we've felt an enormous out pour of love from our fans and fans of creativebug. That's why we're thrilled to announce the Crafts, Cocktails, and Caketoppers event with creativebug at Chronicle Books! Sabrina and Eunice will be there giving hands on instructions for how to make your own cake topper, perfect for any event. The workshop (Thursday September 27th from 6-8) is totally free but space is limited so click the image above or RSVP here! Bring your friends or family members for a night full of fun with local craft connoisseurs. We'll see you there!
DIY: Silk-Screened Place Mats

For today's Handmade Weddings DIY project we're bringing you detailed instructions for our popular silk screened place mats! Whimsical and totally customizable, these kraft paper place mats work for both buffet-style or plated service. Place a charger and napkin on the mat (as shown) or have it double as a place card by writing guests’ names in the middle of the plate. If silk-screening feels out of your league, consider just photocopying them in black/white or on bright colored paper. The pattern is easy to make for a big wedding reception or even for a small dinner party.
Materials
• Custom screens • One hundred fifty 12-×-18-inch sheets kraft paper, such as Borden & Riley #840 Kraft Pad
Tools • Place Mat template • Newsprint • Set of 2 hinge clamps • A wood board at least 1/2-inch thick and several inches wider and longer than the silk-screen frame • Four 1/2-inch long screw • Screwdriver • A small prop, such as an art eraser • 2-inch wide masking tape • Water-based screen-printing ink in white • Squeegee • Chipboard or cardboard scraps

How to 1. Make your screens. Send the Place Mat template files to a screen printer to have screens made, or make them with a home screen-making kit, following the manufacturer’s instructions.
2. Prepare your silk-screening station (figure 1), but do not outline your screen frame with a Sharpie. Position your test paper; use a spare sheet from your kraft pad.
3. Make a test print. With the frame in the down position, squeeze or spoon a line of the printing ink (approximately 1 tablespoon) along the top edge of the screen (figure 2). Take your squeegee and drag the ink from the top edge toward you, across the design area, applying pressure as you pull (figure 3). Carefully raise the frame to the up position and view the print. Make any adjustments to the placement of the paper (moving your registration tape accordingly) and amount of ink. Using your spoon, scrape excess ink from the squeegee back onto the top area of the screen, adding ink if necessary. Make additional test prints until you are happy with the quality and placement of the print. Build up the masking-tape marks with chipboard or cardboard scraps so that the paper won’t shift when you are printing (figure 4).
4. Print the rest of your place mats. Lay them out to dry completely.
Happy crafting!
For more DIY ideas, visit our website here!
Studio Valentine's Day Craft Night

We love crafting up a storm around here and Valentine's Day offers a great excuse for us to pull out all of the paper, washi tape, heart stamps, and other craft supplies we have laying around the studio. We were joined by the fabulous ladies from Alison Events and our new friend, wedding photographer Allan Zepeda. Here are a few shots from the crafting extravaganza!

Lia's valentine matched her outfit.

Anna B.'s sweet dog silhouette valentine.

Alyssa from Alison Events made a sweet paper couple.

Lyndsey's adorable banner.
We hope you have a sweet Valentine's Day!!
Craft inspiration from Felt & Wire

Calling all crafters! Felt and Wire is an excellent source for sprucing up your paper products and gifts. We piled a few of our favorites, but there are endless choices! Check out their shop here.
(above: Paperphine twine)

Paperfinger stamp

Top Hat tape
Jude's French flash cards
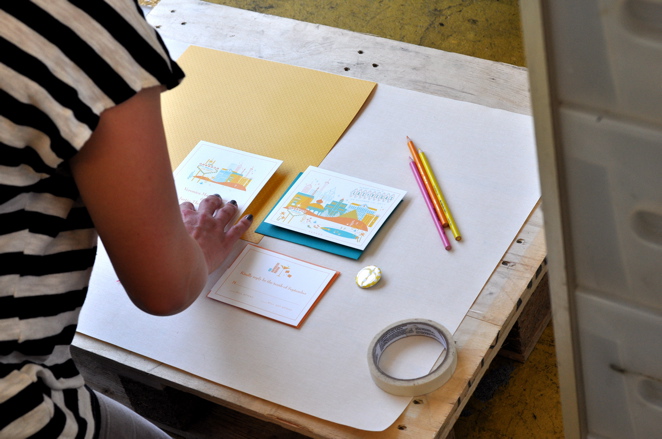
At craft night, Eunice has been working on French flash cards for her son, Jude. They are pen & ink illustrations with a watercolor finish - absolutely fantastic for any aspiring bilingual babies!

Eunice is trying to raise Jude bilingual in French and English, so she's always trying to find fun ways to teach him new vocabulary (ok, so he doesn't speak yet, but!) as well as adding to her own French vocab. She has a love for making flash cards - the words really stick and it's a fun and quick excuse to doodle. It's also a great excuse to play around with painting/watercolor techniques - the perfect platform to practice on (being the raging multi-tasker that she is!)

Her inspiration for each card is to find things Jude has seen, or words that are just plain amusing (like the fact that raccoon directly translates to "a washing young rat" more or less!) - both the raccoon and the otter are animals they saw at the zoo recently. The kites are from a recent outing to Crissy Field and the race car is a noise he's learned to make lately. Next up are a horse, gorilla, tiger, cow and duck - more noises he's been making lately (for the gorilla he pounds his chest!). Once he sees a cow and starts mooing, he will moo for the next 20 minutes!

Hello!Lucky Photoshoot
We have a bunch of sparkling new designs that we're getting ready to launch and we couldn't be more excited. It's still top secret but we can tell you that everyone has been working like busy little bees around here. Designers are designing, printers are printing, and the number crunches are... we'll we're not actually sure but it looks really hard! Best of all the super cute and talented photographer Edyta Szyszlo is in the studio working her magic and taking gorgeous photos of our products.

We were so lucky to have a bright and sunny day here in San Francisco (no fog!) and our photo shoot glowed with natural light.


Our craft stash was the perfect place to find all kinds of goodies to use as props - buttons and bows, candies and clothespins! We love to collect and hate to throw away so our storage room is filled to the brim with creative notions and vintage ephemera.


Lively backdrops make old favorites like Heirloom Harvest pop, while artful accessories give new designs like Midsummer (coming soon!) an appropriate introduction.

Weddings aren't the only life events we celebrate around here - a new baby deserves a shout from the rooftops... or at the very least an adorable circus animal announcement! Our Big News Elephant gets the job done in style.

We love, love, love Edyta and her super creative assistant and welcome them back anytime! Hello!Lucky staff glamor shots anyone?
Pottery Barn Decorating Workshop

Last weekend, we got to teach a special event decorating workshop at Pottery Barn at Stanford Mall and at Chestnut Street in San Francisco! We shared DIY craft ideas from Handmade Weddings, along with party & wedding decorating tips. I, for one, had been clueless about Pottery Barn's awesome entertaining selection before the workshop -- turns out the have fabulous glass drink dispensers, cake stands, linen-wrapped candles, and mercury glass votives -- all great accent pieces that make a table scape feel polished and stylish!

We showed the class how to decorate a table in two different styles: Romantic (left) and Happy Graphic (right), using similar projects in different palettes to show just how easy it is to create a unique look. The flowers were picked out by our friend, florist Nancy Liu Chin (we did a DIY arrangement -- Nancy, hope we did your flowers justice!).

We started with recycled glass jars, which we wrapped in linen and stretch denim and stenciled with table numbers - the same project gets a totally different look just by choice of materials.

We finished each wrap with a simple row of stitched "X"s. They slip on and off easily, and you can reuse the containers -- no special sewing skills needed! We wrapped books in papers matching each palette to use as risers, adding height to the table (helped achieve a pleasing pyramid composition. And who doesn't have some books lying around? So easy!).

The Happy Graphic side featured a palette of reds, yellows, and blues plus kraft and denim accent textures. We incorporated patterns with fabric-wrapped favors and DIY bread basket liner.

We added graphic pop with an easy fabric-covered button napkin ring and striped dollar store party favors (who knows what these things are called?! please tell us!).

Drink flags are one of our favorite party details. All you need are bamboo skewers (available at most super markets) and ribbon or paper. We did a simple satin ribbon flag for the Romantic side...
 ...and a paper pennant for the Happy Graphic side.
Thanks to Pottery Barn for hosting us, and to all the wonderful folks who attended the workshops - it was great meeting you!
Reminder— A Midsummer's Eve Affair, Tomorrow, June 4th!

Summer Streamers and DIY Party Decor
The DIY experts over at Made recently posted this tutorial on creating colorful streamers that we absolutely love!

Wouldn't this make great decor for a summer wedding?

Perhaps a great compliment to our Mi Amour design with Mexican paper flags?

Sewing paper ... how perfect!
Beautiful Decals by Shanna Murray
We are huge fans of Shanna Murray and found this post on Creature Comforts about her new decal collection.

We think a customized decal would be fantastic as decoration for a wedding, such as "The Smiths" or " Eunice & Daniel"!

Or maybe a sweet note on the wall of a baby's nursery or playroom...
How darling!
Custom Wedding Signs by Chocolate Butterbean
We absolutely love these hand-painted signs by Chocolate Butterbean! A perfect addition to your wedding!

This horseshoe sign would be an absolute smash with our Elegant Equestrian design!

Or a sweet wedding gift...

A Midsummer Eve's Affair— Save the Date!
Here's a little teaser for an exciting upcoming crafting event:

Click on this link to the Paper Source website for more details, and to register for a workshop near you!
Jude's Big Top Birthday: Birthday Cake Banner!

A slightly tardy post on how make the little flags that topped Mr. Jude's Big Top Birthday Cake (thank you for your patience, dear readers, things have been a little busy here at H!L HQ!) We thought these little banners were the perfect topper for a circusy cake! That perfect stripey candle and equally genius napkins found at Shop Sweet Lulu...
Download the tutorial here (with printable flags!)
Let it Never be Said...

That we are not deeply dedicated to our clients! This is the result of a bag of confetti and brief moment of distraction while assembling wedding invitations - clearly he is a future artist, expressing his creativity in all it's glory!
La Moustache Party de Mr. Hugo

We were very pleased to be invited the La Moustache Party de Mr. Hugo (who you may remember from his recent appearance as a French clown)...

His mom, Vanessa, is hilarious and quite the style maven, and she did not disappoint with the many cute and funny details!

Like these snappy little moustache cupcake toppers (the cupcakes were DELICIOUS - from That Takes the Cake)

and these hard candy lollipops...

She had all kinds of simple, yet ingenious, touches - Washi tape bands add cute graphic flair to plain glass bottles...

Love these little paper cups!


Of course, one must have a selection of moustaches on a stick! These fab paper 'staches available here and the wooden 'staches here...

...and we loved the hilarious bunting made from photos of famous mustaschioed gentlemen - ah, Tom Selleck...

And the random celebratory moustache imagery that popped up in unexpected places...love those Y-fronts!
Ah, how we love a well-designed par-tay! Bonne anniversaire, Mr. Hugo!
Jude's Big Top Birthday: Ring 'o' Fire, baby!

Every serious circus needs a ring of fire, obviously - here's how to make your very own. Tiny tiger not included!