Free Father's Day DIY Templates Updated for 2015

We've been getting requests for a version of our father's day diy templates updated for 2015. We aim to please, so here they are!  Download the links below and print these puppies up for your favorite father figure! 

 Father's Day is right around the corner and this year we've got your one-of-a-kind gifts covered. You can jazz up a simple pair of socks, a bottle of wine, or a bottle of beer with these manly labels we've designed. Do you have a handsome and debon…


Father's Day is right around the corner and this year we've got your one-of-a-kind gifts covered. You can jazz up a simple pair of socks, a bottle of wine, or a bottle of beer with these manly labels we've designed. Do you have a handsome and debonaire Dad? Print out our matching labels for a black pair of socks and a nice bottle of wine. We even created a slick card to match!

 Is your Dad more on the rugged side? Why not make some beer and a pair of white socks a little more special with our free matching labels?


Is your Dad more on the rugged side? Why not make some beer and a pair of white socks a little more special with our free matching labels?

 We printed ours on label paper which made sticking them to the bottles and socks a little easier, but these would look just as nice printed on regular white paper or card stock.Simply click on the links below to print your free Father's Day cards a…


We printed ours on label paper which made sticking them to the bottles and socks a little easier, but these would look just as nice printed on regular white paper or card stock.

Simply click on the links below to print your free Father's Day cards and labels. Enjoy!

Sock Bands

Father's Day Card in White

Father's Day Card in Black

Wine & Beer Labels


And as always we love seeing our printables in action - so send us pics or post them directly to our Facebook page. And tell Dad we said Happy Father's Day too.


Louie Award Winners!

The Louie Awards is an annual ceremony put on by the Greeting Card Association in honor of our fellow card producers. We have been lucky enough to be included in this fancy affair alongside our favorite designers.  Last year we were grateful to win an award in the Thanks category. This year we were claimed best in two categories, thanks & congrats, and received a final win for Card of The Year! It was a huge honor to be involved and an even bigger one to take home several awards! This left us with the obvious feeling of self-gratification and it’s all due to you guys, so thanks so much for all your support. You truly did make our day!

See all the winners here.

Tiny Dictator was named best of in the Congrats category for $3.50+

Sunny Day was named best of in the Thanks and Card of The Year categories for $3.50+

Sunny Day was named best of in the Thanks and Card of The Year categories for $3.50+

National Stationery Show!

We just got back from the National Stationery Show in New York & what a wonderful experience it was! Each year we are so impressed & inspired by all the wonderful new card designs. It truly is a smorgasbord of eye candy & we couldn't be happier to be a part of it. We attended a few lovely & carefully crafted soirees with our industry pals & the Louie Awards Gala where we brought in three awards with one Card of The Year Award for our Sunny Day card! It was a huge honor, especially when  surrounded by such talented people! 

Overall a complete success! Thanks to all you guys for all the support!

Postable introduces Hello!Lucky wedding stationery!

We are thrilled to announce that our wedding suites will soon be available through Postable! They have such a wonderful collection of cards to choose from, and they even offer customization all the way to stamping and sending your cards out for you! This is what you've always been waiting for. Writing thank you cards has never been so easy! Check them out!

Write_On Campaign

Today marks day 1 of our 30 letters in 30 days challenge celebrating National Letter Writing Month! We hope you will join us & Egg Press in this mission to bring back paper & ink! Order your free kit here & share your progress on instagram & twitter VIA #write_on. We will be sharing your photos here on the blog!

DIY STAMP KIT + GIVEAWAY!


was kind enough to let us pick out a little somethin’ for a DIY project! Naturally we were drawn to SF local- Yellow Owl Workshop’s stamp-carving kit, though it was a tough call since they offer a ton of great DIY kits. We decided we wanted to do a bandana using a neon color palette, our most recent obsession. Follow the instructions below to create your own stamped bandana. In addition we will offer up $40 gift cards to UncommonGoods to TWO lucky winners. Find contest guidelines below!

Happy crafting!


created this genius Carve-A-Stamp Kit that contains everything you need to master the art of stamp carving.

The kit comes equipped with: • 2 rubber blocks mounted on wood for carving • 1 brilliant red ink pad • 1 pencil • 1 wood carving knife with five tips & a tip remover • 1 template featuring different designs • 1 piece of tracing vellum • 1 muslin bag


What you will need in addition for this project: • 1 yard of muslin • washable/ fabric friendly neon ink pads • scissors • neon thread (optional) • a sewing machine (optional) • one extra block of rubber (optional)


*All of these items can be found at Michaels, or the craft store of your choice. STEP ONE:

Carving the dot pattern stamp-

We used the semi circle tip in order to cut out our dots for our reversed dot stamp. First use your pencil to draw scattered dots. Then push the semi-circle into the rubber, rotate 360 degrees, and pop the rubber out. Repeat until your pattern is complete.

STEP TWO:

Carving the star pattern stamps-

Draw the star onto the rubber with your pencil. Then use the flat knife to trace the outline of your star. After, use that same tool to remove ¼ inch of the entire surrounding area. In order to achieve only the outline of the star, you will then use the wide “V” carving tool to remove the rubber from the inside of the star.

*note: If you wish to create another star stamp, repeat the steps listed above with your extra rubber pad.


STEP THREE:

Cutting out your bandana- Cut a 23 inch square out of your muslin. This allows for a ½ seam allowance on each side. Using your neon thread, iron, pin, & sew the edges in.

*note: if you would not like to sew the edges, cut out a 22 inch square & leave it raw!

STEP FOUR:

Stamping your bandana- Using the dot stamp you have created, line up the block along the edge and make a border all the way around. Then fill the center with your star stamps as seen above.

STEP FIVE:

Protect your fabric- Wait until the ink has dried (a few hours). Place a piece of muslin over your pattern and iron each side without water/steam. Allow for a week or so before washing, then hand wash or machine wash alone for first rinse.


STEP SIX:

Strut around in your new bandana.

We made two bandanas, one for our pen pal, and another tiny one for Imogen because we couldn’t resist, duh.

Jump the gun and make one for mom for Mothers day! Get your own kit here! Or check out more great mom day ideas here.

CONTEST GUIDELINES:

Enter to win a $40 gift card to UncommonGoods to snag your own stamp carving kit and then some!

All you gotta do is like UncommonGoods on facebook & comment on this post! Don’t have a facebook? Join their newsletter instead!

Our winner's will be announced Friday the 21st!

Hello!Lucky meets Hello Shiso!


Yesterday we met with our new favorite accessory designer Mimi Tsang of Hello Shiso. The company started in 2010 with Mimi assembling each product personally by hand & has since flourished! We are in love with Hello Shiso designs. These accessories serve as the perfect addition to the little ladies outfit! We couldn't resist and had to buy some for Eunice's baby Imogen who is modeling her new Hello Shiso clips below! Check out these sweet heart shaped bobby pins, just in time for Valentines Day! Visit Hello Shiso!

Contest: giving thanks in 2014


ENTER TO WIN TWO PACKS OF LETTERPRESS THANK YOU CARDS BY JANUARY 16th!!! There’s plenty of research showing that gratitude promotes happiness -- expressing thanks helps you hone in on what’s positive in your life, and everyone loves to be thanked and appreciated! So this year we are promising to say thanks!

Here are perfect occasions for writing a thank you note:

  • A gift
  • A dinner or date
  • A handwritten card
  • A great conversation
  • A thoughtful action, like helping you with a project or chore
  • A long-term friendship or partnership

You can write thank you notes to family, friends, work associates, teachers, or those who provide a helpful hand day by day like your mail man or garbage collector.

Great thank you notes are brief and heartfelt. Here are some samples:

Thank you for the wonderful birthday card. I am so grateful that you thought of me.

Thank you for your the great conversation we had yesterday. I appreciate your support, and I am so glad we’re friends!

Here are some tactics we’ll be trying out in 2014:

  • Keep a stash of thank you notes, stamps, and a pen by your bedside. Write a note at the end of the day. (Think of it as a twist on writing “gratitude journal,” which some researchers advocate -- one that has a positive impact on other people’s lives as well as your own)
  • Write thank you notes right away -- the feelings will be more authentic and meaningful.

What are some of the ways you like to say thank you? Post a comment and we’ll pick a winner next Thursday the 16th to receive your very own stash of 12 letterpress thank you cards (featured above)!

SF Bazaar This Weekend!

This weekend we will be participating in one of our all time favorite events! The SF Bazaar is a free entry craft festival showcasing local artists. It's the perfect opportunity to get your holiday shop on with so much crafty goodness to choose from, and multiple chances to win cool stuff! Read below for more info on entering to win! 

Share This link on your facebook & automatically enter to win 2 boxed sets of Hello!Lucky holiday cards! Winners announced at the event! Are you that person that never wins anything? That's okay! show up early and get a gift baskets! The first 200 people in the door take home the basket. Double your chances by sharing AND showing up to the event early. And remember, you're always a winner to us!

Imogen's Birth Announcement

Eunice's baby girl Imogen was born on August 16th of this year. For the birth announcement, Eunice went for a hand-illustrated approach for the main, and drew inspiration from our sunshine stationery for the french/chinese insert. She used printstagram for the photo. Printstagram is an awesome service that prints your instagram photos on little squares and ships them to you within the week! We are all smitten with the outcome of this birth announcement!birth announcement

Lower Haight Urban Air Market

Come by tomorrow between 11-6 for some foil cards and discounted holiday greeting card packs! It's a local makers market full of 130+ vendors, and free to attend! The perfect opportunity to support your neighbors, and get your holiday shopping out of the way! Find us on Haight between Fillmore and Steiner. We hope to see you there! lower haight urban air market

Family Photo Shoot with Leah McCormick

Photography by Leah McCormick Just before Imogen was born, we were lucky enough to squeeze in a family photo shoot with the AMAZING Leah McCormick...

photography by Leah McCormick

We just got the photos back this week, and I couldn't resist sharing them - Leah did such a fabulous job capturing our family (and all accompanying silliness)...

Photography by Leah McCormick

The shoot was so relaxed and fun that even my husband Daniel, who is usually a bit grumbly about being made to participate in such shenanigans, had a great time - and was super pleased with the results...

Photography by Leah McCormick

Love her sense of composition and the way she captures light and color!

Photography by Leah McCormick

Photography by Leah McCormick

2684

You would never guess that I was  incredibly exhausted and quite whale-ish at the time!

2673

Leah does beautiful wedding photography as well - check out her work at www.byleah.com!

Shop Feature: Postmark

We are so thrilled to pick up our store features again. This time we're kicking off with a great shop we love in the UK called Postmark. Postmark has two shops, one of which is located in Balham, just a little south of our offices in London Bridge. When Postmark in Balham opened their doors they added greatly to to the the area's increasing reputation for being a shopping destination for those seeking out a more individual retail experience. We chatted a bit with the owners to give you a little more insight into this great independent boutique.

We are a small family run company based in South London. Run by a team of passionate card lovers with over 25 years experience, we pride ourselves on our hand picked selection of cards. We mainly deal with small independent publishers with over 95% of them based, designing and producing in the UK.

Our Balham store first opened it's door in 2004 and soon became a neighbourhood favourite. We won the title of 'Best Independent Card Retailer - London' in 2008 and the buzz and excitement this created was the catalyst for us opening our East Dulwich store in December 2008. In 2009 we then became the first company to retain and win this award twice. This award is the industry 'Oscars' and rewards and recognises excellence in the greeting card industry.

We pride ourselves on customer service and are always looking for new and exciting ways to stand out from the rest. In both our stores, you can use the first of it's kind, in house postal service. Each store has an in store postal service, enabling customers to send their cards and parcels to anywhere in the world without even leaving the shops. Just pop in, pick a card, write it and we will do the rest! We have been finalists in 2007,2010 and 2011 for 'Best Retail Initiative' for our fresh and intuitive retail ideas. From our 'Golden ticket' campaign to our most recent 'Beat the postal price increase' campaign starting in November 2012.

While Hello!Lucky is one of our favourites we also stock cards from Caroline Gardner, Urban Graphic, Simon Drew, Noi Publishing, Almanac Gallery, Rachel Ellen, Pigment Productions, The Art File, ArtPress, Stop The Clock to name just a few as well as numerous small up and coming publishers who we feel could be the next big thing!

*****************
Thanks for taking the time to chat with us Postmark and thanks for being such a supporter of our cards over the years. You can shop Postmark's great inventory of cards online or visit one of their two locations if you are in the UK.

Valentine's Day Discount

It's almost Valentine's Day! Are you feeling the love yet? Well you can start today because we're offering 10% off all Valentine's Day cards and gifts. From now until February 13 you can send your family and friends some love for less with tons of letterpress cards to choose from. If you can't get your list together on time, be sure to get your hands on our free printable Valentine's Day cards for a quick hello. Check out our newest love and friendship cards here, and enter the code SMITTEN2013 at checkout for your discount!

New! Lisa Congdon for Hello!Lucky

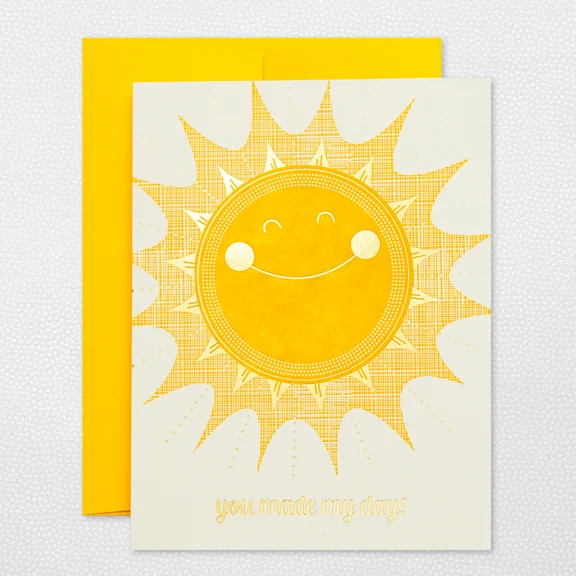
When Lisa Congdon agreed to do a line of cards with us for 2013 we were beyond thrilled. We love Lisa's colorful illustrations, hand lettering, and imaginative renderings of nature and animals. We think her cards are perfect for any occasion but we're especially excited to launch the line just in time for Valentine's Day. Check out these images of her studio (Taken by Victoria Smith of SF Girl by Bay). No wonder her designs are so bright and cheerful, her space is an inspiration in itself!

We asked Lisa a few questions about her process and what she has in store for 2013:

What is your process like? Does it change with every project?

It does depend. Sometimes I draw things straight from my brain, especially if I am making a simple drawing without much nuance. The cards I did for Hello!Lucky were all things I drew that just came from my imagination. When I paint or draw something more realistic or complex, I find images (photographs) to use as reference, so I can get the proportions and lighting right. Typically, especially in my commissioned illustration work, I make sketches first. And then I move to making the final artwork.

I always start by drawing things by hand. Always. None of my work starts as digital work, even if it ends up as digital work. In the case of the card line for Hello Lucky, I drew the designs in pen on paper, then scanned them and turned them into vector so they could be reproduced as plates for letterpress printing.

What was your inspiration for this line? 

I remember I got really simple, straightforward art direction for this line: create designs in your own style around the theme of love. So I brainstormed different sayings that would lend themselves easily to colorful illustration: things like You are My Sunshine, You are my Queen, You Light up My Life. It was really as simple as that! I really enjoyed it!

Do you have a favorite in the collection or do you love them all equally?

I think You Light Up My Life is my favorite! But I like them all.

(My Sunshine, Sailboat Love, Falling for You, Lighthouse)

We loved your 365 days of hand lettering project you did for 2012. Is there a favorite quote/motto you have from that project? 

One of my favorites is: "Leap and the net will appear," which John Burroughs is quoted as saying. It's the motto for many things in my life.

What are you currently working on or what's your latest release? Is there a 365 day project for 2013?

I just launched a weekly project for 2013 with Maria Popova of Brain Pickings called The Reconstructionists. It's a a yearlong celebration of remarkable women who have changed the way we see the world. Every Monday in 2013, we'll publish an illustrated portrait (by me) of one trailblazing woman (artist, scientist, writer), along with a hand-lettered quote that captures her spirit and a short micro-essay (by Maria) about her life and legacy. I'm pretty excited about it!

(Queen, King)

Thank you Lisa for being such an inspiration and so much fun to work with! Visit Lisa's website for more lovely illustrations and follow along with her blog here. Shop Lisa's new collection for H!L here!

Product Photos by Edyta Szyszlo Photography

Portrait of Lisa by Leslie Sophia Lindell Photography

New! Monthly Card Subscriptions!

To ring in the new year we are thrilled to announce our new monthly card subscriptions! It's easier than ever to write letters to friends and family and now you can get your favorite cards without lifting a finger. All you need to do is visit our subscription page, select how many months you'd like to receive three pre-stamped letterpress cards, and watch them arrive in your mailbox for only $12 dollars a month! The cards are all new or best-selling so you'll always be surprised. These subscriptions make great gifts for those who love to send hand-written notes, too. Order online today!

*Note this is only available in the US and UK.

Pin it to win it! Letterpress Holiday Cards Edition

We're thrilled to announce the next edition of Pin it to Win it! This time we're giving away a box set of letterpress holiday cards! Our letterpress cards are printed on a vintage press on 100% recycled paper, and in festive color palettes perfect for sending holiday cheer. To play, just pin any box set from this page of our website or an image from this blog post. Once you have pinned your image, leave a comment below this post with the URL to your pin so we can check it out.

Just like last time we’ll randomly pick one lucky person to win a free box set of 6 cards. We’ll announce the winner on Friday, December 14th. **A winner has been chosen and contacted via email. Thanks for participating and stay tuned for more Pin It to Win It giveaways!

Good luck!

DIY Color Block Holiday Cards

It's hard to believe Thanksgiving has passed and we're in the home stretch toward the holidays. Over the Thanksgiving weekend we were thankful for down time with family and friends, but itching to get decorating and DIY-ing for what's next. This can be a hectic time of year, so we're all about keeping things simple. This DIY Color Block Holiday Card project is a simple and inexpensive way to send cheer to your loved ones. And, you most likely have the majority of the supplies at home. It was inspired by our Color Block Kids Party Invitation (also available in pinks!) made for the boys' 2nd birthday party earlier this year, but we also have a new Color Block Holiday Photo Card with convenient customization. With some quick snips of colored tissue paper, you can recreate this bold typeface design into a one-of-a-kind Christmas card. Instructions below!

Materials needed:

Tissue Paper - We used green and red, but any combination would work! Just one sheet of each color will be plenty.

Blank Cards or Card Stock paper - Most craft stores sell 5" x 7" blank cards and matching envelopes, or you can cut a 10" x 7" sheet of card stock and fold in half. Use some spare envelopes or buy some from the craft store as well.

Bone Folder - For trouble-free folding!

Glue Stick - Make sure the glue stick is new - or retains its moisture. If it's too sticky you will have trouble working with the tissue. Also be sure it dries clear.

Scissors - The sharper, the better! Cutting tissue paper is tricky because the paper is very delicate. Sharp scissors will make cutting a breeze.

Craft Knife (optional) - Some people are more comfortable cutting small pieces with a craft knife. Just be sure it's super sharp, to get a clean cut of tissue paper.

Step 1: Using just a small corner of tissue, start by cutting your shapes. For "Noel" each vertical line was about 2" x 1/4" and each horizontal line was about 1" x 1/4" but we say, the more imperfections the better.

Step 2: Glue your shapes onto your card, one at a time. This step can be frustrating, so bring on the patience. A nice, new, moist glue stick will be a tremendous help. We suggest using a blank piece of paper as a gluing surface. Gently (and we mean ever-so-softly) apply glue to one side of the tissue <insert frustrations here> It will be ok, just be gentle. Lay your piece of tissue down on the card and smooth with a glue-free finger. What we like best about the look of this DIY is the overlapping of colors. You can just apply glue directly on the card, then lay the tissue on top, but you will see the dried glue surrounding the shapes.

All done! You can get creative with this DIY and come up with any shapes you like. Our Color Block Kids Party Invitation had some fun arrows and scalloped edging, so we definitely wanted to include that in our cards.

We'd love to see the cards you come up with. Be sure to share any pictures on our Facebook page!

Happy crafting!

For more fun DIY ideas, visit our website!