Creativebug Video Shoot

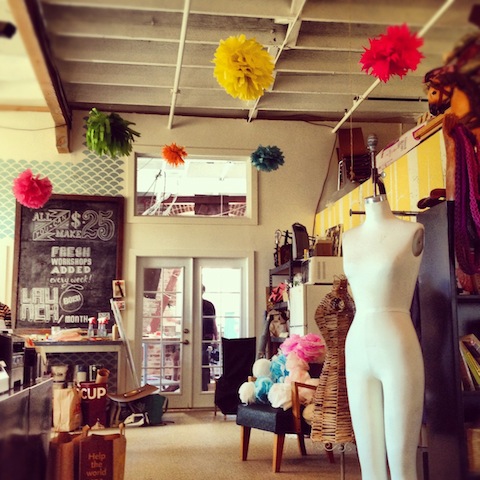
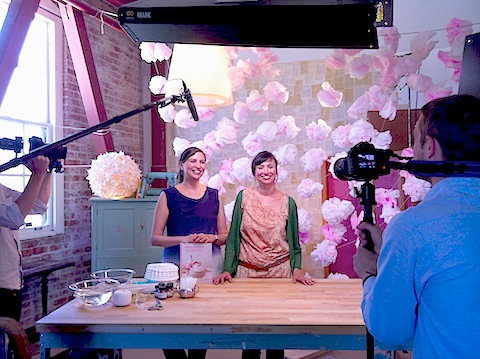
Earlier this summer we were in and out of the Creativebug studios shooting four different craft video tutorials, the first of which debuts on their site today!

Creativebug is a new website dedicated to online art and craft instruction. They offer high quality video workshops on almost any topic - from pottery to bookbinding. They have some amazing crafty superstars in their lineup already and we're totally honored to have been asked to be instructors. Right now you can take classes from people like Diana Fayt, Natalie Chanin, Debbie Stoller, and others - check out the complete list of instructors here. They're constantly adding new videos and teachers to the site so be sure to check back often.

 Our videos are focused on crafts to make for parties and can be adapted for any size event from a big wedding to a small birthday gathering. We had lots of fun shooting them and we hope you check them out! You can view our trailer and tutorials here.

Thanks to the amazing team at Creativebug for making the experience such a great one. We can't wait to shoot more!

DIY Patterned Papers: Envelope Liners

DIY Envelope Liners from Hello!Lucky on Vimeo.

Do you remember our How To Assemble Your Wedding Invitations video? Well we had so much fun making it we just had to come up with more. With the launch of our new DIY Collection this is the perfect time to debut the first in a series of DIY Paper Details stop-motion videos. All videos were styled, directed, and filmed right here in our San Francisco studio and we couldn't be more excited to share them with you! Today we have DIY Envelope Liners. Using our bulk patterned papers and envelope liner templates, you can add these easy and cheerful liners to your wedding invitations in no time. Watch the video for full instructions or see below!

Lined Envelopes

To save time, photocopy this template onto the back of each of your patterned paper sheets and cut out each envelope liner (skip to Step 4).  If you don’t have access to a photocopier, follow the steps below to create your own template to trace.

You’ll Need:

DIY Envelope Liner Template, Printer, 1 sheet cardstock, 8.5 x 11” (US) or A4 (UK), Ruler, Bone folder or a butter knife, Cutting mat or a magazine, Craft knife, Scissors, Pencil, Patterned paper (1 sheet per envelope), Envelopes, Glue Stick

How To:

1. Print out this template on cardstock. Make sure your printer is set to 100% (or, “no scaling”) to ensure that the template prints to scale. 2. Using a ruler, craft knife, and cutting mat, cut out the envelope liner template. Use scissors to trim the rounded end. Hold the template up to your envelope to make sure it’s the right size - envelope liners need to slip neatly into the envelope and should align with the envelope flap but not cover the glue. If needed, adjust the template using your printer’s scaling options. 3. With a pencil, trace the envelope liner template onto each sheet of patterned paper. 4. Using a ruler, craft knife, and cutting mat, cut out the envelope liner. Use scissors to trim the rounded end. 5. Fold the flap down to crease the envelope liner, approximately where it says “fold here” on the template. With the flap portion of the liner folded down, apply glue. Fold the envelope flap down and smooth to secure.

For more pretty paper projects, head over to the DIY section of our website, here!

DIY Card Stands

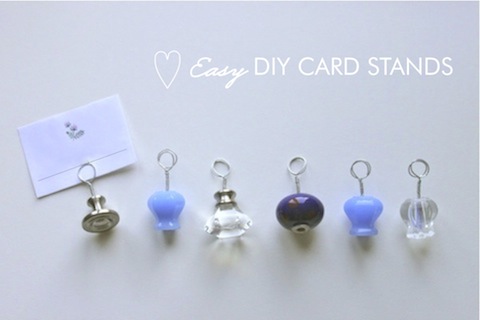
These super simple and easy to make card stands are the perfect pick-me-up to any table display. We love the quirky drawer knobs found at local antique shops or the ornate ones for sale at Anthropologie. You can even buy wooden knobs at your local hardware store and paint them any color you like! The possibilities are endless with these little fellows. We'd definitely use them as place card holders at a reception or dinner party, but they could also be used to prop photos on a mantle, keep to-do notes on a desk, or even hold up a new recipe in the kitchen. Full instructions below!

 Materials:

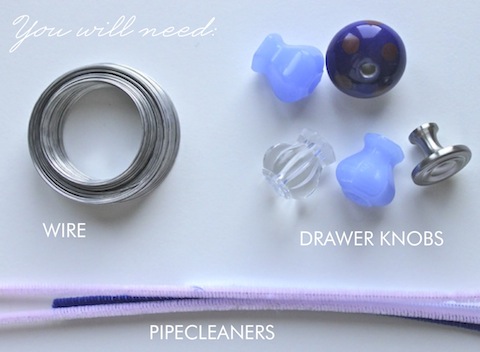
Used or new knobs preferably without set screws (browse your local antique shop for fun shapes and colors, or visit Anthropologie), wire (we used 20 gauge for better strength), pipecleaners (any color will do, but try to match the colors of your knobs), wire cutters or scissors and some craft glue - if necessary.

How To: 

Step 1. Remove the screws and any washers from the knobs.

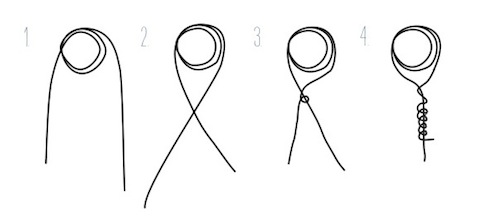
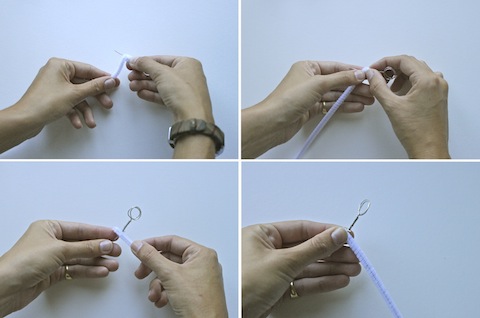
Step 2. Prepare your wire. Cut about 8" - 10" strips and fold at the center. Wrap the wire around your index finger twice creating a spiral loop.

Step 3. Cross both ends and spin to hold in place.

Step 4. Carefully wrap one end of the wire around the other side, leaving as little space as possible between each loop.

Step 5. Wrap your pipecleaner around the bottom part of your wire (underneath the hook). Cut off any remaining pipecleaner.

*The thickness of your pipecleaner will depend on the width of the hole in your knob

Step 6. Place the wire and pipecleaner inside the hole of the knob. It should fit pretty snug - if not, add more pipecleaner and a dab of craft glue to be sure.

Step 7. Insert place card between wire loops and display!


Visit our website for more fun DIY ideas!

We Heart Vintage Lace

Are there others out there who have a fabric collecting compulsion? We do, admittedly. We wonder if we could figure out how to make stuff like this:

lace1

How about this lace medallion? Absolutely gorgeous! Can you imagine how people used to craft these by hand?

And how about this swiss lace? Swoon! So sweet and simple.

lace2

And this one looks like something a Klimt lady would wear— wild!:

lace3

We'll put learning lace crochet techniques on our To-Do List. ; ) But in the meantime I wonder what sorts of amazing things we could make out of these?!  All found on AntiqueFabric.com.  You should visit before we buy them out!

For lovers of lace imagining a lace-filled wedding, remember our lovely Vintage Lace save the date design.