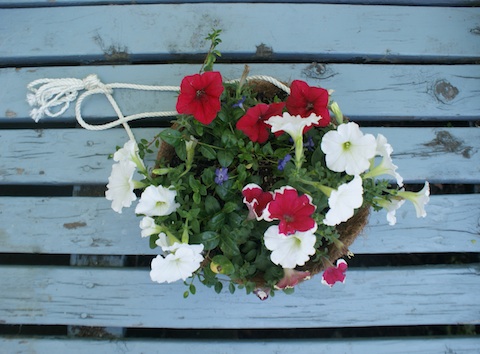
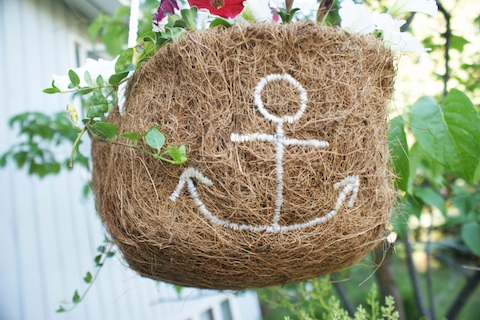
Are you looking for an inexpensive way to spruce up your patio or front stoop? Look no further! This DIY embroidered flower basket is insanely easy, and totally customizable. Coco liners are great for iron window hayracks and basic standup plant stands, but the natural fibers of the liner itself make for a fabulous embroidery project. We grabbed a few at our local craft supply store and went for a nautical themed basket. The anchor was free-handed but you can easily create a monogram, a flower, or any icon you like! Loop some rope through the basket or even leather or chain to create the right look for your home. See the steps below!
Materials:
Coco liner, embroidery thread and needle, rope (or other hanging material), potted flowers and soil
How To:
Step 1. Draw your icon or design on paper before you get started, and make sure it will fit nicely on your liner. Place your paper over your liner and make some loose stitches to mark your lines. Tear the paper out to reveal a basic outline.
Step 2. Dive right in! Create a large knot in one end of your thread. Begin by creating a clean outline of your design as a guide, then go back through carrying the thread to fill the space. Here are some tips for satin stitching.
Step 3. When you're all finished, be sure to knot the end of your thread so it doesn't unravel.
Step 4. Cut three equal sized pieces of rope (or whatever your hanging material is) at 3' each.
Step 5. Make three dime-sized holes about 1.5" below the top of your coco liner at equal distances apart. Keep your design in the center of two.
Step 6. Loop your rope through the holes and double knot to keep in place. If you're using chain, an "S" hook will do the trick.
Step 6. Tie the three pieces of rope together at the top.
Step 7. Plant your flowers and hang with a ceiling hook!
Voilà! The easiest and most inexpensive hanging basket around. We want to see yours! Post pictures to our facebook or twitter to share!
For more fun DIY ideas, visit our website, here!


