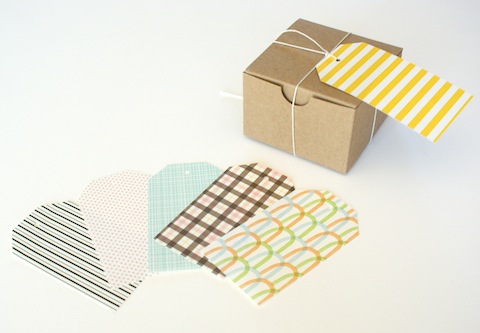
We're feeling a lot of love for our new DIY Collection and one of our most exciting additions is the selection of patterned papers that match your favorite wedding suites. The papers, all 8.5 x 11" and printed on smooth, 80-lb text weight paper are the perfect way to add finishing touches on your big day, from paper drink flags to napkin rings. To add to our series of DIY wedding crafts, we're bringing you easy and adorable paper favors. These can also be doubled as place cards or escort tags!
These mini paper bags are the simplest way to provide favors for your guests, but there are many ways you can dress them up to match your decor. You can find them in various colors at your local craft supply store, and they come in large and small sizes. They make the perfect grab bag for a casual wedding filled with local treats or handmade gifts. Instructions below!
Mini cardboard boxes may be the most traditional wedding favors around, but they are as versatile as they are practical. We wrapped our patterned paper around them and secured with a label or ribbon to make them match. If you want to get extra crafty, you can even make a favor box out of the patterned paper! Use this favor box template to trace.
And last but not least are these easy tea bag tags. You can wrap them to almost any object, and they can be dressed up or dressed down with some fancy calligraphy or alphabet stamps. Use this favor tag template for easy tracing.
Paper Bags:
Materials: 3.5" x 2" x 6.75" Paper Bags, Patterned Paper, Glue, 1/8" Hole Punch, Ribbon or Twine, Scissors
How To: Cut your patterned paper into 2.5" x 3.5" rectangles. Insert your favor into the bag and fold the top 1.25" down toward the back. Fold your patterned paper in half (the long way - or hot dog style!) Apply some glue to the back side of your patterned paper and stick to both sides of the folded bag. Punch a hole 1.5" from both sides. Loop your ribbon or twine from the back and tie a square knot or bow. Cut the ends of the ribbon at 45 degree angles.
Adhesive Labels:
Materials: 3.5" x 2" x 6.75" Paper Bags, Patterned Paper, Glue, Label Paper, Washi Tape or Stickers
How To: Cut your patterned paper into 2.75" x 3.5" rectangles. Glue to your paper bag. Print a 2.25" x 3" label on label paper and stick on top of your patterned paper. Stuff with a favor and fold 1" from the top. Seal with washi tape or a sticker.
Mini Cardboard Box Wrap:
Materials: 3" x 3" x 2" Boxes, Patterned Paper, Glue or Double-Sided Tape, Label Paper or Ribbon
How To: Cut a 1" x 11" or 1.5" x 11" strip of patterned paper. Wrap around the box and secure with double sided tape or glue. Add a personalized label or piece of ribbon and tie.
Mini Paper Favor Box:
Materials: Patterned Paper, Pencil, Scissors, Glue, Template
How To: Cut out the template with scissors and trace onto the back of your patterned paper. Cut with scissors and fold in places of dotted lines. Apply glue on the two labeled tabs and fold pieces together so the "top" and "bottom" squares are in place.
Tea Bag Tag:
Materials: Patterned Paper, Scissors or Craft Knife, Pencil, Ruler, 1/8" Hole Punch
How To: On the back of your patterned paper, draw a 2" x 3.5" rectangle with a pencil and ruler. Cut out with scissors or craft knife. Cut 1/2" corners off the ends of one side. Punch a hole 1/2" from the top and 1" from the sides to center. Loop with ribbon or twine and tie to your favors! Use this handy template for easy tracing!
Shop all patterned papers here, and to view more paper DIY projects, visit our website!


