Bat Cake Topper DIY


Try this sweet and spooky cake/ cupcake topper DIY using our free printable template! Materials + Template + Printer + Black cardstock + Craft knife + Cutting mat/ magazine + Tape + 5 bamboo skewers + Hot glue gun & glue + Scissors 1. Print out template here 2. Tape the template to your piece of cardstock so it doesn't move around. 3. Cut out each bat with craft/ exacto knife. 4. Cut each skewer at a different height. 5. Using your hot glue gun, glue the back of each bat to top of skewer 6. Place in cake and voila! Enjoy!

DIY Halloween Centerpiece


A table is never complete without a captivating centerpiece! Follow these steps for the perfect Halloween themed décor. What you will need:+ Glass cylinder vase/ terrarium- Michaels or Amazon + Moss- Home depot + Sand, bark, or rocks + Succulents- Home depot + Potting soil- Home depot + Ceramic hand- Etsy (This is an investment, but they make for amazing jewelry holders). + White spray paint (optional)- Home Depot + Black spray paint (optional)- Home depot + Pumpkins/ squash- Home depot + Toy spiders- Amazon or Michaels Spray paint pumpkins white and spiders black (if not purchased that way) & allow for overnight drying.1. Fill the bottom of your glass vase with 2-3 inches of bark, sand or rocks, this is so the water has somewhere to drain. 2. Place your purchased ceramic hand in the center of the vase. 3. Surround hand in potting soil and pack tight so the hand is stable. 4. Place succulents around the hand, gently pushing roots into the soil. Sprinkle an extra layer of potting soil around base of succulents. 5. Cover the top layer of soil in moss.

Halloween Tablescape


Charm your dinner party guests this Halloween with a themed tablescape. With easy and affordable creepy crawler place card holders, printable poison wine labels, and a corpsy succulent centerpiece, your table will be the talk of the town.

This week we will be posting DIY’s and free printables so you can create a spooky tablescape of your own!

Stay tuned for these DIY’s and printables:

+ Glow in the dark serpent wreath- DIY

+ Lend me a hand centerpiece- DIY

+ Bats cake topper- Printable

+ Poison wine bottle label- Printable

Wild & Free: Vintage Map Envelope Liners

allgoodthings

As summer comes to a close, we can't help but reflect on all the adventures that have filled our days for the past few months. In that spirit of adventure, we decided to put some old maps to good use and make envelope liners. Liners are a great way to utilize old magazine pages, scraps of gift wrap or calendars that have served their time.

liner_process

DIY Envelope Liners (Check out our handy how-to video!)

Supplies needed:

Envelopes Paper Templates Scissors Glue stick Bone folder

Happy Independence Day!


Sabrina had a great time making this cake with her kids to get ready for the holiday. We love that it uses fresh summer berries instead of colored frosting as decoration. And the best part -- it's chocolate cake inside! For the complete recipe head over to Epicurious.

We hope you have a fantastic holiday weekend! We'll be taking off on Friday as well just to squeeze a little more sunshine out of summer.

Happy fourth of July!

Spring Maker Series with Skill Exchange

Join Skill Exchange and Makeshift Society for these great events coming up. The fun starts tonight! More details below & here.

SKILL EXCHANGE MIXER: SKILLS, COCKTAILS AND MORE FRIDAY MAY 17TH 7-9PM

UPHOLSTERY BASICS: FOCUS ON CHAIRS TAUGHT BY LARA REMPEL | UPHOLSTERER & DESIGNER THURSDAY, MAY 23RD 6:30-8:30PM

CHEESE LOVE: A LESSON IN ITALIAN CHEESE TAUGHT BY SOPHIE MOSGROVE | CHEESE MONGER THURSDAY, MAY 30TH 6:30-8:30PM

COCKTAILS AND BITTERS: HOW TO BUILD A BETTER DRINK TAUGHT BY GENEVIEVE BRAZELTON | CHIEF MUDDLER AND JILL FITZGERALD  | BAR OWNER THURSDAY, JUNE 13TH 6:30-8:30PM

Inspired By: Coral & Tusk

We first discovered the embroidered work of Coral & Tusk at a local wedding fair where a vendor had a beautifully stitched table runner on display. We loved the detailed feathers and immediately sought out more of their work online.

Founded in 2007 by Stephanie Housley together with her husband Chris Lacinak, Coral & Tusk creates work inspired by their travels all over the globe. Their love of animals, adventure, and the natural world are reflected in every piece they create. We're especially fond of their stitched animals who always seem to be celebrating.

A RISD-trained textile designer, Stephanie creates all of her scenes and irreverent characters as original pencil drawings before she redraws them stitch by stitch using special computer software. Finished by hand in Coral and Tusk's Brooklyn loft, every machine-embroidered pillow, doll, napkin and artwork retains the story-telling spirit and hand-drawn allure of the original illustration. A mix of smart design, magic and mischief is at the heart of every Coral & Tusk embroidery.

View & shop Coral & Tusk here.

See if they are in a store near you here.

Follow along with their latest here.

Third Birthday Party -- Rainbows & Unicorns!

Jude, James, Alex and a whole band of kids just celebrated their big birthday number 3 and the theme for this years party was rainbows and a unicorn. The Unicorn was the only member in the group who was turning one. Beatrice had a special unicorn outfit just for the party. It wasn't easy to top last years amazing neon bash but Eunice, Sabrina, and their friends outdid themselves and managed to make this years celebration even more memorable than the last one.

Eunice designed the rainbow themed invitations complete with custom rainbow liners. Each kid was assigned a color of the rainbow and as you can see from this photo the parents matched!

This years party was held at Urban Recess in San Francisco on a Saturday evening. Urban Recess proved to be the perfect space since there are already so many built in activities for kids including train sets - which Jude loved-- slides, a climbing wall, and even a giant swing.

As a surprise the parents brought in a musical act this year and the kids loved dancing and singing along to the band Your Song My Song. Jaime Lee Currier and Eric Hart sing classic kids' songs, Beatles, originals, family favorites and lots of sing-a-longs.

The preparation for this years party of course involved lots of crafting. Together the parents made sweet little party hats (inspired by hats made by Jihan of Geronimo), a giant number 3 covered in rainbow streamers, t-shirts with the number three on them for the birthday kids, colorful cupcake liners and rainbow toppers, rainbow balloons from Sparky's, and of course a giant number 1 so Beatrice wasn't left out.

Happy Birthday to Jude, James, Alex, Ella, Raphael, Hugo, Lillian, & Beatrice! We can't wait to see what your 4th birthday party looks like!

All photos (excluding the giant number 3) taken by Sandra of Happy Morning

The Fabulous Mr. Finch

We just stumbled across the work of Mr. Finch, a textile artist from Leeds in Yorkshire, and were immediately enamored by his ethereal and whimsical creations.

Finch says he is inspired by British folklore, shape shifting witches, and moon gazing hares. We love that he believes the animals he creates come to life at night when everyone is sleeping.  It's no surprise that his creatures feel so magical.

He has had no formal training which is completely inspiring.


Love this sea horse...

This charming hare reminds us of the Velveteen Rabbit.

Check out more of his work here and here. You can pick up some of his pieces at his Etsy shop.


Easter Craft Projects

While we haven't had a chance to come up with a fun craft project for Easter yet we love seeing everyone else's projects popping up online. To celebrate the season here are some of our favorite Spring projects from around the web. Shown above are Moustache Easter Eggs from the blog No.2 Pencil. She uses a craft cutting machine to make the vinyl moustaches, but it would be just as fun for kids to draw them on the eggs with a Sharpie. Adding eyes and some hair would give these eggs even more personality.

How sweet are these marshmallow plush bunnies? They're like giant bunny peeps! You can find the full tutorial over at Dandelions & Lace.

You probably noticed we have a thing for circus characters around here. So we fell in love when we spotted this guy over on Etsy. Who wouldn't love this illustrated cup and matching wooden egg? He can be found in Sweet Bestiary's shop here.

How adorable is this burlap bunny table runner? We love the little bunny silhouette and the yarn cotton tail. You can find the instructions to make this sweet table runner over at Eclectically Vintage.

How could you go wrong with old school egg dying and stamping? We love the way these eggs look and it's such a simple project. Read more over on Lovely Indeed.

And finally we had to share one of our own projects. This is from our book Handmade Weddings, but it's the perfect project for Spring. You can download the template to make this spring wreath here.

Do you have any fun Easter craft projects you want to share? Leave us a link in the comments!

Chloé Fleury Studio Visit

Last Friday a few of us were lucky enough to visit Chloé Fleury in her studio in San Francisco's Mission District. Chloé's studio is in her apartment and we found inspiration in every corner of her home. Her space was full of light, colorful, and modern. We could have stayed there for hours and all left feeling inspired to go home and work on art projects.

(everything in this photo except the bear mask is made from paper) 

If you aren't already familiar with Chloé's work this will be a fun look into her world. She creates amazing sculptures and illustrations with paper and it was so much fun to see her work scattered throughout her home. We snapped quite a few photos so you can see the loveliness yourself. Enjoy!

(a shot from Chloe's living room)

(we were even inspired by her chairs and pillows)

(paper lady with fox mask & an ice cream truck made from paper)

Chloé moved to San Francisco from France and told us she didn't start making her paper sculptures until she arrived here four years ago. One of her main inspirations? San Francisco's color and architecture. This piece is from her first show which was at the (recently closed) Curiosity Shoppe.

(Chloé's workspace) 

(amazing paper guitar sculpture) 

(one of Chloé's iconic paper bunny heads) 

(paper bikes and a look at Chloe's library)

(there was beautiful paper every where we turned) 

(Eunice & Chloe) 

Thank you so much for letting us visit your studio & your home Chloé! We're still feeling inspired from the visit.

See more of Chloé's work in her Etsy shop and follow along with her daily inspiration on her blog.

Inspired By: Wee Gallery

How clever are these Wee Gallery Dress Up animal cards? As stationers it's sometimes a challenge to come up with designs that can be suitable for both kids and adults, but these cards definitely bridge that gap. We love the simple and painterly illustrations and the thought of kids customizing these card for a friend or sibling. So sweet! The Wee Gallery definitely has a knack for kids, and their focus on making “smart art for little minds” is brilliant. Getting kids to channel their creativity at a young age is a great way to inspire new ideas and we've got to give props to Wee Gallery for contributing.

They also just released a book to go along with the clever cards! It would be a great stocking stuffer or gift for kids (oh, and did we say this is fun for adults too?!) We can probably come up with 32 ways to dress up a pig, bunny, and fox. Can you?

Since Jude, Alex, and James are all obsessed with sea creatures and animals (remember their costume sneak peek?), these Sea wall graphics would make a fantastic addition to their rooms.

Visit the Wee Gallery website for more awesome kid-spiration!

Hello!Lucky Loves Love

We love celebrating all holidays around the studio, but Valentine's Day is the one we get most excited about. This year we decided to do a 'secret valentine' exchange, we all drew names and brought in a sweet little something for the co-worker we picked. Of course the creative packaging, original presentations, and handmade gifts were so very Hello!Lucky. Did you see how all out we went for Christmas? Here are some scenes from Valentine's Day around the studio. Enjoy!

Lia brought in chocolate covered strawberries for everyone.

Lillian gifted Holly with this amazing package of candy. Holly is the biggest candy lover among us and is the go to person when we need a little sugar fix, she's always holding.

How adorable is this hand stitched bag Lia made Stewey and filled with a seed bomb?

Heather's amazing package to Shayna. What was in there? Girl Scout cookies!!

Lyndsey gave Christina this sweet little rose bush in a heart container and some delicious chocolate.

The note from Heather's package to Shayna. And Shayna looking adorable holding her cookie from Stewey - who, like the sweet little cupid he is, brought in his famous 'Stewey's Chewies' for everyone in the studio.

We hope you had a sweet Valentine's Day! xoxox

Valentine's Cards for Meals on Wheels

Our employees love to get together after hours for holiday craft nights, especially if they benefit a good cause. Meals on Wheels has been providing meals to seniors since 1940 and has evolved into an extraordinary foundation for fighting hunger. For holidays the good people like to deliver cards to the seniors as a gift of love, and this year we decided to join in. All of our cards were handmade with love for the people supported by Meals on Wheels, and to know they were going to a good home was a beautiful thought.

As stationers, paper is our primary medium, so coming up with materials was a cinch. We try to save as many scraps as we can, knowing that they could come in handy for a card-making craft night.

Our team is the best at coming up with witty one-liners. We loved this "I a door you" card.

To support the Meals on Wheels Association of America, visit their website!

DIY Valentine's Day Geo Heart Bulletin

Our next DIY doesn't just have to make an appearance for Valentine's Day. It's a nice addition to any home decor and it's sleek shape would look great year round! Geometric shapes are trending around the blogosphere lately, and we're really into the look. This DIY Geo Heart Bulletin is fun and functional, and the perfect way to show your home some love. Instructions below!

Materials:

12" x 12" cardboard* (recycle from an old box!), Pencil, Box cutter or sharp scissors, Ruler, 18" x 18" fabric, Spray adhesive, Hot Glue and gun, Foamfast hanger or command hook for hanging

*Make sure your cardboard is 1/4" thick, so pins don't poke through to the back

Instructions:

Step 1. Measure your heart shape. The two long sides are 9", the rest are 4.25". See below for reference.

Step 2. Use your box cutter or scissors to cut out your shape. Discard scraps. Be sure you use a scrap of cardboard or a magazine underneath to prevent cutting your work surface!

Step 3. Apply a thin, even layer of spray adhesive to one side of the heart and smooth on the fabric. Use your fingers to smooth any bubbles. Use scissors to make a slit directly above the point of the heart.

Step 4. Fold the edges of fabric over to the back side. Secure with hot glue, about 1/2" from the edge. Snip any excess fabric off and discard.

Step 5. Voila! These Foamfast hangers or command strips will work well for hanging.

Leave your loved ones a special note on Valentine's Day or use it to pin up special photos. It's lightweight and easy to make!

For more festive DIY ideas, visit our website!

DIY Valentine's Day Candles

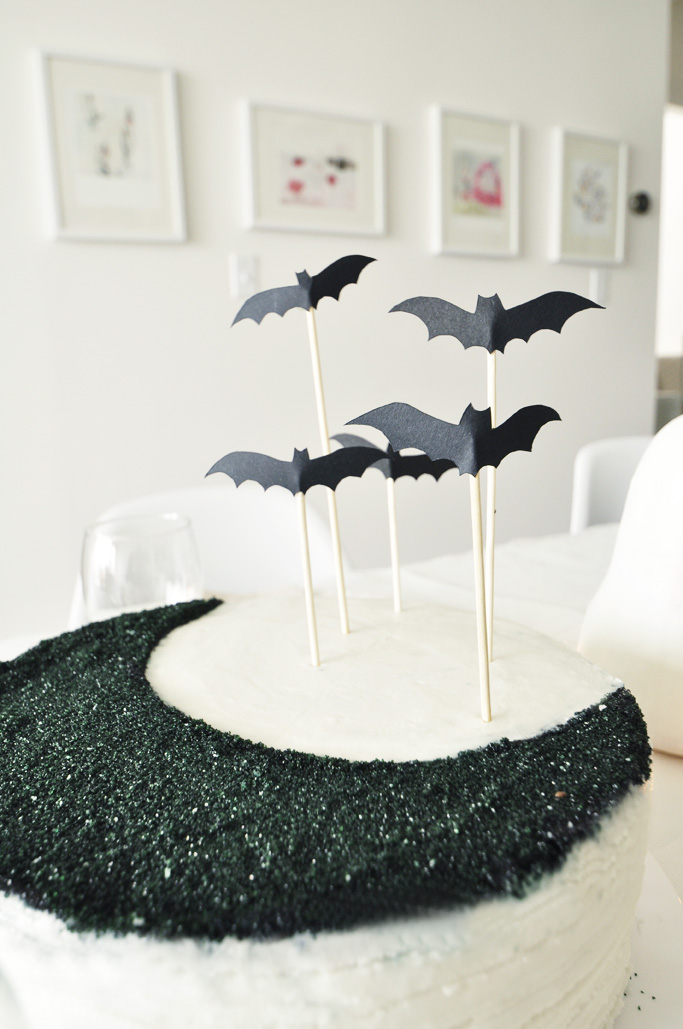
Valentine's Day is definitely one of our favorite holidays to celebrate. Christmas, Thanksgiving, Fourth of July, they're all a blast, but when we're given the thumbs up to decorate with all the pinks, fuchsias and reds we wish, we're overjoyed. Our Love/Valentine's card collection is one of our strongest (especially with the latest additions by Lisa Congdon) and our Big Day Pinterest Inspiration Board is overflowing with hearts and love. But it's really gearing up for the big 2/14 that get's us in the mood. The beauty of this DIY (found and inspired by the ladies at Design Mom!) is that you can use any color of wax, and cut in any shape you want, but we're going all out in hearts and XO's.

Materials: Colored candles or wax, candle wick, toothpicks, double-boiler or two pots, wax paper, small cookie cutters or knife

How To: Step 1. Using a double-boiler melt your wax. If you don't have a double-boiler, just stack one pot on top of anther. Add a little water to the bottom pot and bring to a boil. Rest the other pot on top (without touching the water).

*Try recycling those used or unwanted holiday candles for this project. It's a shame tossing out the bottom half of those delicious apple-pie scented wonders, so throw them in a pot and melt it down for a new facelift. Most wax will melt down well but we recommend you steer clear of beeswax.

Step 2. While your wax is melting, cover a flat work surface with wax paper, and snip your candle wick to about 1" stems. The length will depend on the shape so check your cookie-cutters in advance. You want the wick to reach about 1/3 or half of the way down your shape.

Step 3. After your wax is completely melted, allow to cool. *If you're using a recycled candle, remove any wick or wick stands.

Step 4. Once the wax starts to stick to the side of the pot, or a thin layer of skin forms at the top, you're ready to pour.

Step 5. Carefully pour the wax onto your covered work surface. You want to aim for 1/8 "- 1/4" thickness.

Step 6. Now you need to let the wax cool for about a minute before you start cutting your shapes. You can test the wax before cutting by pressing your finger into a corner. It should be firm but still hold the shape of your finger. You will need to pay close attention so that the wax does not get too firm before you cut.

Step 7. Cut your shapes out of the wax with your cookie cutter and remove excess wax.

Step 8. Carefully drive a toothpick up the center of the wax (about 1/2" - 1" depending).

Step 9. Finally, set your pre-cut wick into the top of the wax, leaving about 3/8" - 1/2" exposed.

Step 10. Allow to dry completely before use. You can reuse the excess wax again by simply melting in the same pot.

*Clean up tips: Allow the wax to completely dry in the pot and use a knife to gently pick it out. If you find there's still residue, boil water in the pot and while still warm, wash with soap and water. If it still doesn't come out, melt the dry wax and wipe with a paper towel, then wash with soap and water.

Happy crafting Valentine's Day lovers! For more fun DIY ideas, head over to our website!

New! Free Printable Valentine's Day Cards

Last year we released our first free printable Valentine's Day cards on the blog and they were a huge hit! Lots of readers downloaded the cards and we were really feeling the love. This year we're vamping things up with our newer designs, just for you! Simply visit the free printable page on our website and click each product to download. There you will also have access to last year's cards, so there are plenty to choose from.

Each download is formatted to fit four cards on an 8.5 x 11" paper, so simply print on a home computer, cut, sign, and send! We recommend using a thicker card stock for a more durable card. They're great for classrooms,  coworkers, or even sending a little love to your honey.

When Valentine's Day comes you'll be well prepared to spread your love with these witty wonders. To download all cards, click here!

DIY Neon Ornament Wall Decals

Christmas is literally almost here but there's still time to spread some cheer around your home! We're big fans of decorating with items already found around the house, and since we're paper geeks, this DIY is dear to our hearts. Looking back at 2012 it was definitely the year of neon. Remember the boys' second birthday party? And our new neon kids birthday party invitations? We thought we'd spend one last time this year indulging in our neon fix before another fabulous trend comes in 2013. These DIY neon ornament wall decals were inspired the hot air balloon decals made by Gosh and Golly shown in Sabrina's nursery. Full instructions below!

Materials:

Neon Paper, Silver Paper, Mug & pencil - or circle-cutter, Scissors, Glue stick, Silver wire or ornament hooks, Hot Glue + Gun, Glue dots or sticky-tac

How To:

Step 1. Trace your circles onto sheets of colored paper and cut out with scissors. This part takes patience, unless you have a handy circle cutter at home. They come in all sizes, but 4" is a happy medium. As long as your circles are all the same size it will work.

Step 2. Choose three colored circles and fold them in half.

Step 3. Glue the back of both sides of the center circle, then adhere to one side of the other two.

Step 4. Cut your silver paper into three 1" x .5" strips. Fold in half (hamburger style!) and glue one half of the back (hotdog style!) Then place at the top end of each of your folded circles.

Step 5. Cut your wire into 3" strips and fold the top .5" over with your finger. Or, if you have spare ornament hooks lying around, you can use those just as well. Place a small dab of hot glue on the back (flat side) of your paper ornament and set the flat end of the wire in place.

Step 6. When you're ready to display, place a dab of sticky-tac or a small glue dot on the back and you're done! Be careful when you remove the wall decals that you do not remove too quickly. With glue dots you can slowly peel of and rub the excess off with a finger, or twist to remove. Sticky-tac is probably more gentle on paint but the decals might not stay in place as long.

Happy crafting and Happy Holidays!

Hello!Lucky Holiday Party

Our annual Hello!Lucky employee holiday party was a big success! We try to get creative with our gift-giving and this year we did just that - got creative! Everyone handmade each of their gifts and we exchanged them at Lyndsey's Twin Peaks apartment above the glowing city lights. We knew everyone had hidden talents but we were blown away with the final product! All our employees went above and beyond and the night was one to remember.

Jon, our house brewer, brewed a winter beer and even created his own labels! Heather also made up a special batch of pumpkin liqueur - and it was delicious with all the treats from the night! Kelly C. made adorable s'more kits, and Lyndsey made homemade cookie butter! Stewey made his famous Stewey's Cheweys and also his famous knit coasters! (Did you see them on the Huffington Post?) Holly made amazing snow globes, James tied some awesome rope door stops, and Shayna handmade her winter scented candles!

Laura made gorgeous pine wreathes and Lillian sewed individual cocktail napkins. Below you can see Lia's adorable felt houses, all lit up with mini lights. It's the perfect decor!

Christina got crafty with her mini terrariums, and spruced them up with some festive holiday deer! The room was overflowing with holiday spirit, and everyone couldn't wait to exchange.

Even more delicious snacks from Eunice and Sabrina's holiday cookies, and Leslie made homemade granola in these sweet little jars.

Each person brought five gifts and each person left with five. As the night went on, surprise Karaoke evolved and we all had a grand ol' time.

Thanks Lyndsey for hosting and the entire HL crew for celebrating such a wonderful year! Here's to 2013!

Handcrafted Holiday by Creativebug

Join Creativebug in their mission to take back the Handcrafted Holiday! Our friends and craft extraordinaire's are offering a weeks worth of FREE handcrafted holiday workshops! It's a great way to get involved with Creativebug and their fabulous DIY ideas. Plus, it makes a terrific gift for your crafty friends. A gift subscription comes with 1-6 months worth of drool-worthy DIY and who knows, maybe your friend will even invite you along for the fun. You can get detailed instructions on our pom pom garland, cake toppers, and photo booth backdrop, along with tons of other inspiring tutorials. Check out the free holiday workshops here!