
School's out for summer! Hello, toy organization!
You’ve just gotten home from a busy day and all paths forward are littered with toys. Your kids are ticking time bombs at this hour, so you can’t slow down. You pick your way through the landmines, but a misstep lands your heel on a plastic lizard. You yelp in pain, and in synchronized call-and-response, your kids start to wail.
Toy organization, anyone?

One of our Summer goals is to keep our kids' toys organized and our sanity in check! Between Eunice and Sabrina, we have five kids under five -- a surefire recipe for toy disaster! (“Please can I just move out of my house and into a FEMA trailer? Because it really is that bad most days.”).
We needed inspiration, so we chatted with San Francisco organization guru (and former elementary school teacher) Pam Parker, to collect some sanity-saving tips for toy organization. Our goal? Get our kids' toys organized in a consistent, aesthetically-pleasing manner that invites them to play, create, and put away!

Toy storage starts with getting the right containers -- ideally ones that are beautiful and functional. Here are some of our favorites:

Sources:
1. Land of Nod, 2. West Elm, 3. Serena and Lily, 4. Schoolhouse Electric, 5. Ikea, 6. Ikea
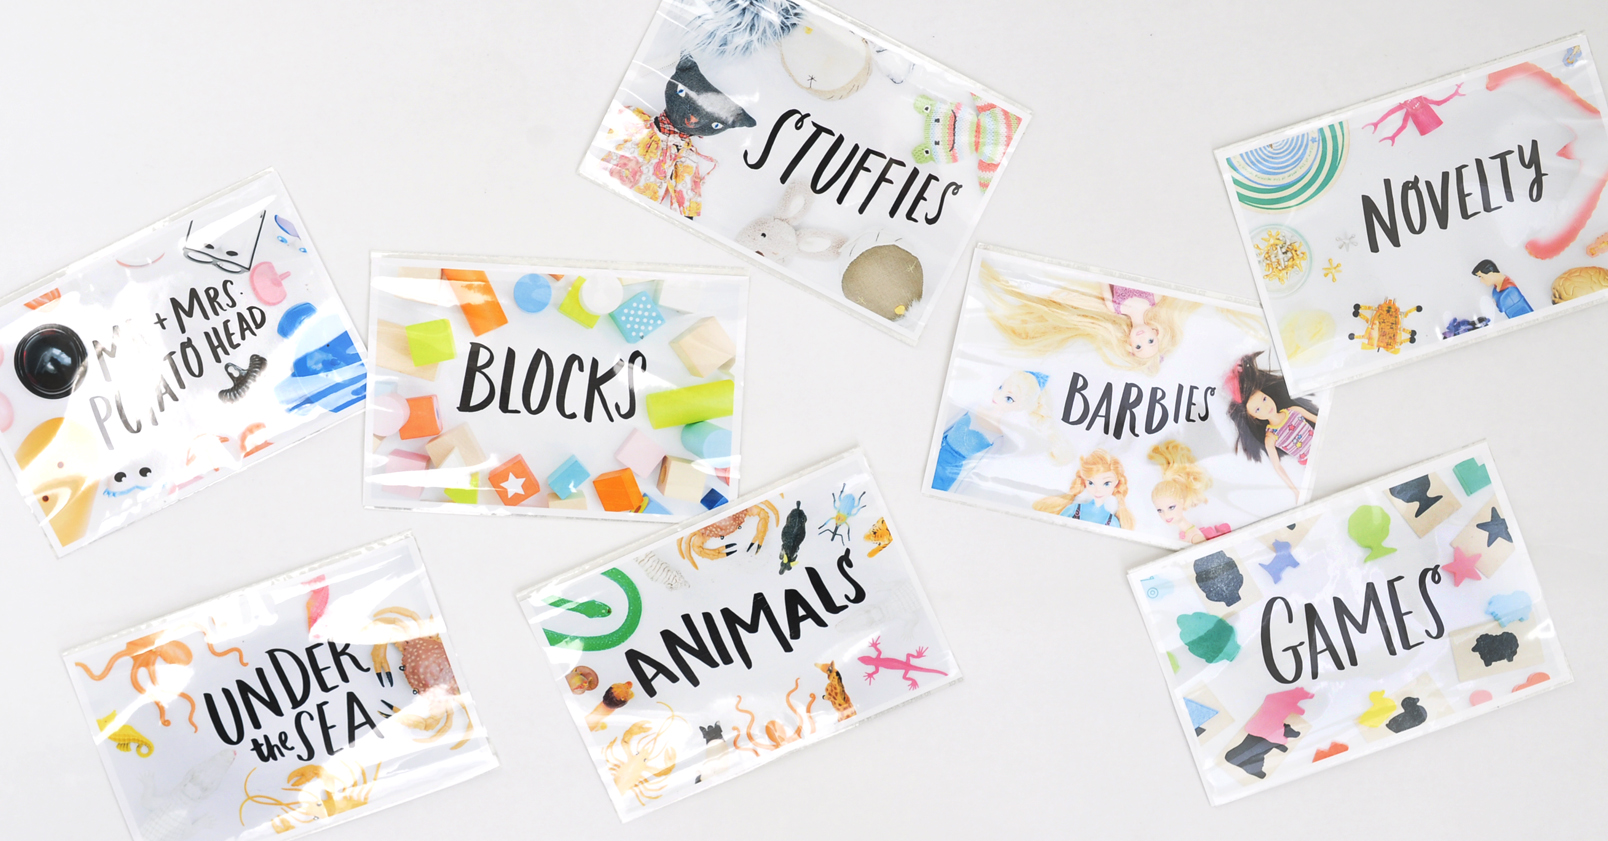
Once your toys are contained, you need useful and beautiful toy storage labels, ideally with images that make them legible to pre-readers. We put our creative caps on and whipped out these free downloads that you can print at home. We recommend printing the labels on 8.5” x 11” glossy paper, trimming them, and inserting them into a plastic photo insert sleeve so you can easily swap them out as your storage needs change.


Tips for organizing your toys (kudos to Julia Morgenstern, author of Organizing from the Inside Out, from which this is adapted):
1. Sort: Sort like with like (e.g. dolls with dolls, blocks with blocks, Legos with legos; novelty items with novelty items; it's okay to have a miscellaneous bin / category). Our labels give you some popular categories to get you going.
2. Purge: Purge any toy that hasn't been played with in the last 6 months, as well as any with broken or missing pieces. A great place to donate toys: http://www.stuffedanimalsforemergencies.org/
3. Assess: Assess which toys you / your children actually want to keep, and which could be put away for a rainy day or donated to someone who really needs it. Involve them in the process by asking them to set aside one toy that they want to give away to a child who is needs more toys to play with. Keep it in a garage or storage area for 1 week just in case; if they don't ask for it, then get rid of it!
4. Contain: Contain each type of toy in a "just right"-sized bin -- it should neither be too large or too small. Use the size of the bin as a natural limit to what is contained in it -- if the bin starts becoming to small to contain its contents, it might be a signal that it's time to purge...or upgrade to a larger bin if necessary. Use our lovely labels to make it easy for pre-literate kids to help themselves to what they want and put away their toys when they're done.
5. Maintain: Once your system in set-up, keep it up, and enlist your kids to do the same.
Get your free printables here!
And now, go put a Sponge Bob bandaid on that heel wound!
Happy organizing!