DIY Halloween Sidewalk Skulls

DIY Sidewalk Skulls by Hello!Lucky

It's that time again! The holidays are right around the corner and that means we're gearing up for a season of DIY decor. Halloween is the one holiday in which you can get away with practically anything. And although we love faux spider webs and painted pumpkins, we're more attracted to unique, original designs. Our DIY Sidewalk Skulls are a great way to add spook to your home without too much black and orange. Where's the wow factor? It's a glow in the dark graveyard so each piece glows in the gloomy night of Hallow's Eve.

DIY Sidewalk Skulls by Hello!Lucky

Materials: White poster board or card stock, Scissors or craft knife, pencil, glow in the dark acrylic paint (available at craft stores), paintbrush, skewer sticks, masking tape

How To:

1. Print this skull template on your home printer. Cut out with scissors and a craft knife (for the eyes and nose) and trace onto your poster board or card stock. *Tip: for extra strength or to keep your skulls from warping over time, glue two pieces of card stock together before tracing and cutting.

2. Cut out the skull from the poster board or card stock using scissors and a craft knife.

3. Apply three generous layers of glow in the dark paint.

DIY Sidewalk Skulls by Hello!Lucky

4. After the paint is dry, place the skewer stick on the back (pointed side down) and secure with a piece of masking tape.

DIY Sidewalk Skulls by Hello!Lucky

*Tip: We recommend keeping the skulls under a lamp or bright light before displaying for best results. If rain is in the forecast, remove the skulls from the yard to preserve the strength of the paper.

Place skulls along your sidewalk or pathway to light the way for trick-or-treaters! We added bats and bones to the mix, but you can make anything from witch hats to pumpkin heads!

DIY Sidewalk Skulls by Hello!Lucky

Happy Halloween!

For more crafty DIY ideas, visit our website today!

Crafts, Cocktails, and Cake Toppers!

Remember our creativebug Video Shoot? Well after the release of our first two tutorial videos we've felt an enormous out pour of love from our fans and fans of creativebug. That's why we're thrilled to announce the Crafts, Cocktails, and Caketoppers event with creativebug at Chronicle Books! Sabrina and Eunice will be there giving hands on instructions for how to make your own cake topper, perfect for any event. The workshop (Thursday September 27th from 6-8) is totally free but space is limited so click the image above or RSVP here! Bring your friends or family members for a night full of fun with local craft connoisseurs. We'll see you there!

Indoor Tents for Kids

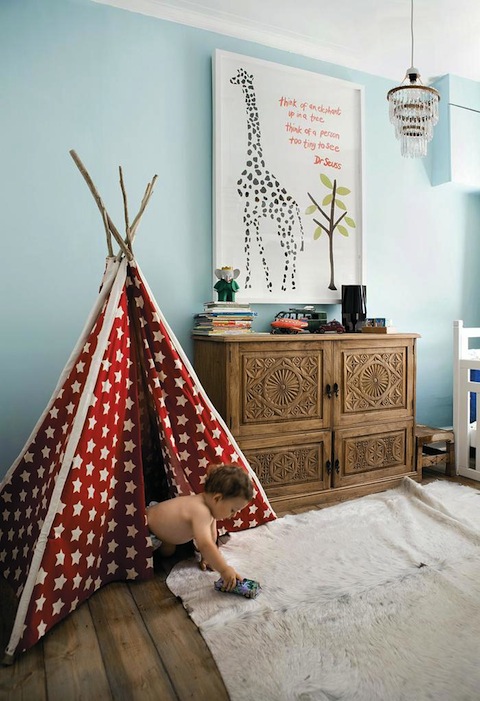
As parents and adults, we encourage creativity and imagination for kids. One of the most treasured activities we remember growing up is building forts. Nothing brought more joy than gathering blankets, pillows, towels, cushions, and any item that could turn the bedroom into a private fortress, much to our parents chagrin. The mess was a handful, but the end product always made great memories. Now our favorite childhood pastime has turned into a sophisticated and trendy home accessory. These talented bloggers and parents have shared images of their own indoor tents and they're pitching a frenzy among crafty moms around the web. The tent above takes teepee to a whole new level. Found via Black Eiffel from Frank Features, those stars are a fun addition to any kids room.

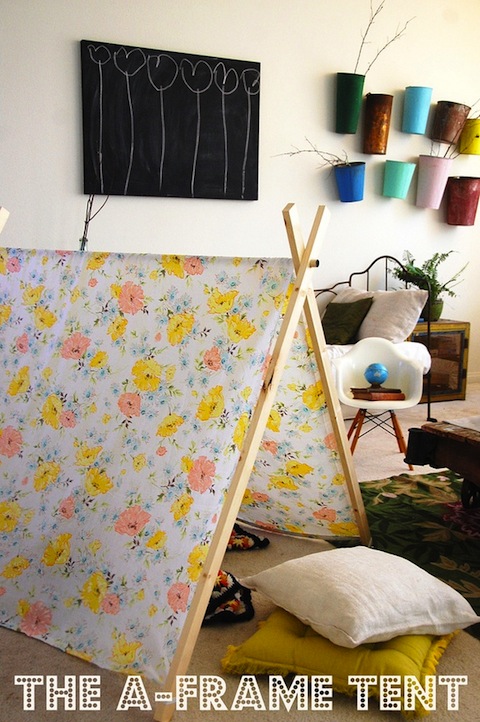
This A-frame tent made by Rubyellen of My Cakies is a simple DIY and can easily be broken down and stored. With elastic bands sewn to the corners and washable fabrics, this tent makes parent playtime a cinch and kids playtime a dream come true.

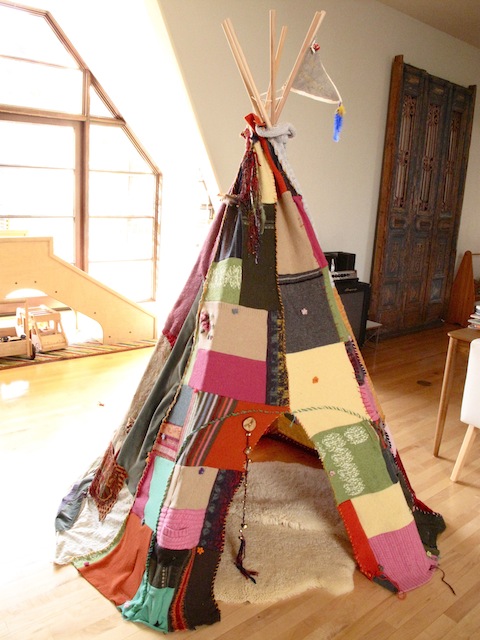
Tifanie of Noddyboom used thrift store found sweaters and textiles for her whimsical teepee style tent.

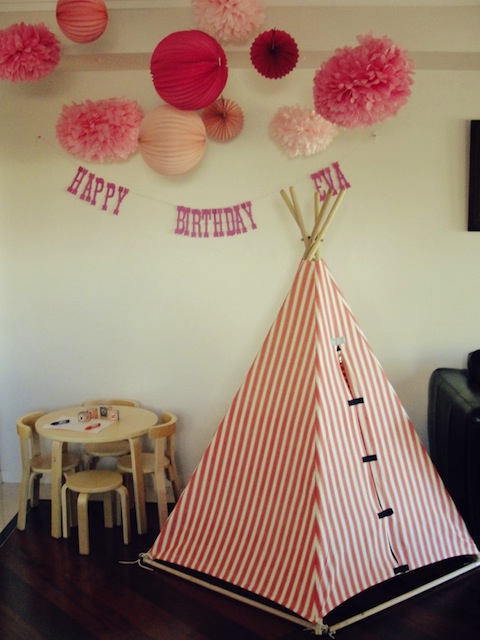
This photo of Eva'a red striped tent (found via Spearmint Baby via Happiness is Eva) takes the cake. The structured foundation, the bold stripes, the velcro fasteners, it's all tent perfection. You can get your own tent over at An Angel at my Table.

DIY Gold Leaf Notepads

Lately we've been following a new craze popping up around the web. Gold leaf, historically used as an art medium, has now turned into one of the trendiest decor accessories this year. We've seen it on picture frames, furniture, fingernails, and jewelry, and once we saw Eat Sleep Cuddle use it for handmade notebooks we knew we had to give it a shot. Naturally our taste for nautical design comes into play when coming up with a new project, so these DIY Gold Leaf Notepads fit right in. Inspired by traditional nautical flags, we felt the pop of gold would compliment the classic color palettes seen in the flags. Since school is back in session and notes are to be taken, this DIY project is perfect for daily to-do lists and is the ultimate stylish campus accessory. Read the full instructions below!

Materials:

4" x 6" note cards, Elmer's Glue, Craft Knife, Paint Brush, Gold Leaf Kit, Painters Tape, Foam Brush, Card Stock Paper, Ruler, Bone Folder, Pencil

*Tip - We don't recommend the "peel and stick" gold leaf, as it isn't a guaranteed success. The original sheets are much more reliable. Most kits will include the gold leaf sheets, adhesive, and sealer, but you can also purchase each item separately. We bought ours at Michaels, but they are sold in most craft stores.

How To:

Step 1. Stack your note cards so the edges are even. Score one end of the stack of cards with a craft knife, making small indentations on the paper. This will ensure your glue will stick strongly to the stack of cards.

Step 2. Apply a layer of Elmer's glue to the scored edge of your cards. We recommend using a bulldog clip or rubber band to help keep the paper in place.

Step 3. Once the first layer of glue is dry, add two more layers. Set aside.

Step 4. While the glue is drying, cut your card stock paper to size. You will need to measure the thickness of your stack of note cards. For most sets of 4" x 6" cards, the stack is 3/4" thick. In this case, cut your paper to 12 3/4" long by 4" wide.

Step 5. Measure 6" from each end. Using a ruler and bone folder, create two score lines 6" from each end, creating a center strip which will act as the binding for your notepad.

Step 6. Apply two strips of painters tape to your card stock. We placed ours along the back score line and 1.5" down from the top.

Step 7. Apply a thin layer of metal leaf adhesive using a paintbrush. Avoid any puddles, as this may cause your paper to ripple. Allow to dry at least 2 minutes, or until it feels dry but sticky to the touch. If the adhesive is still wet, the gold leaf will not stick properly.

Step 8. Gently lay a layer of gold leaf on top of the adhesive. Most kits will have detailed directions, and should come with small sheets of wax paper to help smooth the gold leaf down. Then use your foam brush to smooth.

Step 9. Once the gold leaf is set and dried to the adhesive, use your foam brush to wipe away any excess pieces. Save large pieces for later. Trust us, you'll want to do this again!

Step 10. Apply a thin layer of sealer on top of the gold leaf to prevent scratching. Allow to dry.

Step 11. Carefully remove the painters tape from the card stock.

Step 12. Cut triangles out of your card stock to create a flag shape. Or, leave as is!

Step 13. Apply Elmer's glue to the center strip of your card stock. It should already be scored from Step 5. Set your stack of note cards (the side you already glued and dried) on top of the center strip and hold to seal. Voila! You have instant modern notepads that you'll be dying to show off in class or at the office. Happy crafting!

For more paper DIY projects, head over to the DIY section of our website here!

Skill Exchange

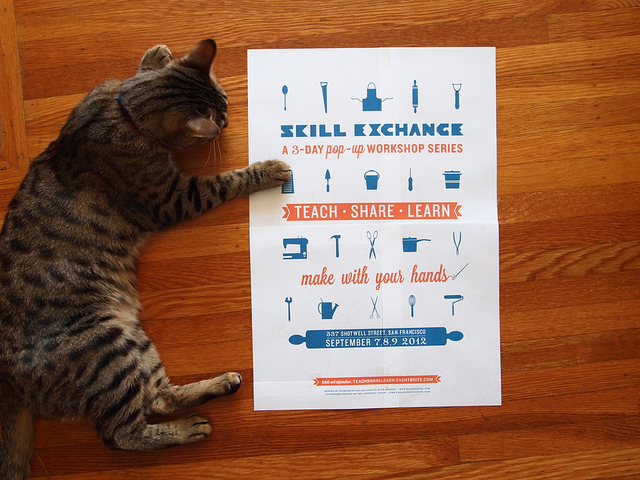
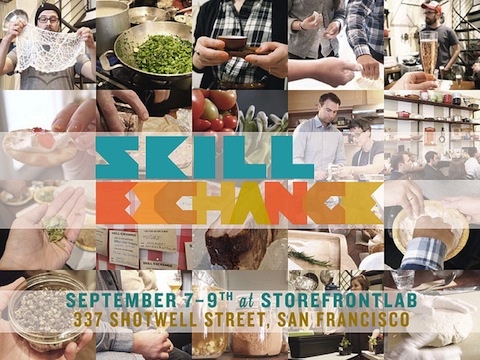
Next Friday marks the start of an awesome workshop program by Skill Exchange. They have teamed up with StoreFrontLab for a 3 day workshop series including demonstrations about hot topics like home brewing, cooking, and even photography techniques. Hello!Lucky will have cards for sale along with drool-worthy coffee by Ritual. All the workshops are super affordable but you have to sign up in advance to hold your spot. We're eyeing the Vintage Clothing workshop on Friday Sept. 8 from 3:00-4:30 - but space is limited! For more info and to sign up for the workshops, click here!

Props to James for printing the poster, too! Sign up to take the Contemporary Letterpress Workshop by the Aesthetic Union here!

DIY Patterned Papers: Favors

We're feeling a lot of love for our new DIY Collection and one of our most exciting additions is the selection of patterned papers that match your favorite wedding suites. The papers, all 8.5 x 11" and printed on smooth, 80-lb text weight paper are the perfect way to add finishing touches on your big day, from paper drink flags to napkin rings. To add to our series of DIY wedding crafts, we're bringing you easy and adorable paper favors.  These can also be doubled as place cards or escort tags!

These mini paper bags are the simplest way to provide favors for your guests, but there are many ways you can dress them up to match your decor. You can find them in various colors at your local craft supply store, and they come in large and small sizes. They make the perfect grab bag for a casual wedding filled with local treats or handmade gifts. Instructions below!

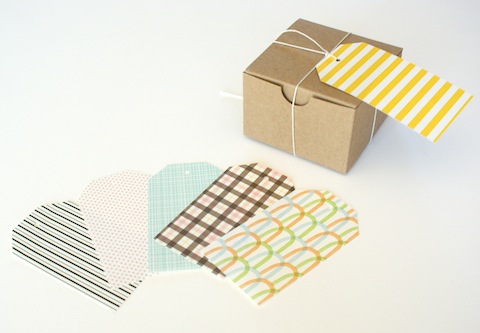
Mini cardboard boxes may be the most traditional wedding favors around, but they are as versatile as they are practical. We wrapped our patterned paper around them and secured with a label or ribbon to make them match. If you want to get extra crafty, you can even make a favor box out of the patterned paper! Use this favor box template to trace.

And last but not least are these easy tea bag tags. You can wrap them to almost any object, and they can be dressed up or dressed down with some fancy calligraphy or alphabet stamps. Use this favor tag template for easy tracing.

Paper Bags:

Materials: 3.5" x 2" x 6.75" Paper Bags, Patterned Paper, Glue, 1/8" Hole Punch, Ribbon or Twine, Scissors

How To: Cut your patterned paper into 2.5" x 3.5" rectangles. Insert your favor into the bag and fold the top 1.25" down toward the back. Fold your patterned paper in half (the long way - or hot dog style!) Apply some glue to the back side of your patterned paper and stick to both sides of the folded bag. Punch a hole 1.5" from both sides. Loop your ribbon or twine from the back and tie a square knot or bow. Cut the ends of the ribbon at 45 degree angles.

Adhesive Labels:

Materials: 3.5" x 2" x 6.75" Paper Bags, Patterned Paper, Glue, Label Paper, Washi Tape or Stickers

How To: Cut your patterned paper into 2.75" x 3.5" rectangles. Glue to your paper bag. Print a 2.25" x 3" label on label paper and stick on top of your patterned paper. Stuff with a favor and fold 1" from the top. Seal with washi tape or a sticker.

Mini Cardboard Box Wrap:

Materials: 3" x 3" x 2" Boxes, Patterned Paper, Glue or Double-Sided Tape, Label Paper or Ribbon

How To: Cut a 1" x 11" or 1.5" x 11" strip of patterned paper. Wrap around the box and secure with double sided tape or glue. Add a personalized label or piece of ribbon and tie.

Mini Paper Favor Box:

Materials: Patterned Paper, Pencil, Scissors, Glue, Template

How To: Cut out the template with scissors and trace onto the back of your patterned paper. Cut with scissors and fold in places of dotted lines. Apply glue on the two labeled tabs and fold pieces together so the "top" and "bottom" squares are in place.

Tea Bag Tag:

Materials: Patterned Paper, Scissors or Craft Knife, Pencil, Ruler, 1/8" Hole Punch

How To: On the back of your patterned paper, draw a 2" x 3.5" rectangle with a pencil and ruler. Cut out with scissors or craft knife. Cut 1/2" corners off the ends of one side. Punch a hole 1/2" from the top and 1" from the sides to center. Loop with ribbon or twine and tie to your favors! Use this handy template for easy tracing!

Shop all patterned papers here, and to view more paper DIY projects, visit our website!

DIY Gold Confetti Champagne Flutes

Are you preparing a toast this season? Planning a special announcement? These DIY gold confetti champagne flutes are a fabulous way to liven up your glassware, especially for a special event. Or, if you're looking for unique gift ideas they would make a dazzling addition to any china cabinet. We found the inspiration for this DIY over at Radical Possibility. The writer, Zandi, has tons of easy and inexpensive projects, and many are Anthropologie replications, or in her words, "knockoffs." Zandi sure fooled us because her Confetti Tumblers are fantastic!

You can find inexpensive champagne flutes at your local thrift store, or buy new at any department store. Spice them up with customized colors for your wedding and the bridal party will be toasting in style. We love the classic elegance of gold, but a fun neon pink wouldn't bee too shabby either!

Materials: Glass champagne flutes, Gold enamel paint, small brush

How To: Step 1. Wash your glasses very well and dry completely

Step 2. Dip your brush in a bit of gold paint. Starting at the base of the cup, dab the paint on to the glass. We set ours upside down for easy painting.

Step 3. As you fill the bottom part, begin to spread out your dots more and more as you reach about half way.

Step 4. Once the glasses are dry, you can bake them to seal the paint. Read the instructions on your paint bottle in advance. Ours baked for 30 minutes at 350 degrees.

Tip* be very careful when hand washing. Use cold water and air dry.

For more fabulous DIY ideas, visit our website here!

Creativebug Video Shoot

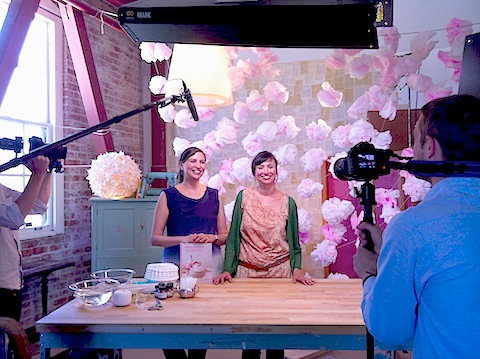
Earlier this summer we were in and out of the Creativebug studios shooting four different craft video tutorials, the first of which debuts on their site today!

Creativebug is a new website dedicated to online art and craft instruction. They offer high quality video workshops on almost any topic - from pottery to bookbinding. They have some amazing crafty superstars in their lineup already and we're totally honored to have been asked to be instructors. Right now you can take classes from people like Diana Fayt, Natalie Chanin, Debbie Stoller, and others - check out the complete list of instructors here. They're constantly adding new videos and teachers to the site so be sure to check back often.

 Our videos are focused on crafts to make for parties and can be adapted for any size event from a big wedding to a small birthday gathering. We had lots of fun shooting them and we hope you check them out! You can view our trailer and tutorials here.

Thanks to the amazing team at Creativebug for making the experience such a great one. We can't wait to shoot more!

Bold Italic Pop-Up Shop at Voyager

Don't miss the big opening party for the Bold Italic's pop-up shop at Voyager! Tonight from 6-9pm you can be the first to get your hands on the local merchandise by your favorite SF retailers including Rickshaw Bagworks, Salty Fox Jewelry, Yellow Owl Workshop, and yours truly, Hello!Lucky! Along with handmade gifts and great people, free beer is being served to trusty San Francisco visitors.  Voyager is located at 365 Valencia Street. See you there!

DIY Strawberry Print

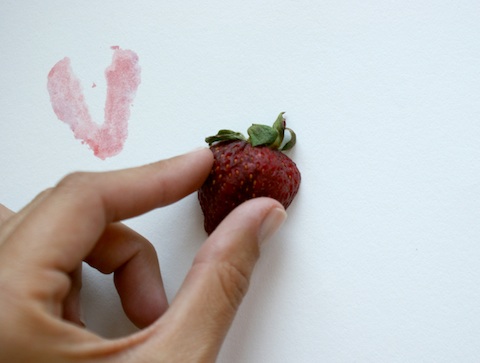
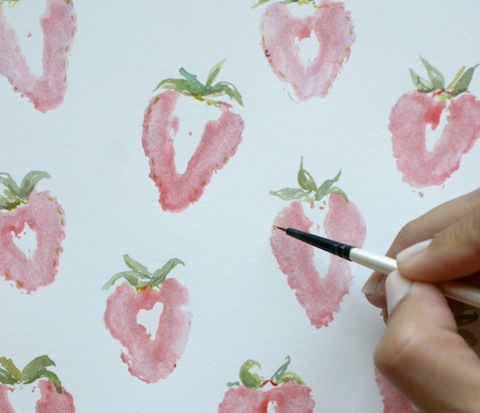
Still feeling the excitement of the summer season? So are we! The farmers markets are bustling, coats and jackets stored away, and beaches are calling our names. While enjoying the sweet taste of some fresh summer strawberries (and constantly imagining new DIY ideas), we realized the organic shape of the berry's insides would make a fantastic stamp! After testing a few of our own, we knew this was something everyone can do, especially kids! In absolutely no time you and your family can have one-of-a-kind artwork hanging on the wall, all made with supplies you already have at home.

Materials:

3 to 4 strawberries (halved), watercolor paint, brush, watercolor paper, frame (optional)

How To:

Step 1. Dip your brush in a little water, then dab in some red or pink watercolor paint.

Step 2. Brush a little paint over the flat surface of your halved strawberry. Try not to add too much water in order to get a more vibrant stamp.

Step 3. Carefully press your berry onto your paper. Let sit for a few seconds before picking up.

Step 4. Repeat! Be sure to leave a 1/2" space on all sides of your paper, in case you want to frame your artwork.

Step 5. After the stamps are all dry, add some leaves to your berries with a small brush. You can even make some little seeds around the edges.

Step 6. Place in a matted frame and display!

For more fun craft ideas for kids and adults, visit the DIY section of our website here!

DIY Patterned Papers: Envelope Liners

DIY Envelope Liners from Hello!Lucky on Vimeo.

Do you remember our How To Assemble Your Wedding Invitations video? Well we had so much fun making it we just had to come up with more. With the launch of our new DIY Collection this is the perfect time to debut the first in a series of DIY Paper Details stop-motion videos. All videos were styled, directed, and filmed right here in our San Francisco studio and we couldn't be more excited to share them with you! Today we have DIY Envelope Liners. Using our bulk patterned papers and envelope liner templates, you can add these easy and cheerful liners to your wedding invitations in no time. Watch the video for full instructions or see below!

Lined Envelopes

To save time, photocopy this template onto the back of each of your patterned paper sheets and cut out each envelope liner (skip to Step 4).  If you don’t have access to a photocopier, follow the steps below to create your own template to trace.

You’ll Need:

DIY Envelope Liner Template, Printer, 1 sheet cardstock, 8.5 x 11” (US) or A4 (UK), Ruler, Bone folder or a butter knife, Cutting mat or a magazine, Craft knife, Scissors, Pencil, Patterned paper (1 sheet per envelope), Envelopes, Glue Stick

How To:

1. Print out this template on cardstock. Make sure your printer is set to 100% (or, “no scaling”) to ensure that the template prints to scale. 2. Using a ruler, craft knife, and cutting mat, cut out the envelope liner template. Use scissors to trim the rounded end. Hold the template up to your envelope to make sure it’s the right size - envelope liners need to slip neatly into the envelope and should align with the envelope flap but not cover the glue. If needed, adjust the template using your printer’s scaling options. 3. With a pencil, trace the envelope liner template onto each sheet of patterned paper. 4. Using a ruler, craft knife, and cutting mat, cut out the envelope liner. Use scissors to trim the rounded end. 5. Fold the flap down to crease the envelope liner, approximately where it says “fold here” on the template. With the flap portion of the liner folded down, apply glue. Fold the envelope flap down and smooth to secure.

For more pretty paper projects, head over to the DIY section of our website, here!

New DIY Collection!

Today we're happily announcing the release of our new DIY Wedding Collection! We know how important all the details of a wedding can be and how expensive it can all get. We're so excited to offer up some budget friendly alternatives that look beautiful and will let you put your own personal touch on your big day.

Our DIY collection includes letterpress printable cards and invitations, patterned papers, wedding craft projects, and free printable wedding signs for all your paper needs. They come in some of our most popular wedding designs like Nouveau Peonies and Heirloom Harvest, along with many others. You can shop our patterned papers and printables online but be sure to follow our blog for tutorials and inspiration for your craft projects!

Our free printable table numbers, guest book signs, and reserved seating signs can easily be printed at home on cardstock paper or mounted on a fun prop or accessory. Browse and download all wedding signs here!

These letterpress printable invitations are perfect for a small event like a rehearsal dinner or bridal shower. They are printed on 100% cotton luxe paper and will guarantee an expensive look for an affordable price. Shop all printable invitations here!

You can make your own paper details with matching patterned papers! We have great DIY templates and instructions for how to make all the best accessories like envelope liners and drink flags. All designs are customizable with 35+ ink colors to choose from. Shop patterned papers here!

We hope you're just as excited about our new DIY collection as we are. Let us know what you think and if there's anything else you'd like to see there in the future!

Renegade Craft Fair

Hooray! This weekend marks the 5th annual Renegade Craft Fair in San Francisco! This year from 11am - 7pm at Fort Mason you can indulge yourself with handmade excellence from over 250 artists and taste some fine San Francisco foods. And they're back across the Atlantic for the second annual London Renegade Craft Fair! This years dates are September 15th and 16th so be sure to mark your calendars.

DIY Lemon Poppy Seed Ice Cream

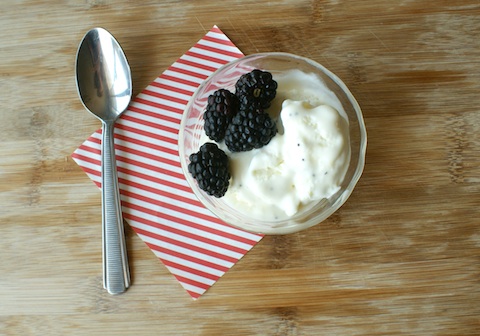
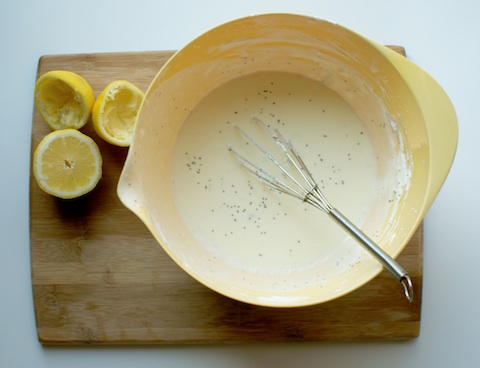
In keeping with our summer DIY theme, we wanted to bring you a tasty DIY treat. If it's a hot day, the last thing we want to do is stay inside while a hot oven raises the indoor temperature, so we figured a recipe that involves a freezer would settle better. There are lots of easy at home ice cream recipes floating around the web, but when we stumbled upon this two ingredient ice cream recipe, a few questions were raised. Could it be true? What would it taste like? It tastes like heaven. Who would have thought these two simple ingredients could produce such a divine flavor. Well we couldn't help but try out our own version so if you're into trying something new, try our lemon poppy seed ice cream with fresh blackberries. Instructions below!

 Materials: 1/2 cup honey, 2 cups whipping cream, 1 teaspoon vanilla extract, 1/4 cup lemon juice, 1 teaspoon poppy seeds, fresh blackberries to serve

How To: (adapted from this recipe)

Step 1. Whip 1.5 cups of whipping cream until it forms stiff peaks. Stir in vanilla and lemon juice. Refrigerate. Step 2. Pour honey into a saucepan. Heat on low until it is very runny and add the remaining 1/2 cup of cream. Stir together until well blended. Step 3. Add honey/cream mixture to the whipped cream. Whisk until well blended. Add the poppy seeds. Step 4. Freeze for about 6 hours until the mixture is the consistency of ice cream.

Enjoy!

found via Curbly via Mommy Knows

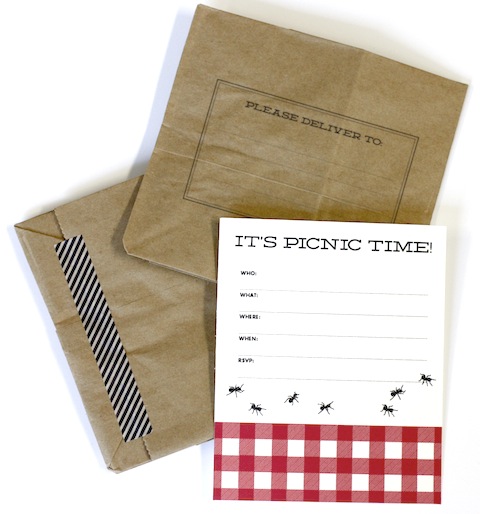
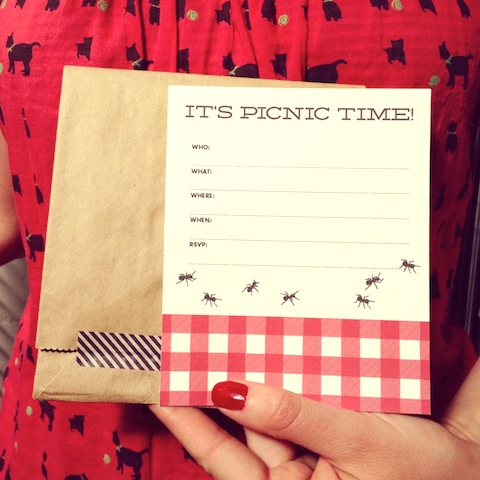
Free Printable! Picnic Party Invite!

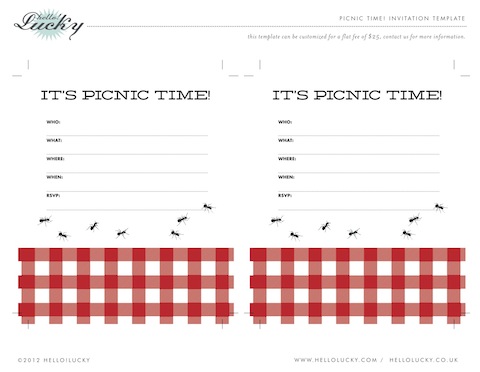
If you're summer hungry like us you're already planning your next outdoor occasion. We are dreaming of warm afternoons, gingham blankets and our favorite snacks. Well the time has finally arrived and so we've created these festive printable picnic invitations just for you! They're perfect for any summer event and can be printed right at home. The address label stamp is also printable, or take it to your local stamp shop and create a lifelong keepsake. You can download the templates here!

Picnic Invitation

Address Stamp

Enjoy!

DIY Embroidered Flower Baskets


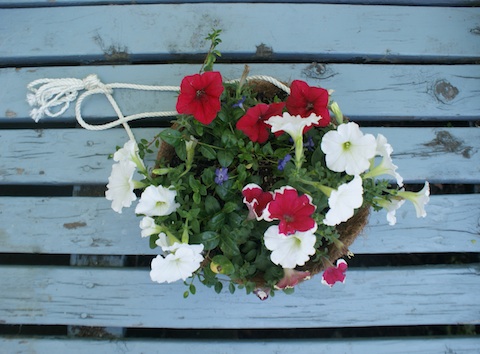
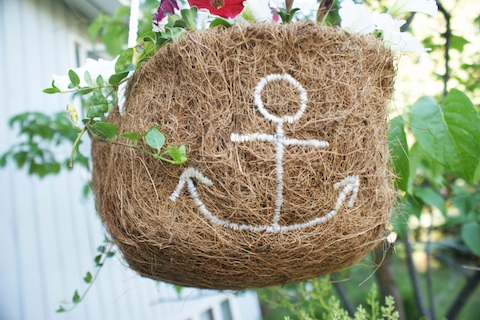
Are you looking for an inexpensive way to spruce up your patio or front stoop? Look no further! This DIY embroidered flower basket is insanely easy, and totally customizable. Coco liners are great for iron window hayracks and basic standup plant stands, but the natural fibers of the liner itself make for a fabulous embroidery project. We grabbed a few at our local craft supply store and went for a nautical themed basket. The anchor was free-handed but you can easily create a monogram, a flower, or any icon you like! Loop some rope through the basket or even leather or chain to create the right look for your home. See the steps below!

Materials:

Coco liner, embroidery thread and needle, rope (or other hanging material), potted flowers and soil

How To:

Step 1. Draw your icon or design on paper before you get started, and make sure it will fit nicely on your liner. Place your paper over your liner and make some loose stitches to mark your lines. Tear the paper out to reveal a basic outline.

Step 2. Dive right in! Create a large knot in one end of your thread. Begin by creating a clean outline of your design as a guide, then go back through carrying the thread to fill the space. Here are some tips for satin stitching.

Step 3. When you're all finished, be sure to knot the end of your thread so it doesn't unravel.

Step 4. Cut three equal sized pieces of rope (or whatever your hanging material is) at 3' each.

Step 5. Make three dime-sized holes about 1.5" below the top of your coco liner at equal distances apart. Keep your design in the center of two.

Step 6. Loop your rope through the holes and double knot to keep in place. If you're using chain, an "S" hook will do the trick.

Step 6. Tie the three pieces of rope together at the top.

Step 7. Plant your flowers and hang with a ceiling hook!

Voilà! The easiest and most inexpensive hanging basket around. We want to see yours! Post pictures to our facebook or twitter to share!

For more fun DIY ideas, visit our website, here!

DIY Fourth of July Tea Towels

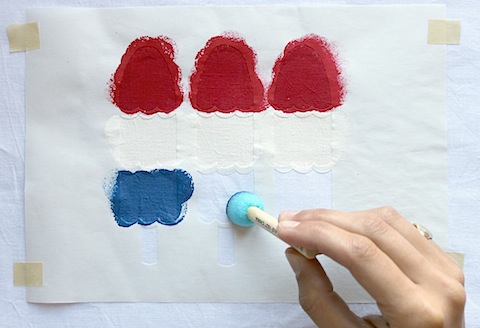
If you can believe it, July is right around the corner and friends and family are starting to make plans for the fourth. Whether you celebrate each year with a blow-out bash or keep it simple at home with close pals, it's always fun to have some festive decorations on hand. There are lots of quick and inexpensive ways to throw together some red, white, and blue, but why not go the extra mile this year and try something worth keeping. These firecracker popsicle printed tea towels relive those nostalgic childhood memories of chasing down the ice cream man and indulging in a sweet summer treat. Super easy to make and totally washable, you'll be glad to have them for next year!

Materials:

Pencil, craft knife and cutting mat (a magazine will work), plastic coated freezer paper, masking tape, red, white, blue, and brown acrylic craft paint, foam brushes (or cut up some sponges at home), iron, white tea towels (we used flour sacks) and this handy Popsicle Template

How To:

Step 1. Print your Popsicle Template on your home computer.

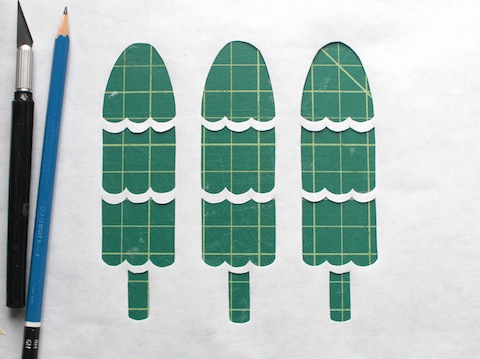
Step 2. Cut out a piece of 8.5" x 11" freezer paper and trace the template. Be sure you trace with the plastic side down.

Step 3. Place your traced paper on a cutting mat or magazine and cut with your craft knife. Be very careful!

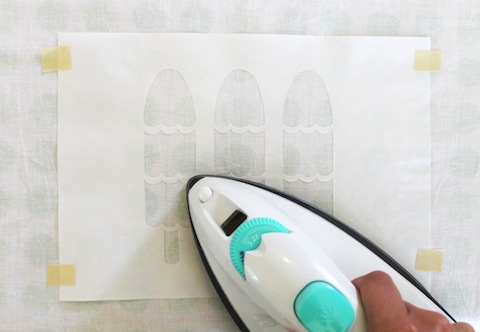
Step 4. Place your cut out freezer paper on your tea towel (plastic side down). We suggest using some masking tape on the corners to prevent it from shifting.

Step 5. With your iron hot, slowly smooth the paper onto the towel. Watch as the plastic seals itself to the fabric. Be sure to get all the bubbles out!

Step 6. Using your foam brushes and paint, dab each color in their designated spot. Don't forget to put a piece of paper under the towel as the paint might leak through.

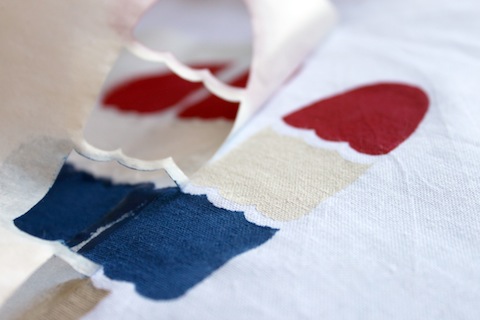
Step 7. After your paint has dried, carefully peel up the paper and watch the design appear!

Easy, right? These tea towels would also make the perfect hostess gift if you're the one attending that big bash. Nothing says Happy Independence Day like a handmade gift.

For more fun DIY ideas, visit our website here!
DIY Father's Day Cupcake Toppers

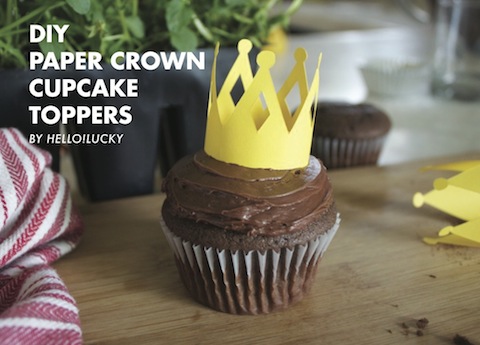
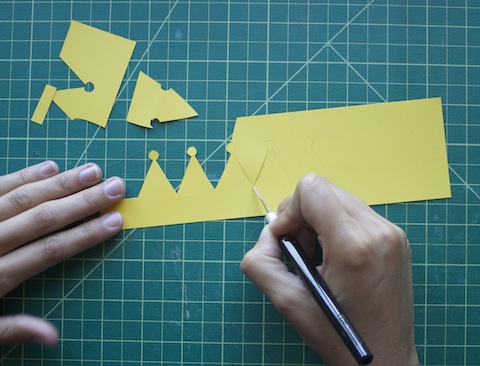
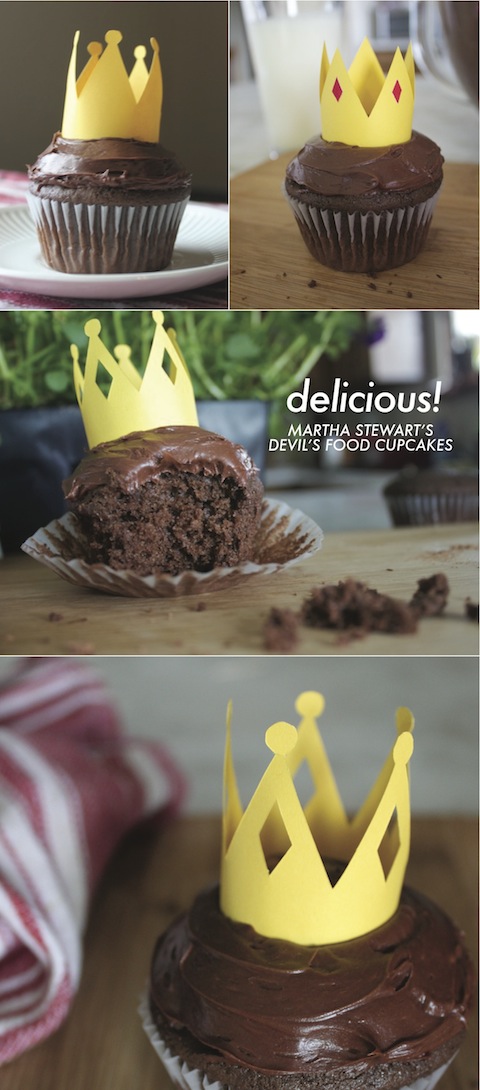
Good Monday morning to all of our favorite readers! We want to start off on this week ahead with a new (and remarkably easy) Father's Day craft. These mini DIY paper crown cupcake toppers are the royal icing on the [cup]cake for your dad's day this year. Show him how much he means to you by customizing his crown with precious jewels, a photo, or even a personal note. Make him feel like the king he is!

Materials:

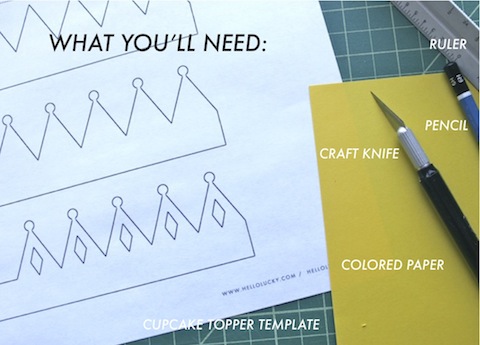
Colored Paper, craft knife, ruler, pencil, craft glue or tape (whatever you have around) and the cupcake topper template. Download below!

Cupcake Topper Template

How to:

Step 1. Print out the cupcake topper template.

Step 2. Trace the outline onto your colored paper. We've created three different designs - fit for all types of kings.

Step 3. Cut out your crown with a craft knife and ruler. This part takes time and patience!

Step 4. Place glue on the outside of the tab and secure to the inside of the crown.

Step 5. Display! We chose Martha Stewart's Devil's Food Cupcake recipe for a rich, flavorful treat. What dad doesn't love chocolate??

 Happy crafting!

For more great paper DIY ideas, visit our website here!

DIY Card Stands

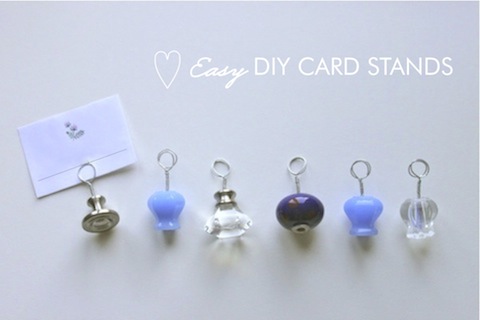
These super simple and easy to make card stands are the perfect pick-me-up to any table display. We love the quirky drawer knobs found at local antique shops or the ornate ones for sale at Anthropologie. You can even buy wooden knobs at your local hardware store and paint them any color you like! The possibilities are endless with these little fellows. We'd definitely use them as place card holders at a reception or dinner party, but they could also be used to prop photos on a mantle, keep to-do notes on a desk, or even hold up a new recipe in the kitchen. Full instructions below!
 Materials:

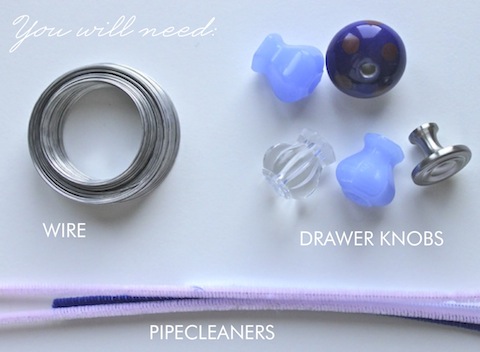
Used or new knobs preferably without set screws (browse your local antique shop for fun shapes and colors, or visit Anthropologie), wire (we used 20 gauge for better strength), pipecleaners (any color will do, but try to match the colors of your knobs), wire cutters or scissors and some craft glue - if necessary.

How To: 

Step 1. Remove the screws and any washers from the knobs.

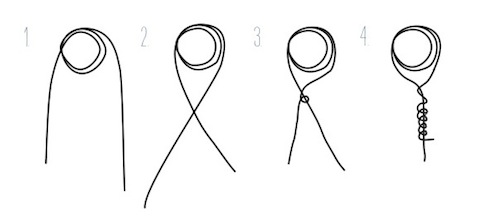
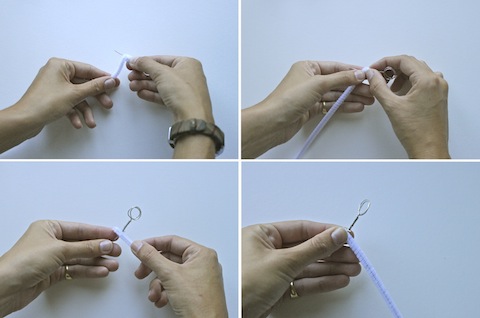
Step 2. Prepare your wire. Cut about 8" - 10" strips and fold at the center. Wrap the wire around your index finger twice creating a spiral loop.

Step 3. Cross both ends and spin to hold in place.

Step 4. Carefully wrap one end of the wire around the other side, leaving as little space as possible between each loop.

Step 5. Wrap your pipecleaner around the bottom part of your wire (underneath the hook). Cut off any remaining pipecleaner.

*The thickness of your pipecleaner will depend on the width of the hole in your knob

Step 6. Place the wire and pipecleaner inside the hole of the knob. It should fit pretty snug - if not, add more pipecleaner and a dab of craft glue to be sure.

Step 7. Insert place card between wire loops and display!


Visit our website for more fun DIY ideas!

Free Download: Table Numbers

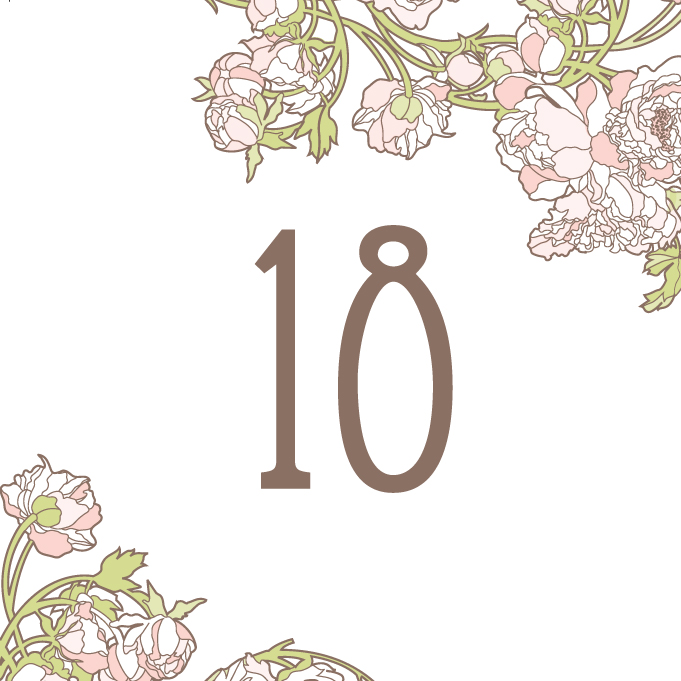
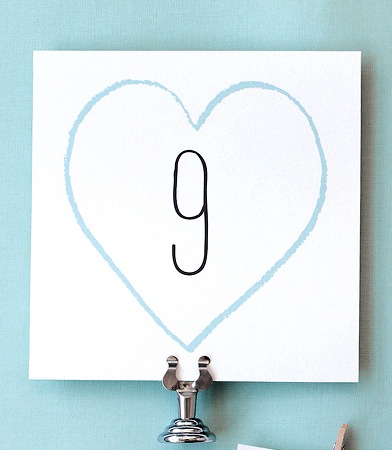
Last week we posted about all of the extras we can print and design for your wedding day. And today we're so excited to offer up some free downloadable templates to make your big day more special. We've created table number templates for three of our most popular suites -- Big Day, Nouveau Peonies, and San Francisco Skyline - and did we mention they are completely free?! All you need is paper, a printer, and scissors.

Just click on the style you'd like to print. Each PDF has 25 designed table numbers.

Download Big Day 

Download Nouveau Peonies

Download San Francisco Skyline 

We'd love to see photos if you use these templates. Email us or post them to our Facebook page.

Enjoy!